
Kaptain Keith's da9. The "Statement"

 . But yeah everyone loves build threads keep this one going!

Thread Starter
Junior Member
Joined: Feb 2012
Posts: 175
From: penetanguishene
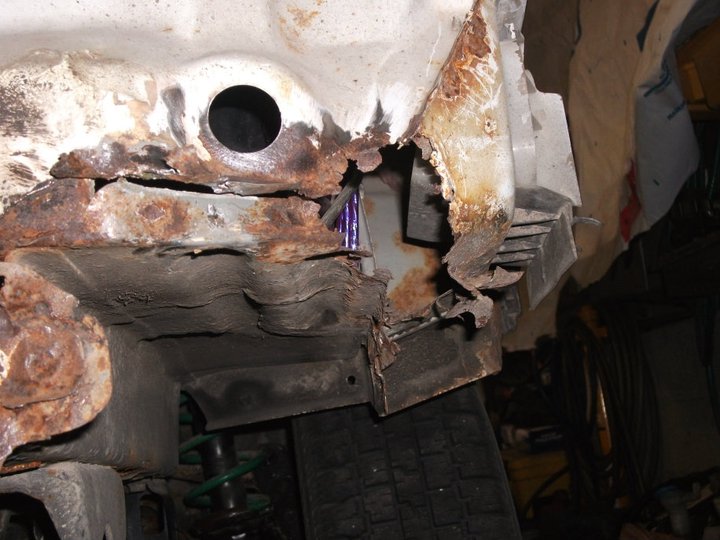
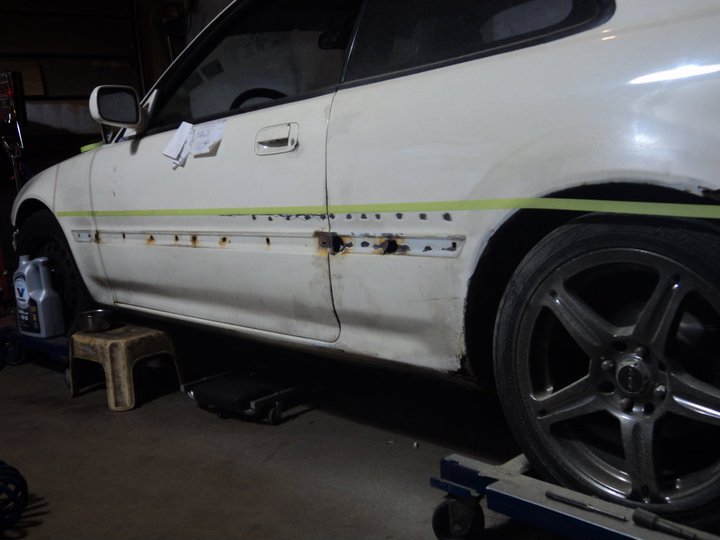
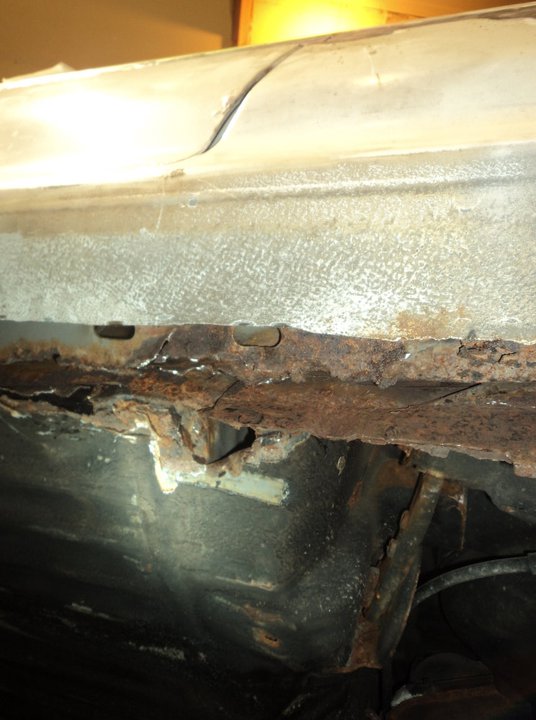
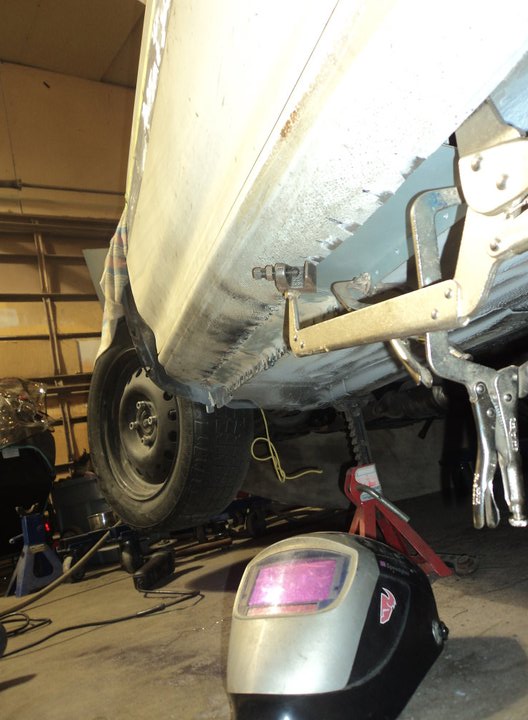
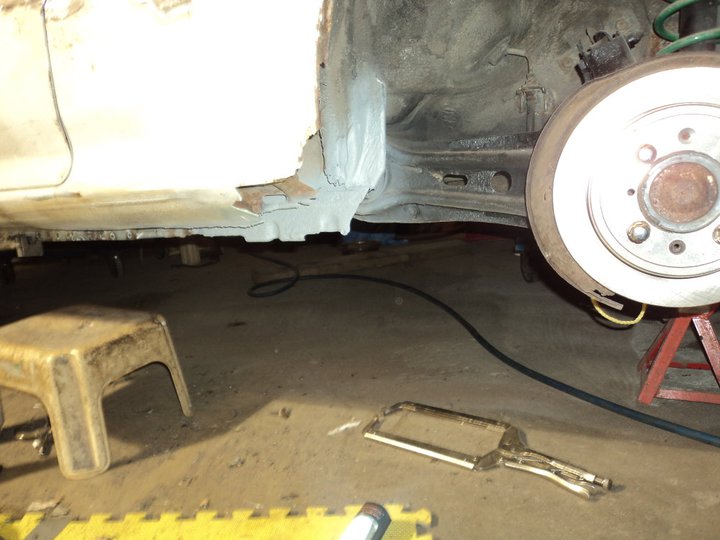
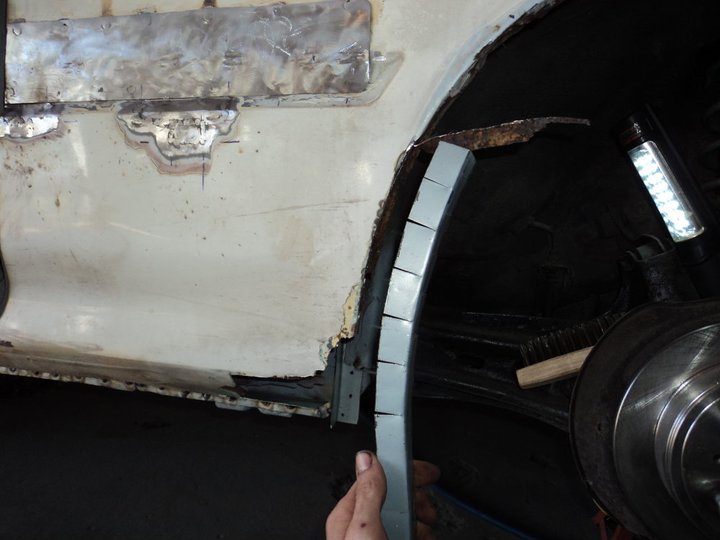
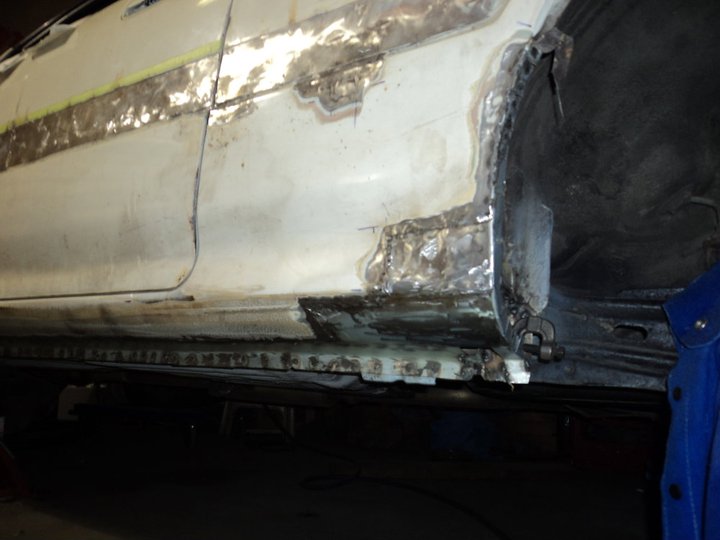
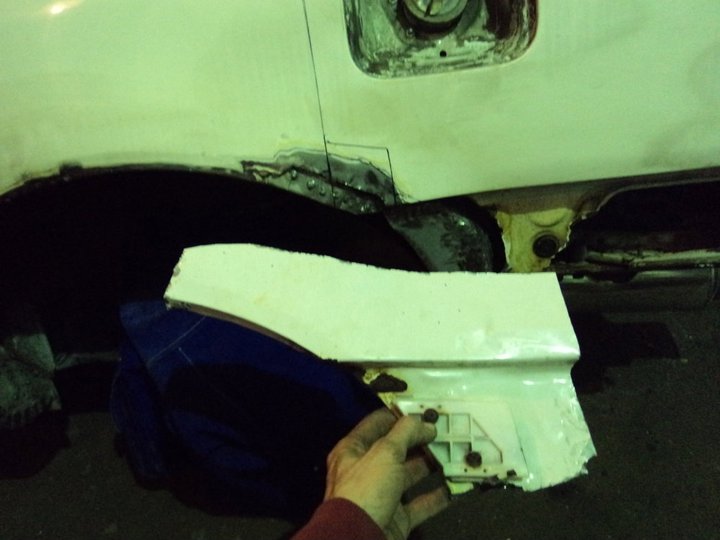
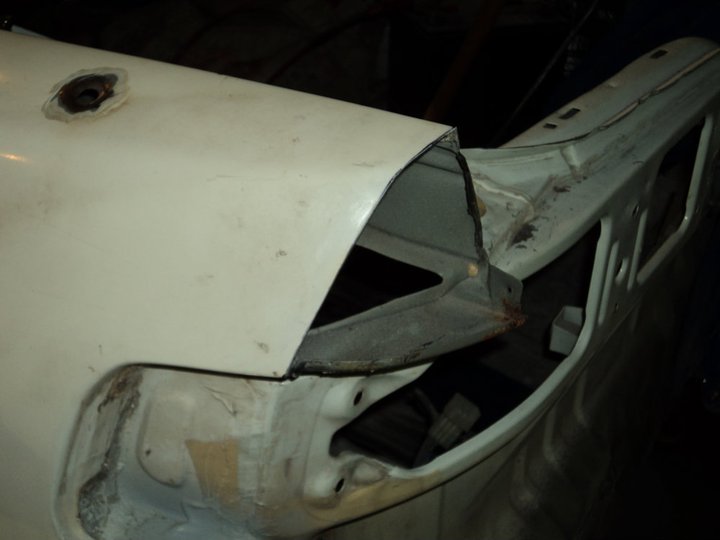
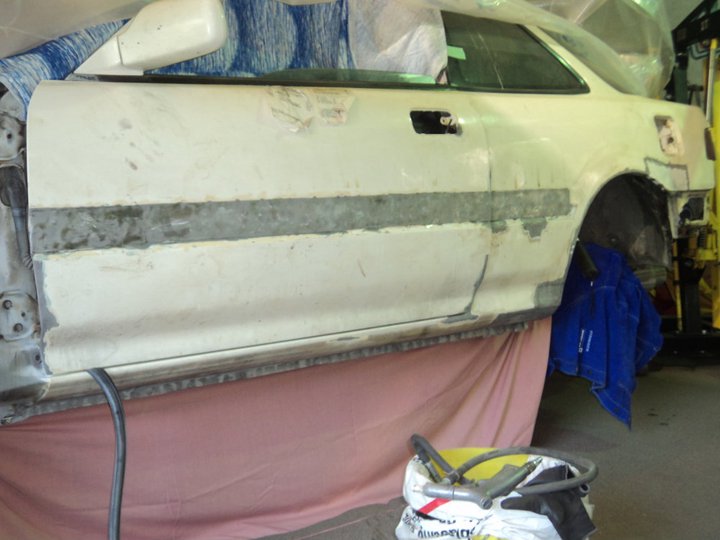
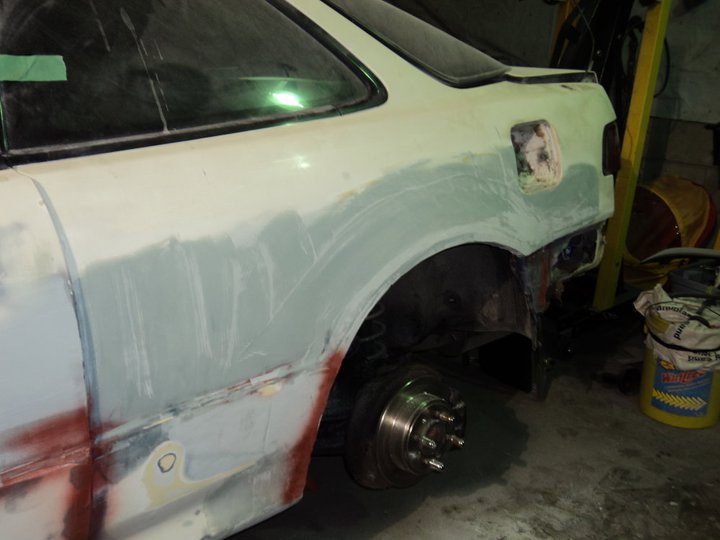
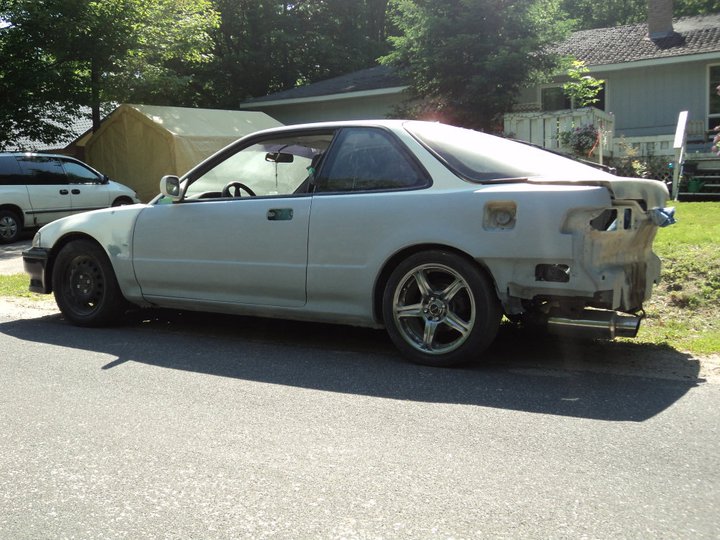
Rear 1/4. although it looks more like an 1/8
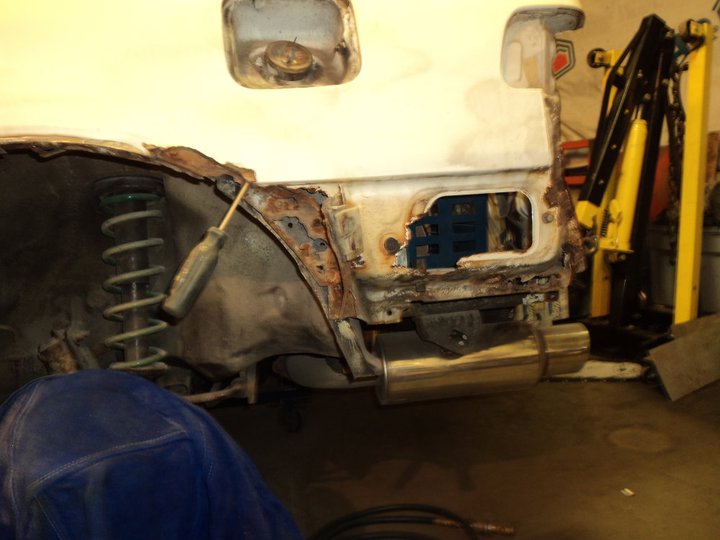
Piece i savaged from a scrap car.
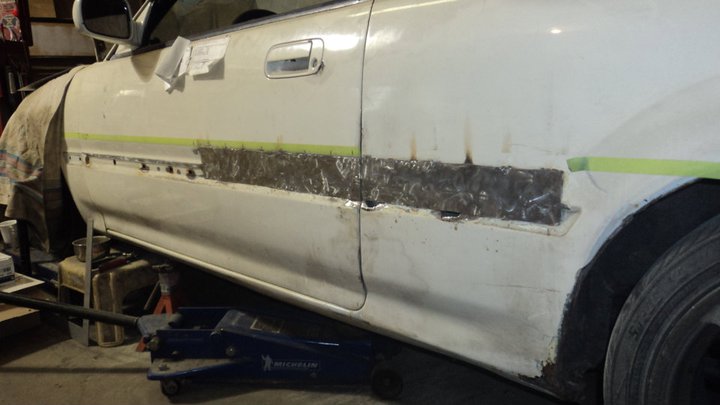
Out with the old
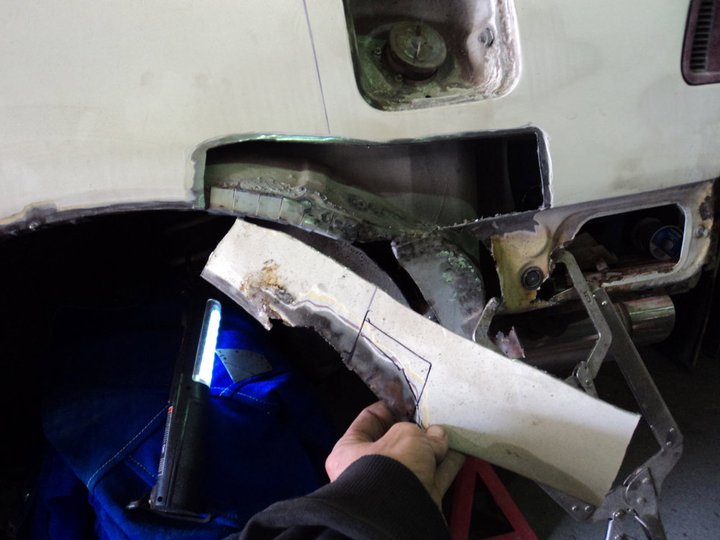
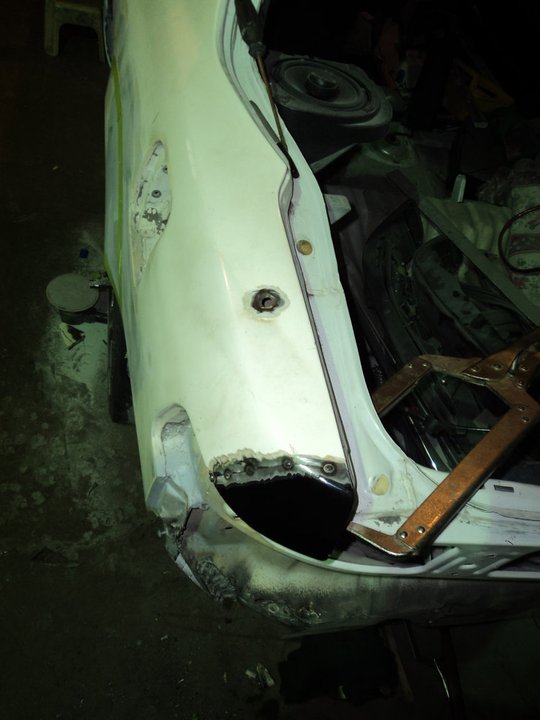
In with new. I use a cold wet rag to cool the welds so it wonr warp
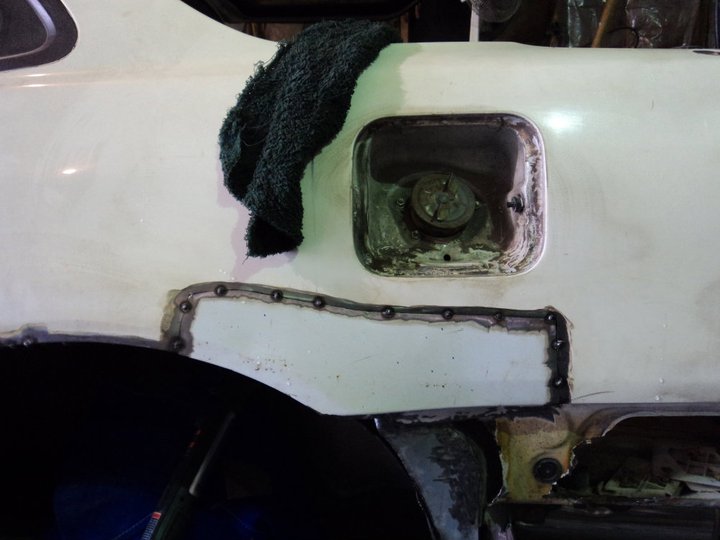
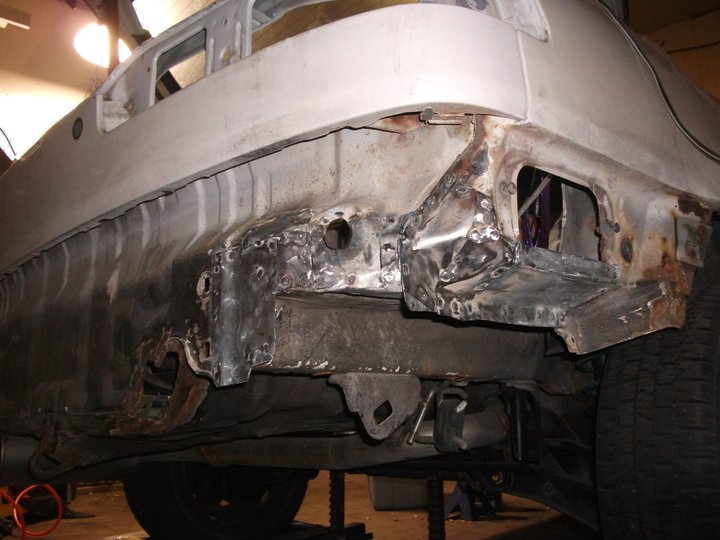
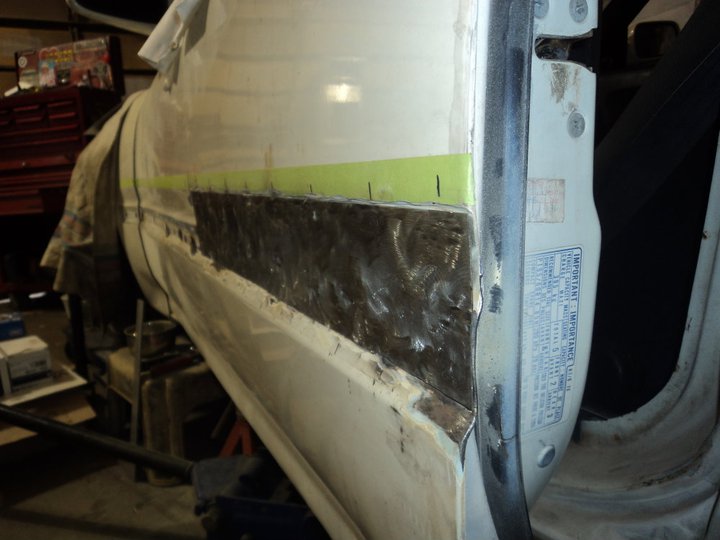
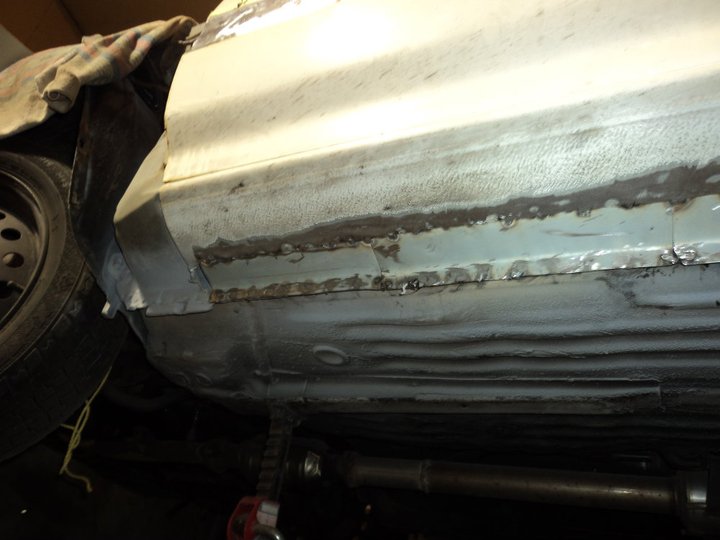
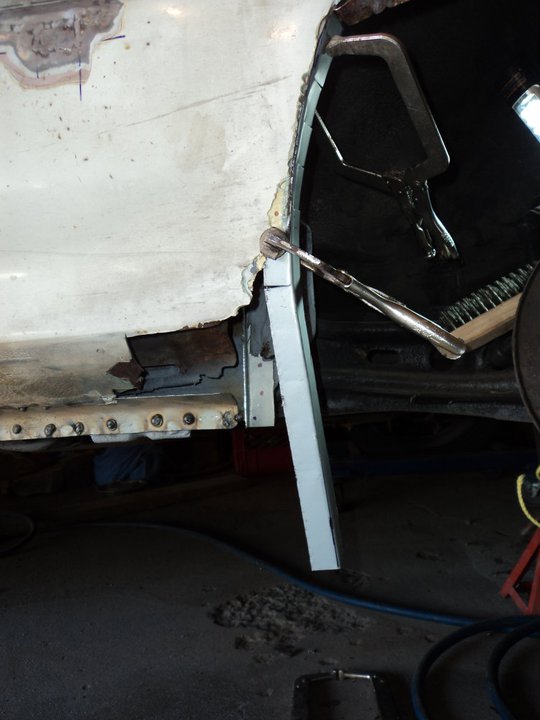
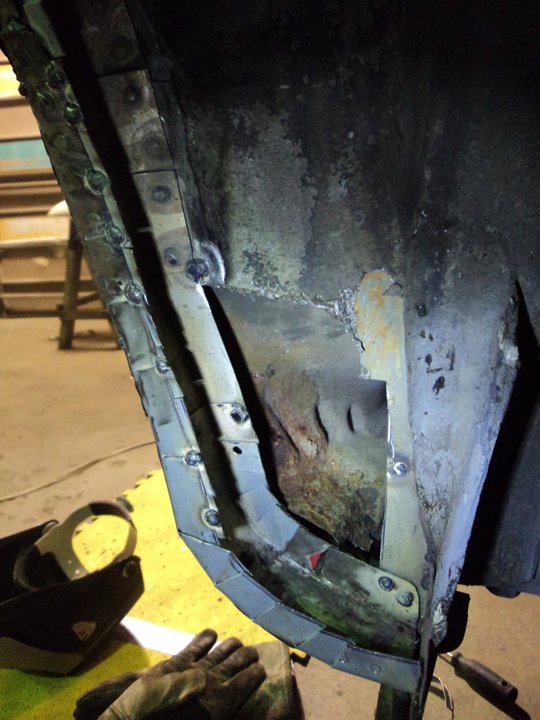
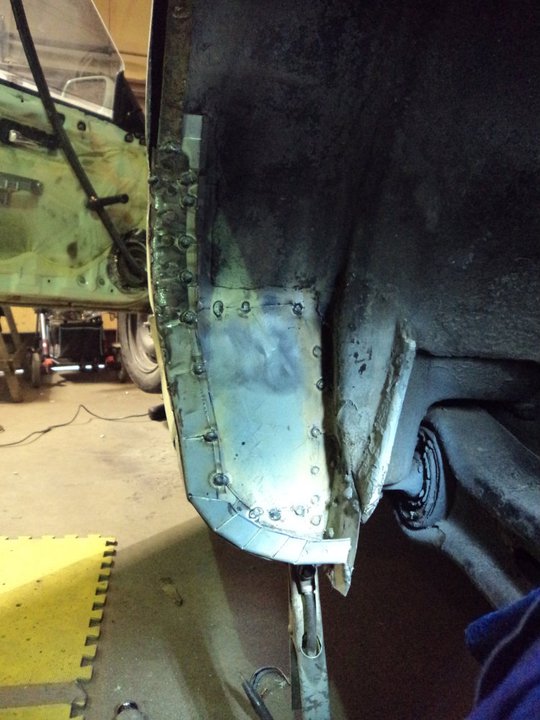
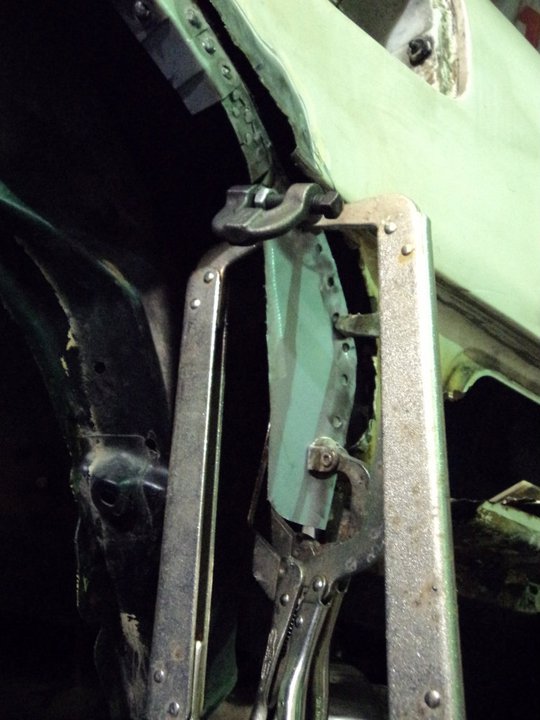
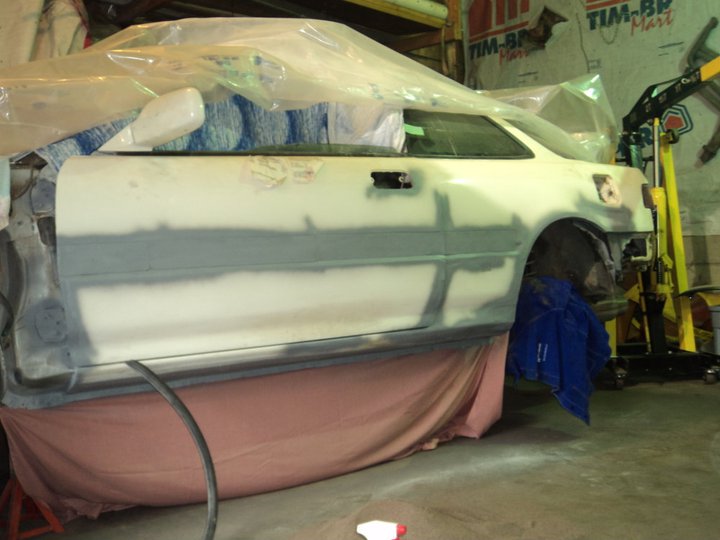
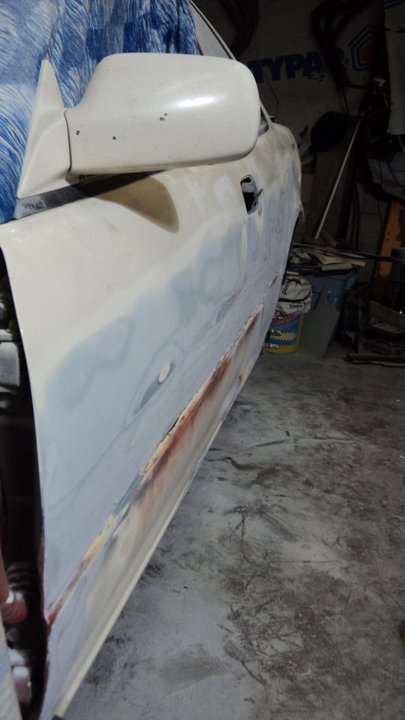
Back hatch corner. Salvaged piece.
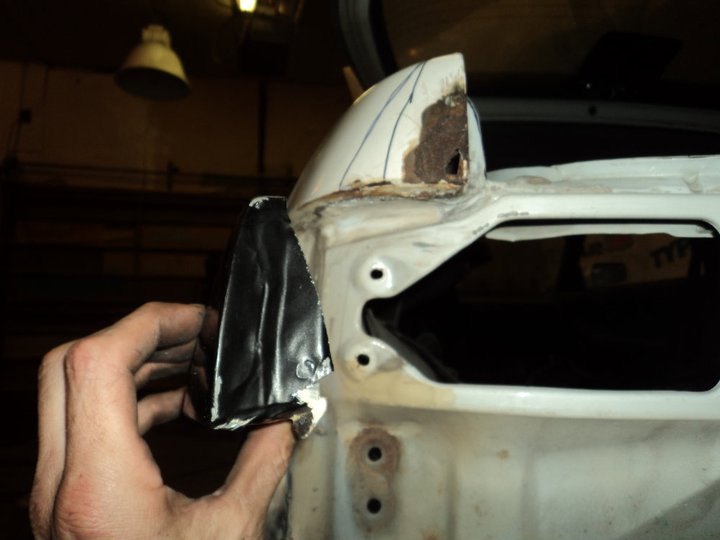
Perfect fit.
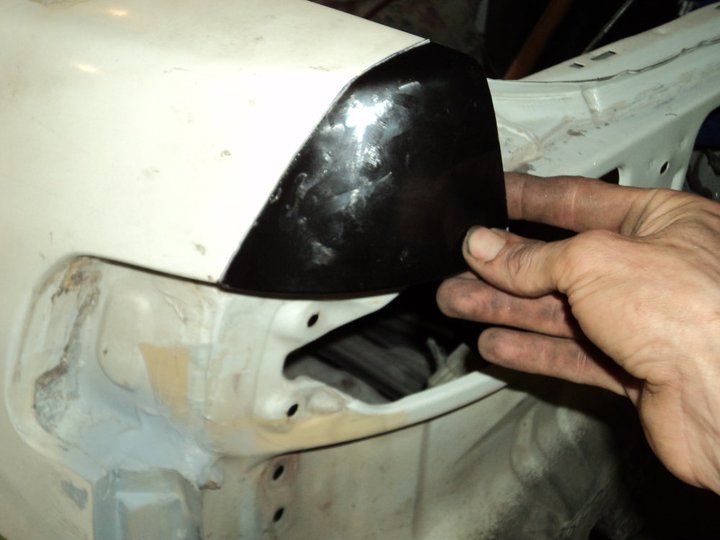
Thats whats up.
Piece i savaged from a scrap car.
Out with the old
In with new. I use a cold wet rag to cool the welds so it wonr warp
Back hatch corner. Salvaged piece.
Perfect fit.
Thats whats up.


Thread Starter
Junior Member
Joined: Feb 2012
Posts: 175
From: penetanguishene
Thread Starter
Junior Member
Joined: Feb 2012
Posts: 175
From: penetanguishene
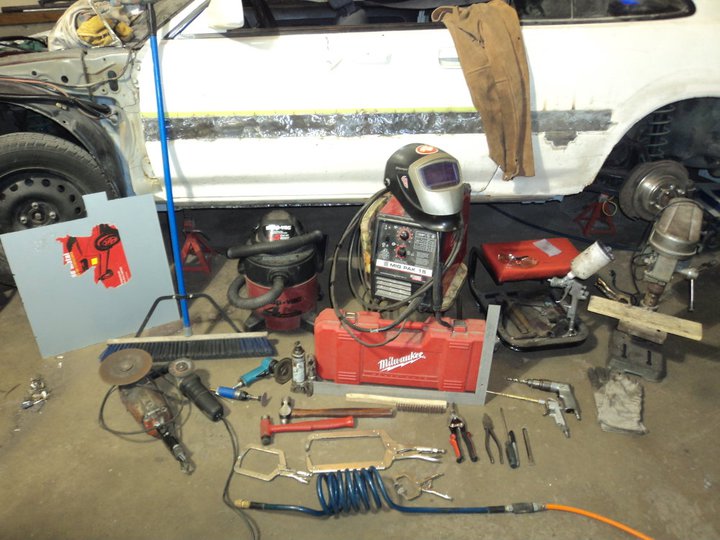
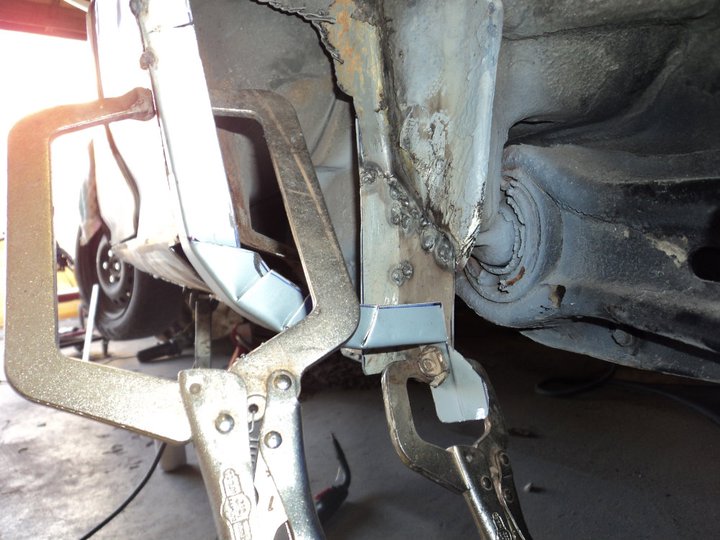
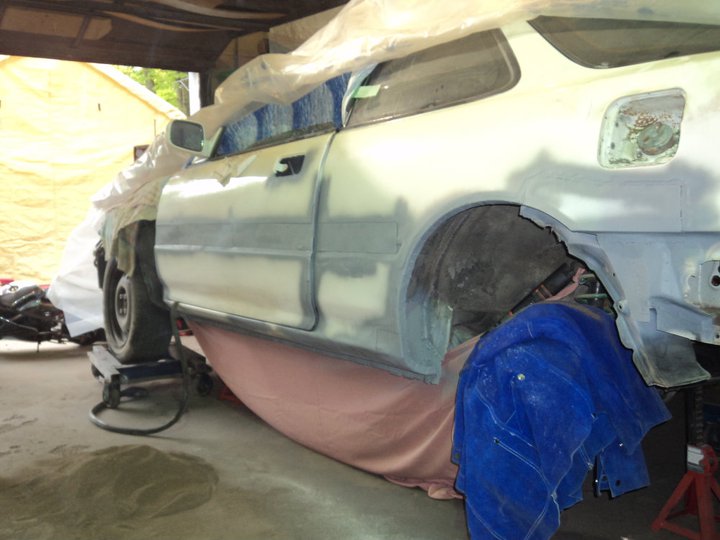
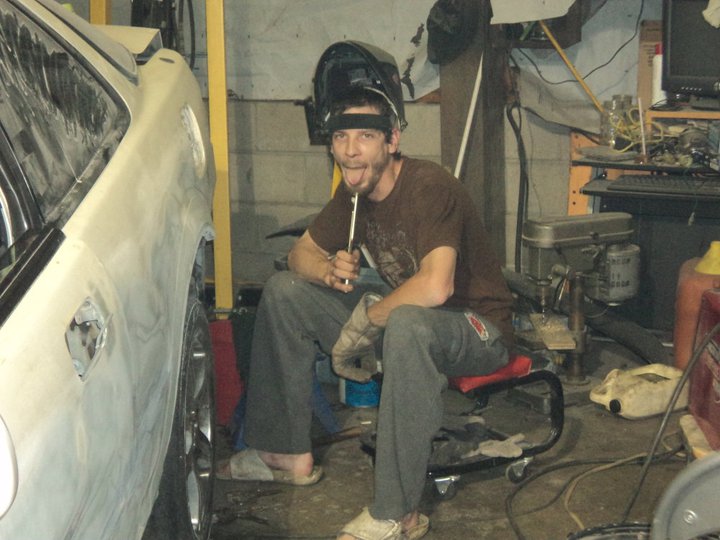
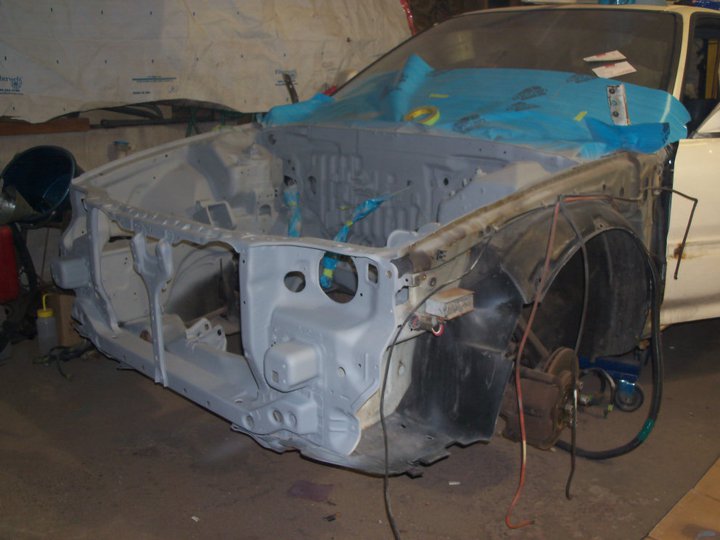
Every weld is ground down. This is my sandblasting shelter. This is all done in my own garage.
All the bare metal is sandblasted
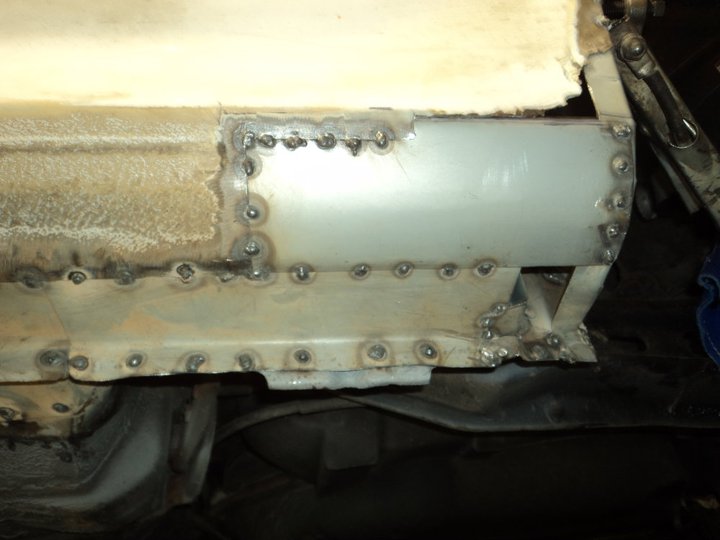
Self etching primer. Only the bare metal gets the special primer.
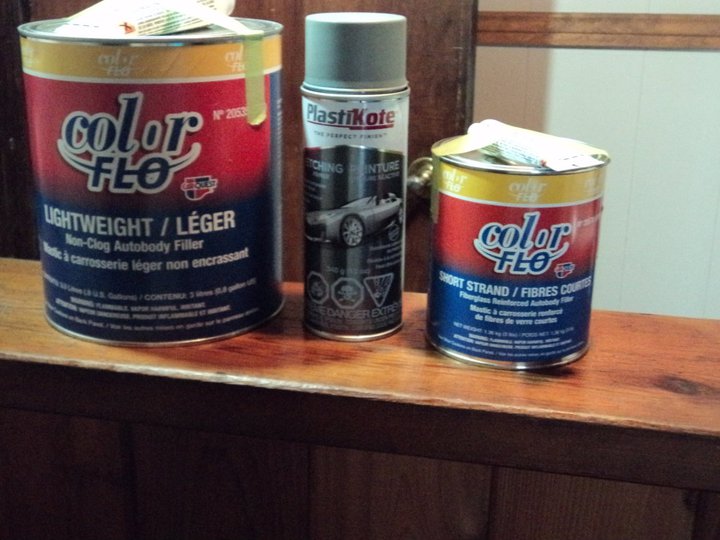
All the bare metal got some fiberglass reinforced bondo to seal it.
Now im straightening and feathering it all with lightweight body filler

Trying to give it a lil more flare
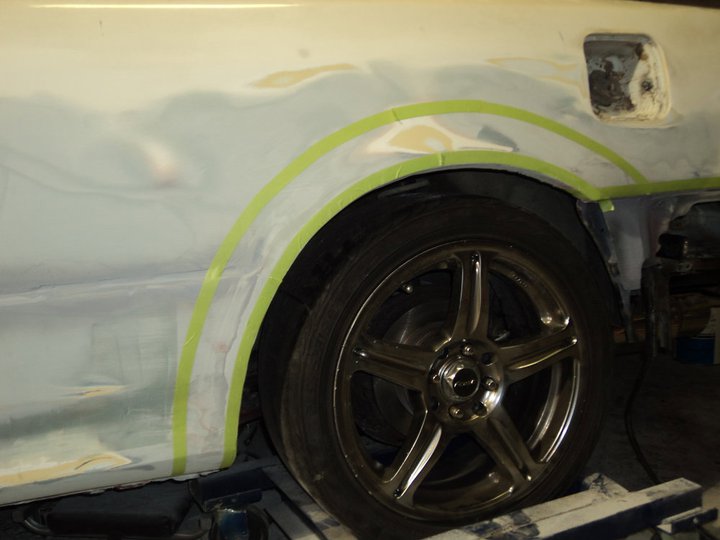
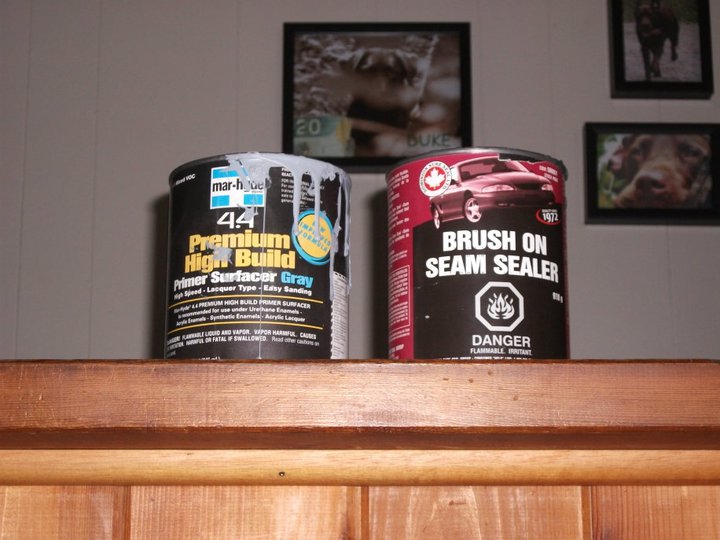
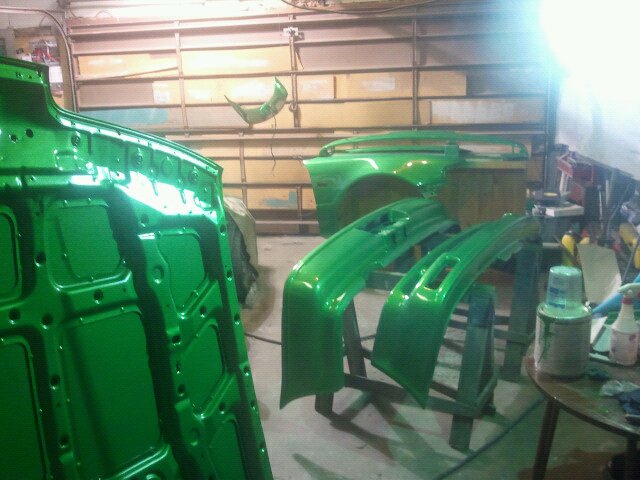
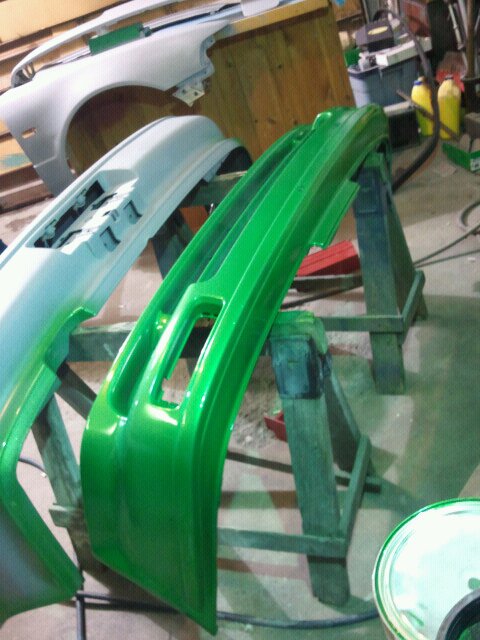
Got some high build primer on it
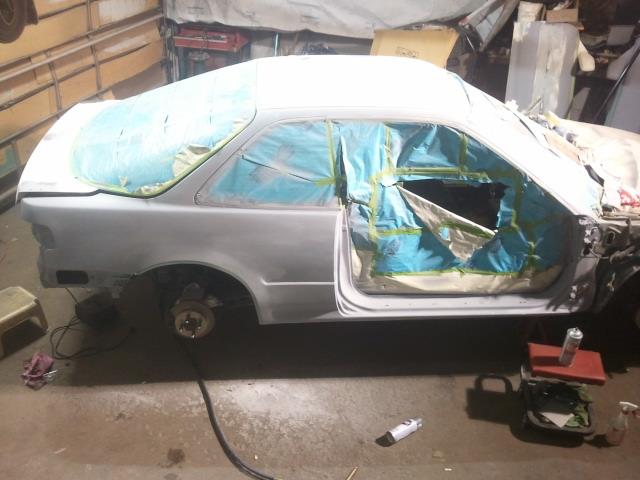
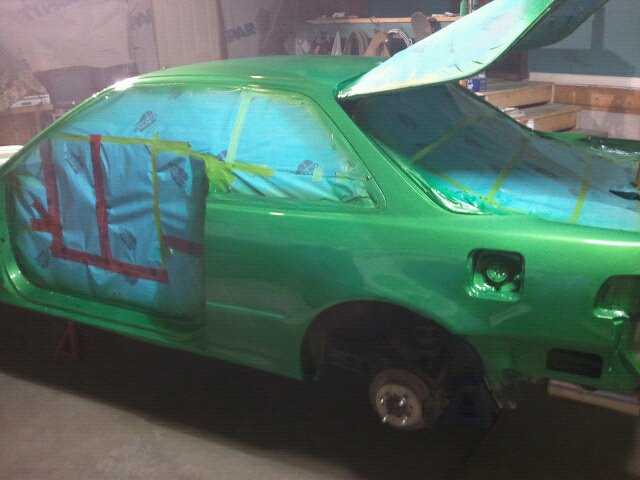
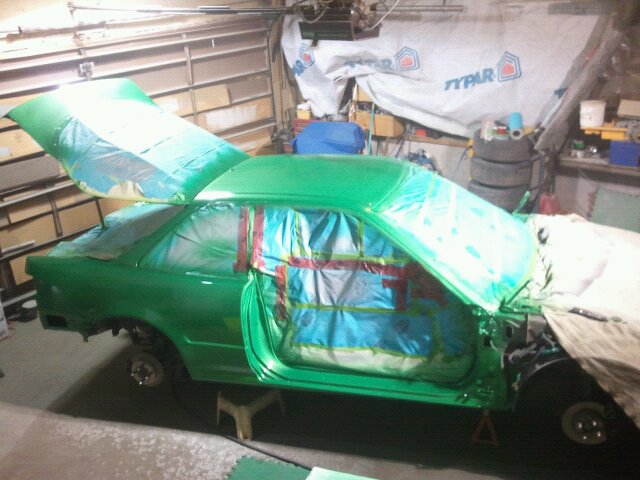
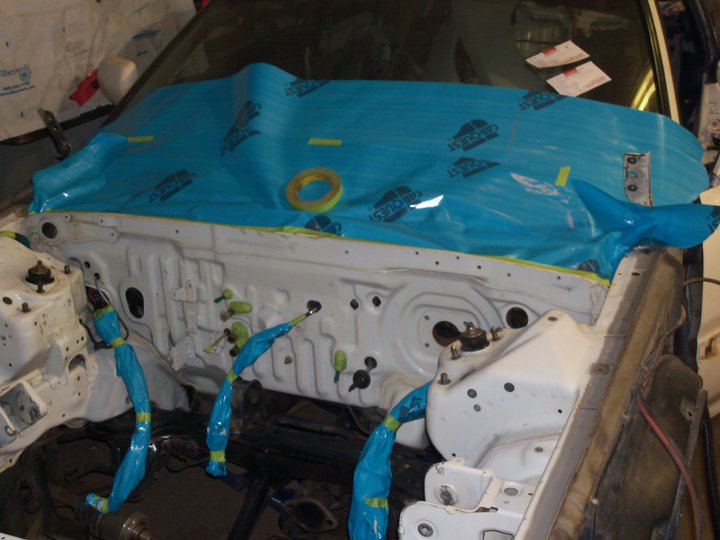
Taped off, cleaned and ready for paint.
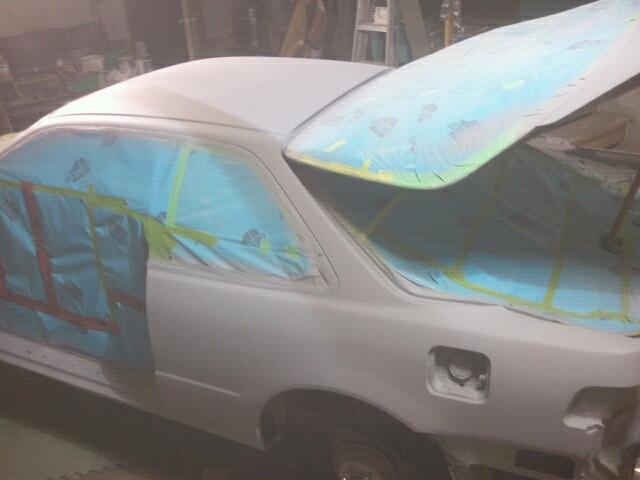
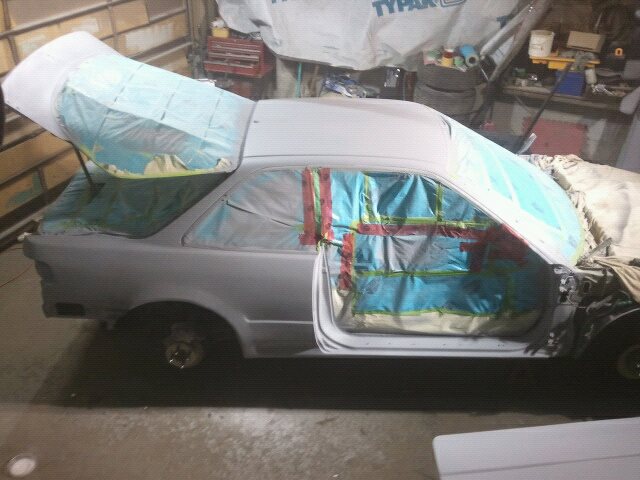
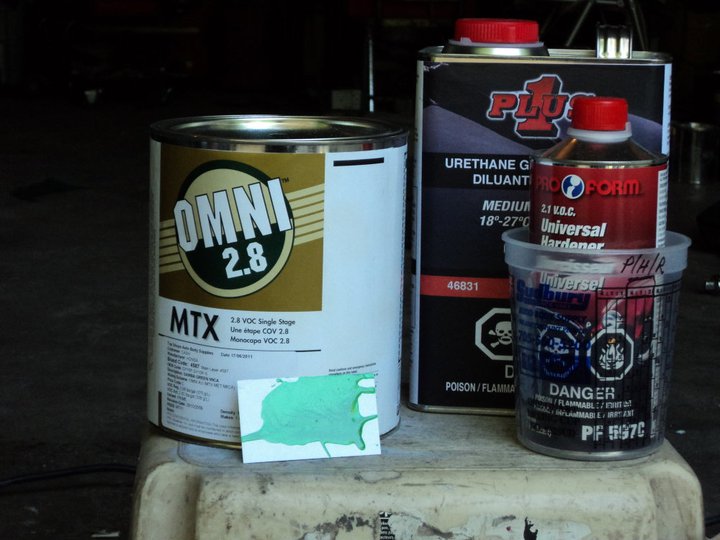
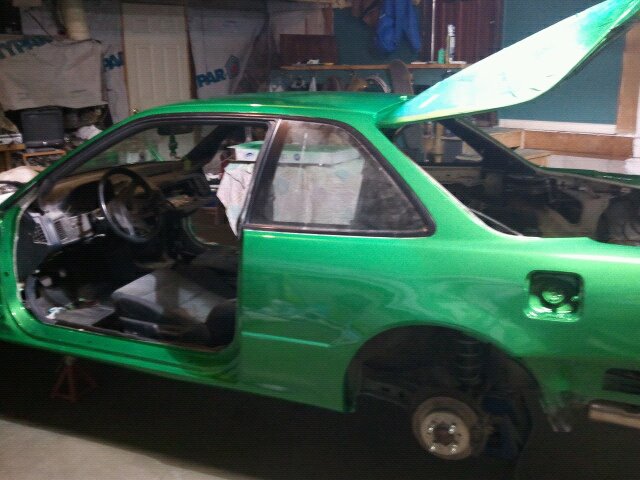
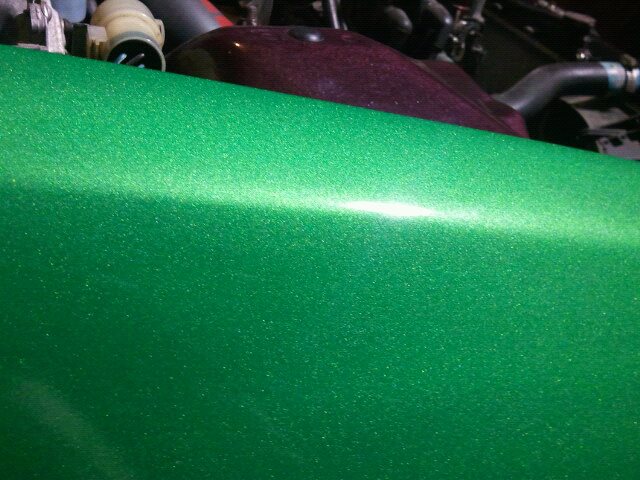
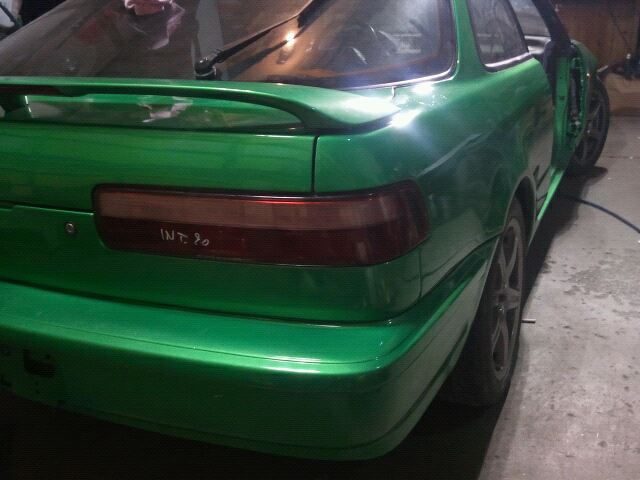
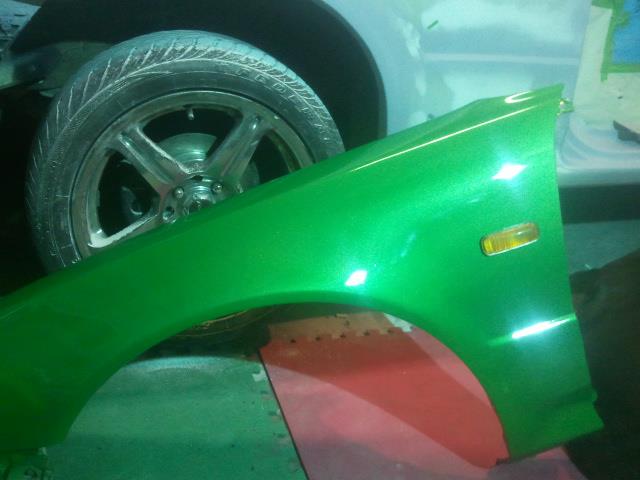
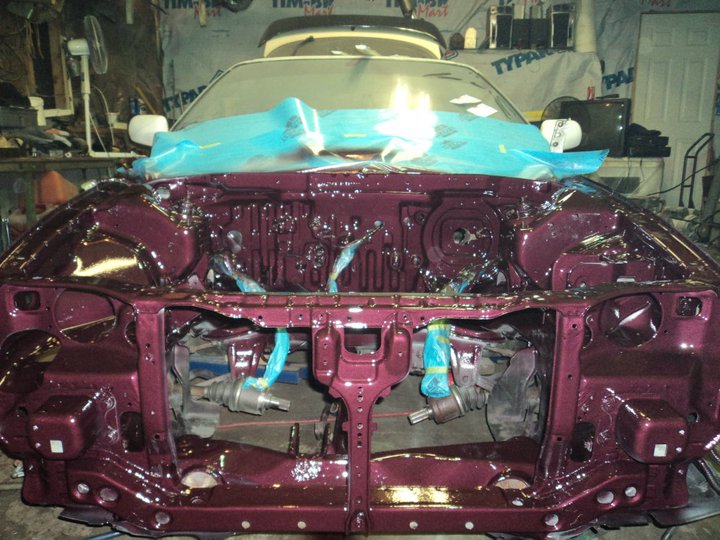
Samba Green mica. FTW. By ppg
All the bare metal is sandblasted
Self etching primer. Only the bare metal gets the special primer.
All the bare metal got some fiberglass reinforced bondo to seal it.
Now im straightening and feathering it all with lightweight body filler
Trying to give it a lil more flare
Got some high build primer on it
Taped off, cleaned and ready for paint.
Samba Green mica. FTW. By ppg

Thread Starter
Junior Member
Joined: Feb 2012
Posts: 175
From: penetanguishene
I got 700 man hours into it. I got it nov. 2010 and havent even drove it yet.
So.. 4x8 piece of sheet metal.
3gals. Of body filler.
4 sprayable gallons of paint and primer.
And a ton of sandpaper.
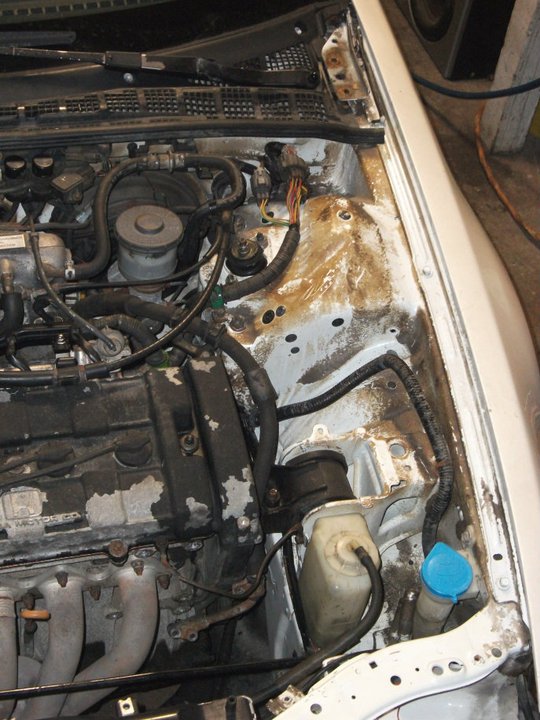
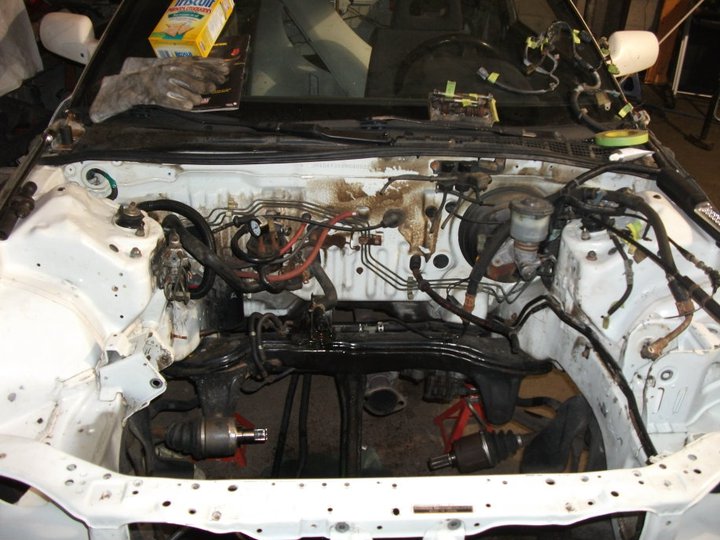
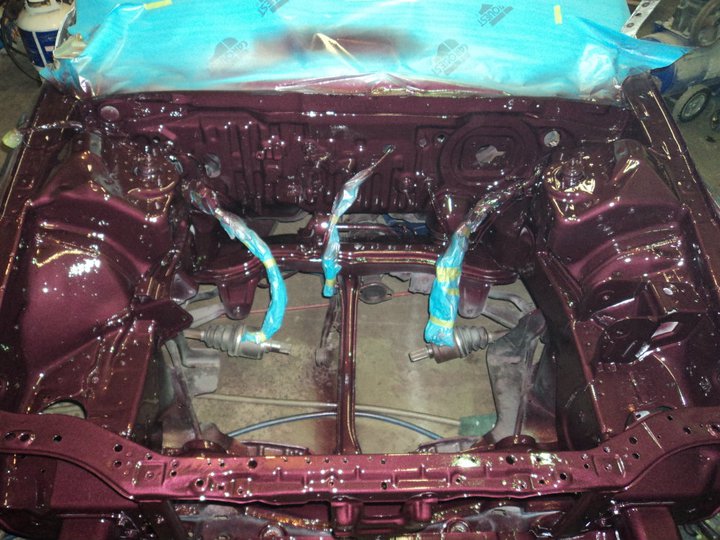
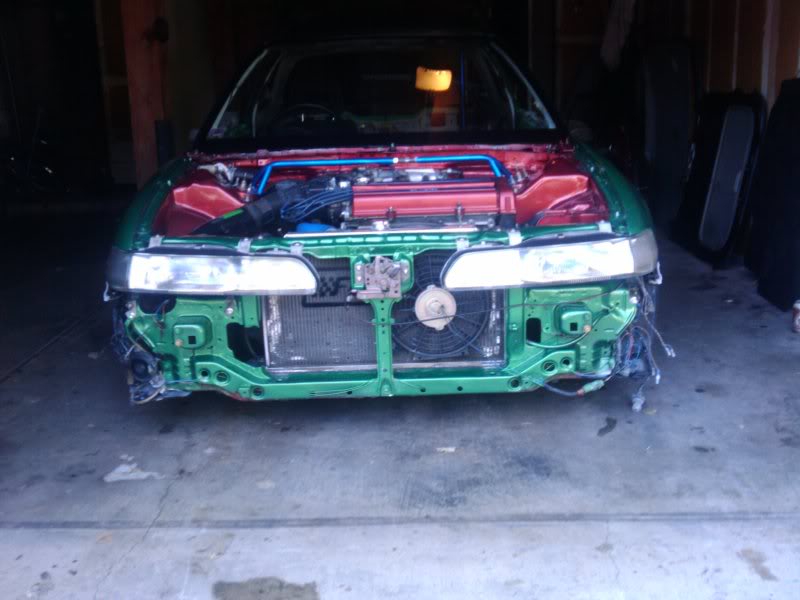
Next is the engine bay.
I will relocate the battery to the hatch.
Relocate the underhood fuse box. Under the dash.
Wire tuck it all.
Tuck the brake lines.
Relocate the proportion valve... Under dash.
Convert to a manuel steer rack from an ef.
Strip and paint everything using the highest quality paint money can buy.
Thanks for checkn out my build so far. Although its more of a resto at the moment, but i do have some tricks yp my sleeve for performance.
So.. 4x8 piece of sheet metal.
3gals. Of body filler.
4 sprayable gallons of paint and primer.
And a ton of sandpaper.
Next is the engine bay.
I will relocate the battery to the hatch.
Relocate the underhood fuse box. Under the dash.
Wire tuck it all.
Tuck the brake lines.
Relocate the proportion valve... Under dash.
Convert to a manuel steer rack from an ef.
Strip and paint everything using the highest quality paint money can buy.
Thanks for checkn out my build so far. Although its more of a resto at the moment, but i do have some tricks yp my sleeve for performance.
Thread Starter
Junior Member
Joined: Feb 2012
Posts: 175
From: penetanguishene
Thnx Malice. I Didnt mean to be rude. I can relate to the whole time and money thing.
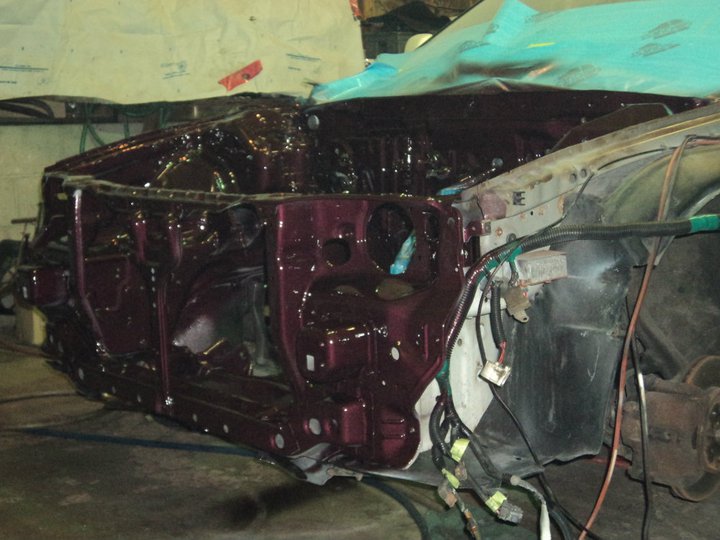
Stay tuned forthe engine bay pics. The colour i pickd is an oem camillia red pearl.
Stay tuned forthe engine bay pics. The colour i pickd is an oem camillia red pearl.
Nah dint think u were being rude, yeah money is always there and I veered off track by picking up an '89 240 coupe as my next project so some money went there, going to UK in May, Vegas in July and planning to buy a condo before end of year so you can see how hectic my year is going to be! Lets hope my teg comes out soon!
Thread Starter
Junior Member
Joined: Feb 2012
Posts: 175
From: penetanguishene
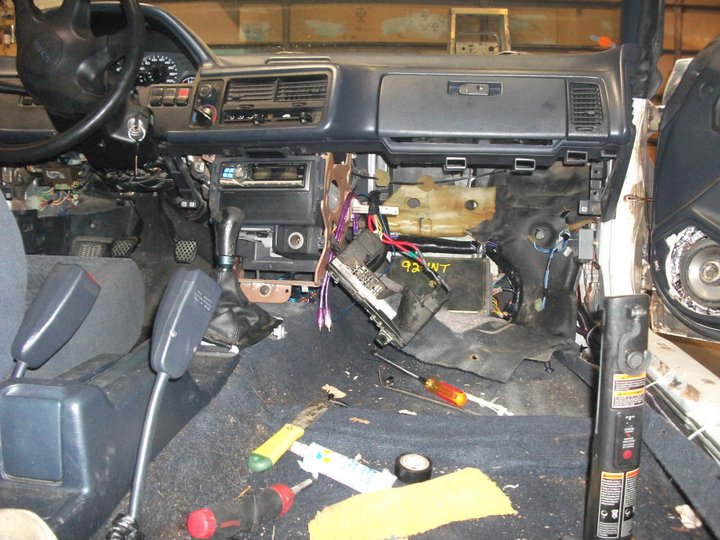
Kso. I dissconected the fuse box. Pulld the wire harness into the car.

New location for fuse box. Not yet secured.

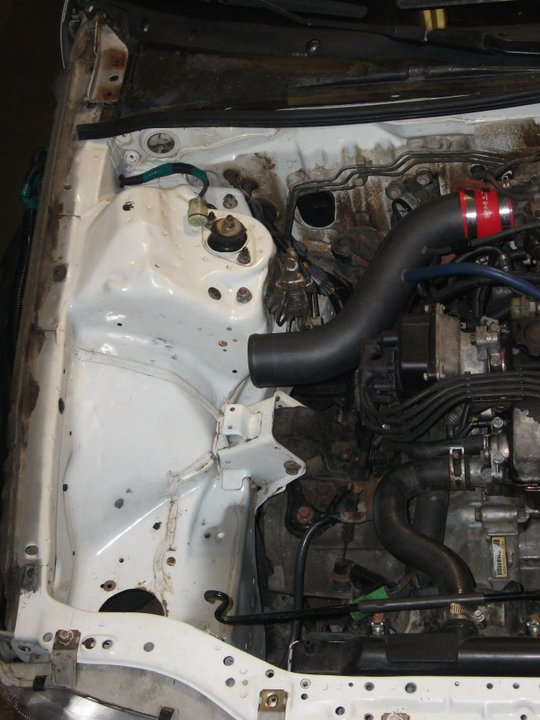
Wire harness is routed through the fender.

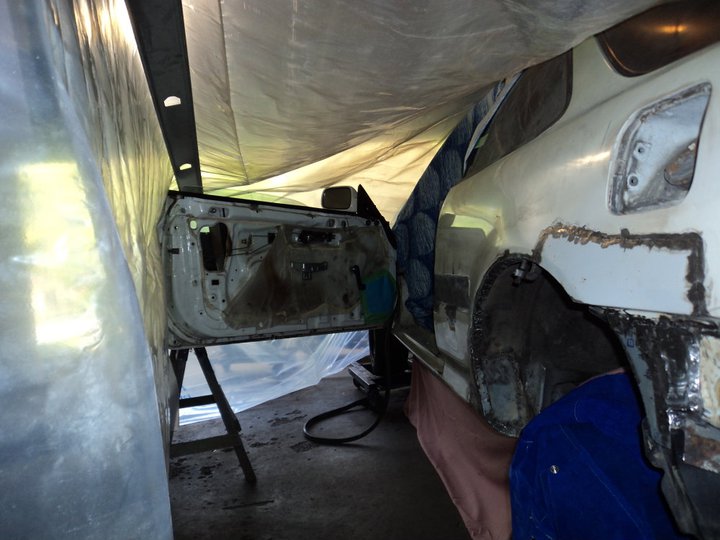
Next is the driverside. Gotta make room to work.
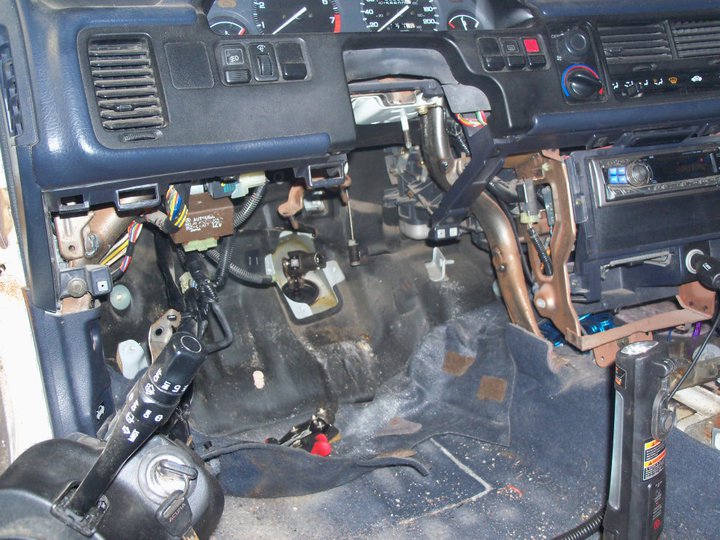
Wire world is sorted and ready to be rerouted.
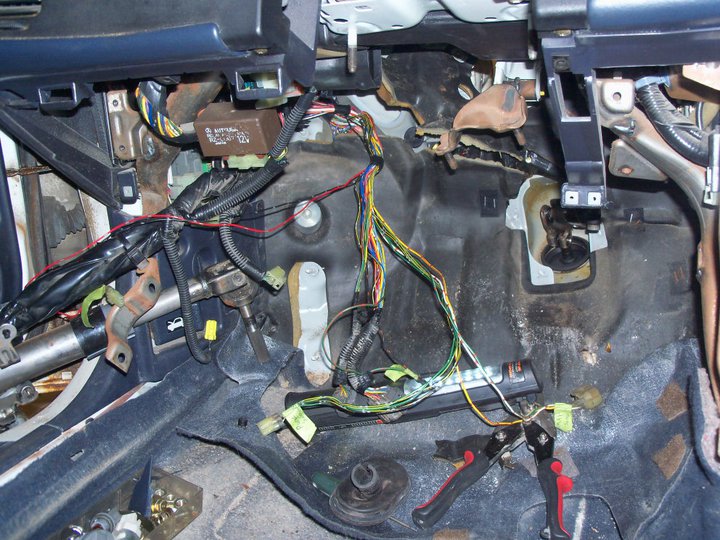
Wire harness is located so low that you cant see.
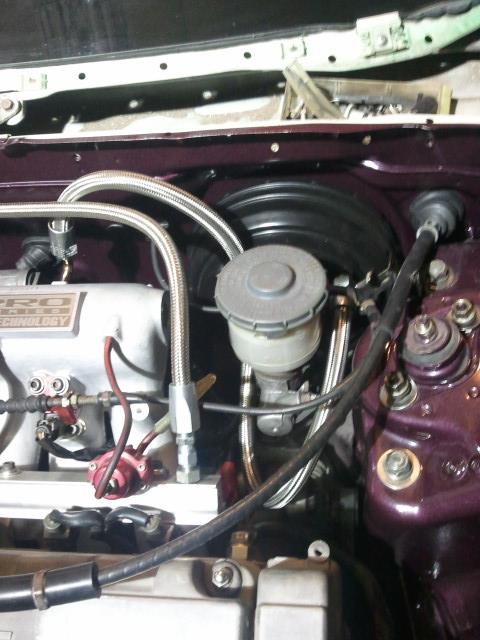
Custom made brake lines. So i can run them under the dash.
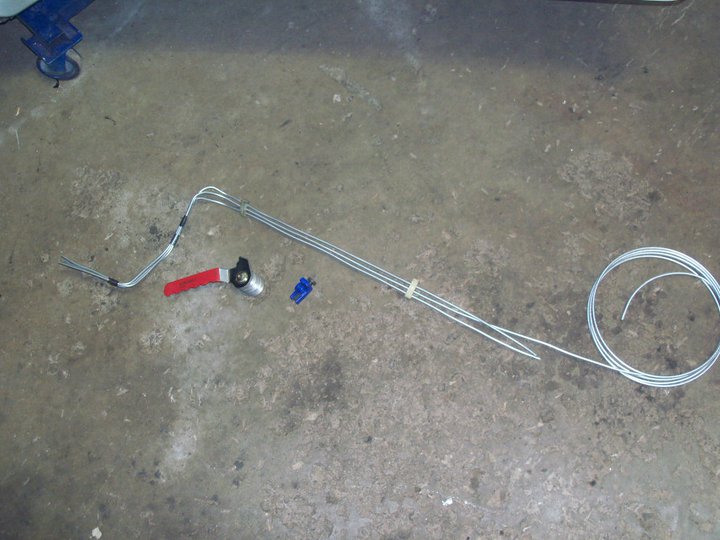
I left em long. Rough in.
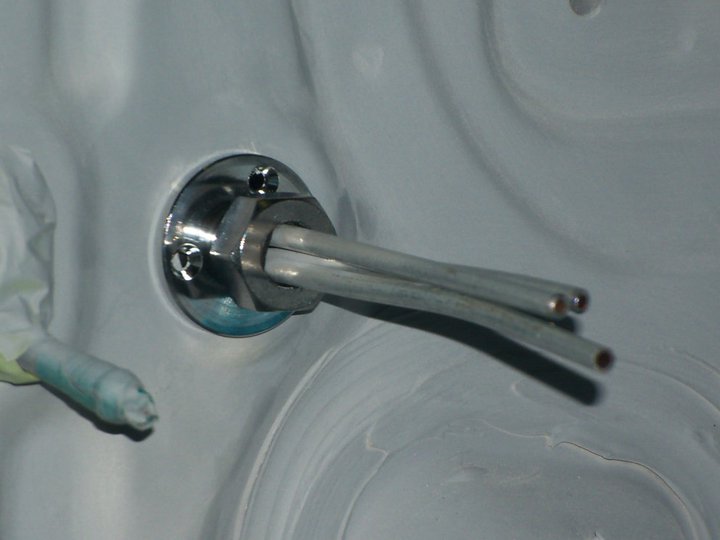
Fire wall fitting for my brake lines.

Dry fit.
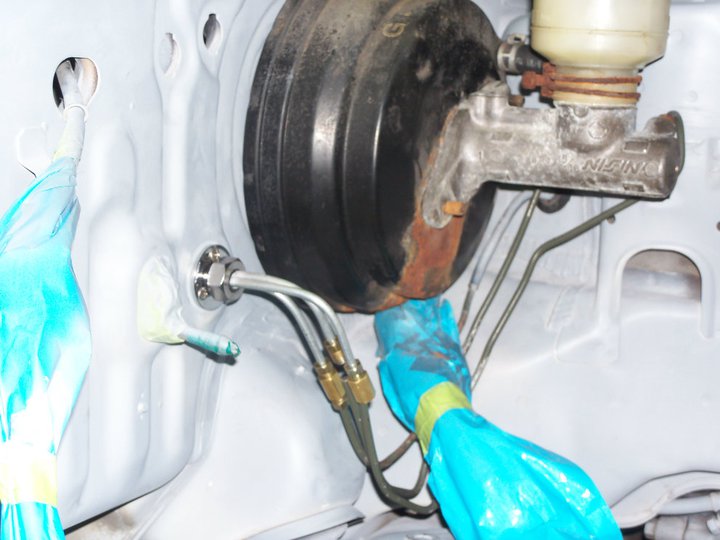
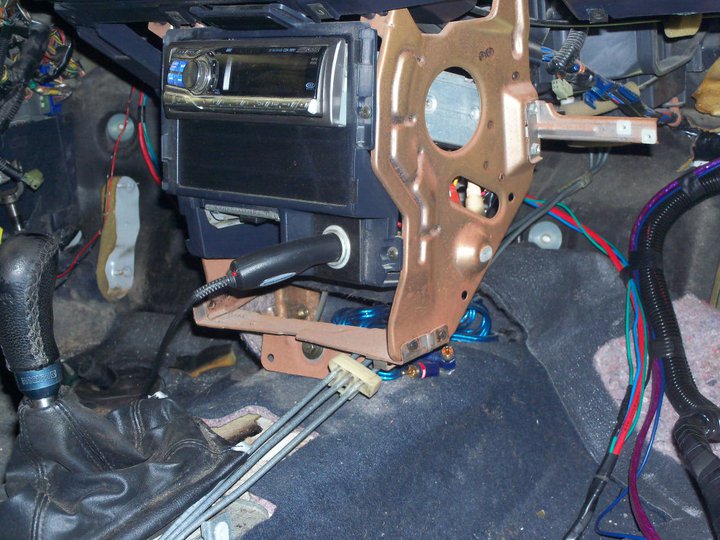
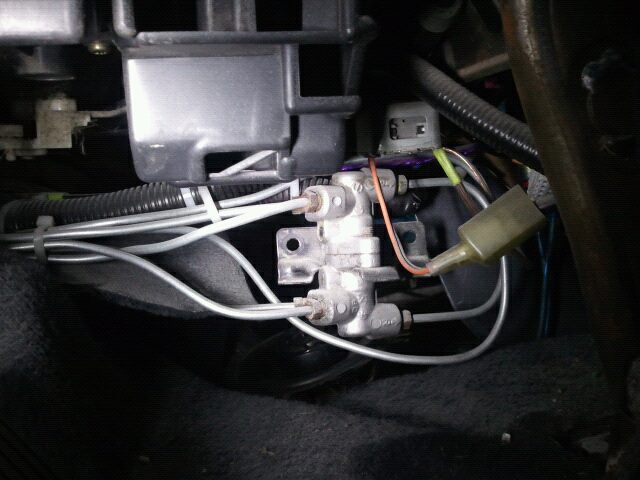
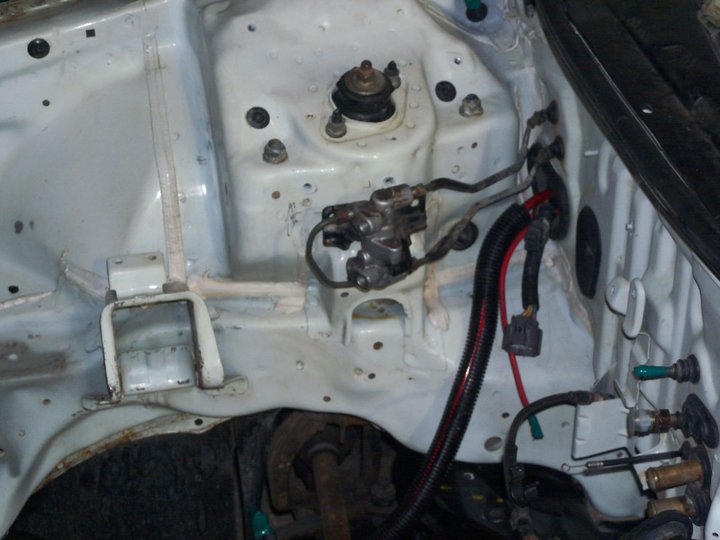
Old prop valve location.

New spot. Behind the stereo.
New location for fuse box. Not yet secured.
Wire harness is routed through the fender.
Next is the driverside. Gotta make room to work.
Wire world is sorted and ready to be rerouted.
Wire harness is located so low that you cant see.
Custom made brake lines. So i can run them under the dash.
I left em long. Rough in.
Fire wall fitting for my brake lines.
Dry fit.
Old prop valve location.
New spot. Behind the stereo.
Thread Starter
Junior Member
Joined: Feb 2012
Posts: 175
From: penetanguishene
Kso. I dissconected the fuse box. Pulld the wire harness into the car.
New location for fuse box. Not yet secured.
Wire harness is routed through the fender.

Next is the driverside. Gotta make room to work.

Wire world is sorted and ready to be rerouted.

Wire harness is located so low that you cant see.
Custom made brake lines. So i can run them under the dash.

I left em long. Rough in.

Fire wall fitting for my brake lines.
Dry fit.

Old prop valve location.
New spot. Behind the stereo.

New location for fuse box. Not yet secured.
Wire harness is routed through the fender.
Next is the driverside. Gotta make room to work.
Wire world is sorted and ready to be rerouted.
Wire harness is located so low that you cant see.
Custom made brake lines. So i can run them under the dash.
I left em long. Rough in.
Fire wall fitting for my brake lines.
Dry fit.
Old prop valve location.
New spot. Behind the stereo.
Thread Starter
Junior Member
Joined: Feb 2012
Posts: 175
From: penetanguishene
Thread Starter
Junior Member
Joined: Feb 2012
Posts: 175
From: penetanguishene
JDM parts acquired:
-2nd gen b16 and cable ys1tranny (actual xsi setup).
-p30 ecu
-Mugen susspension on green tiens.
-rear lca's.
-tail lights.
-1 pc headlights.
-side markers.
-2 obdo front bumpers. 1 rear.
-spoiler.
Thats pretty good. Cause this ---- is hard to find for a da.
-2nd gen b16 and cable ys1tranny (actual xsi setup).
-p30 ecu
-Mugen susspension on green tiens.
-rear lca's.
-tail lights.
-1 pc headlights.
-side markers.
-2 obdo front bumpers. 1 rear.
-spoiler.
Thats pretty good. Cause this ---- is hard to find for a da.
Thread Starter
Junior Member
Joined: Feb 2012
Posts: 175
From: penetanguishene
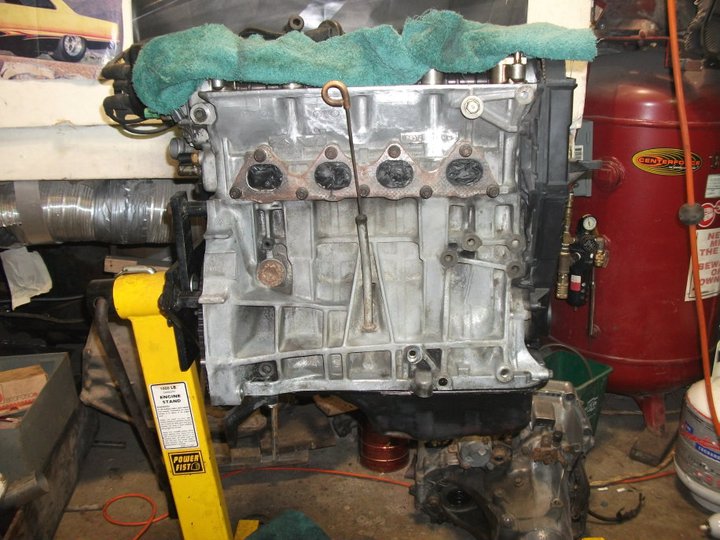
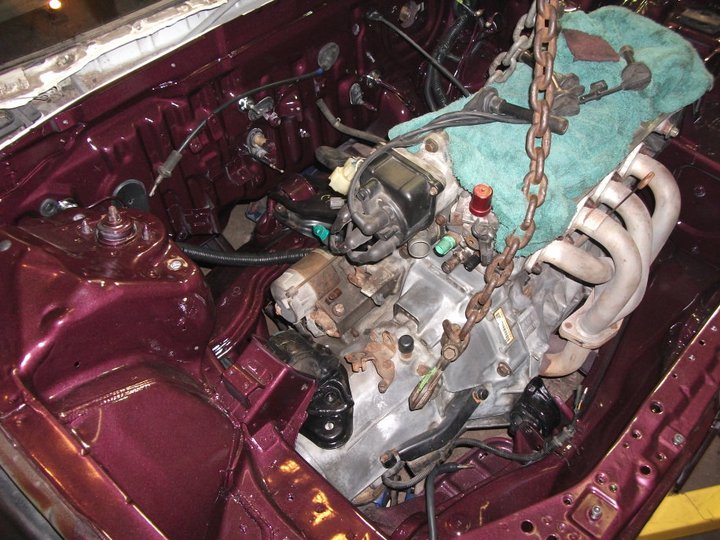
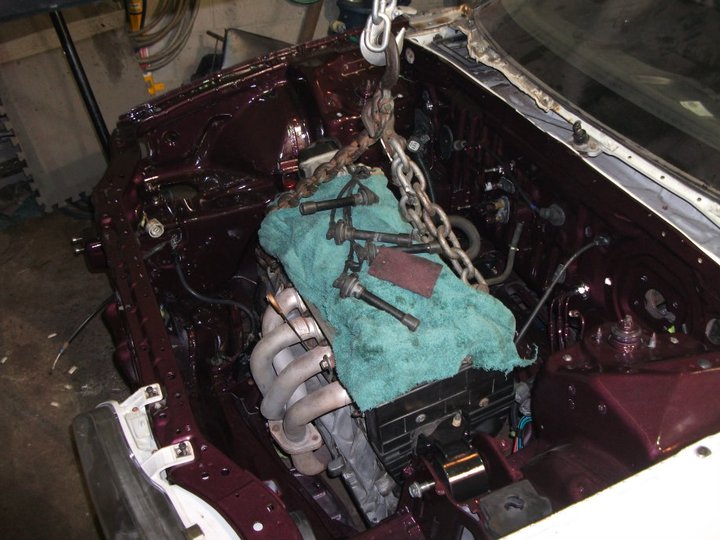
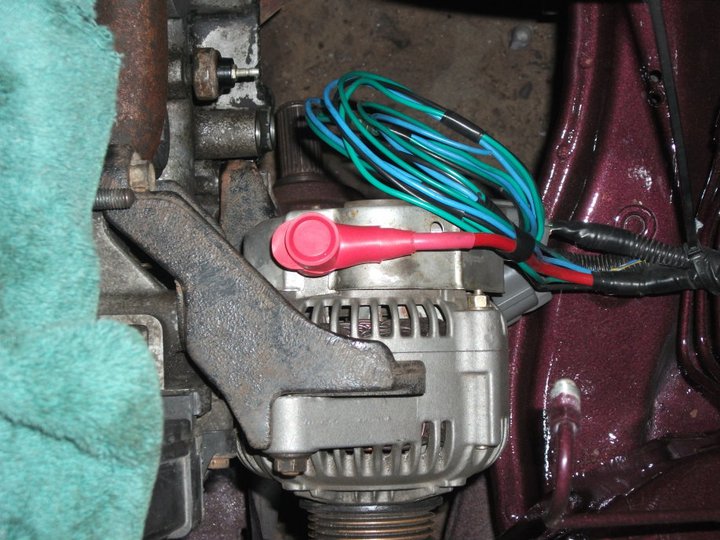
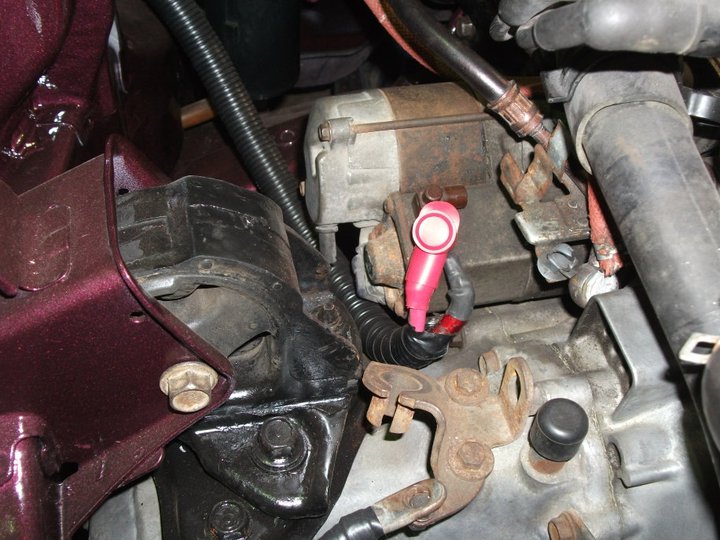
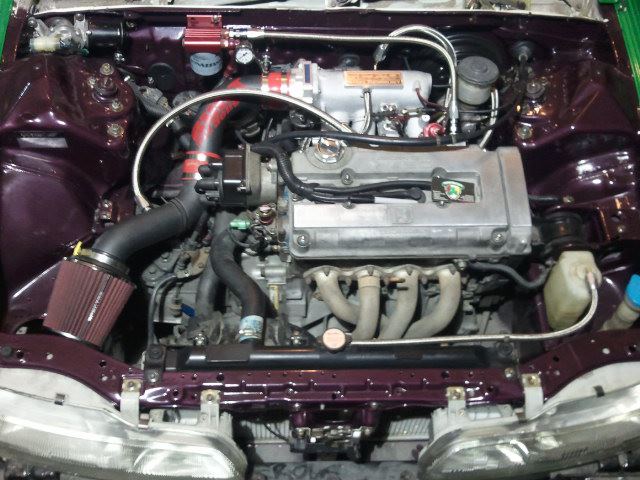
Got the engine out. So its time to remove everything..
Organized an ready to be cleand an painted
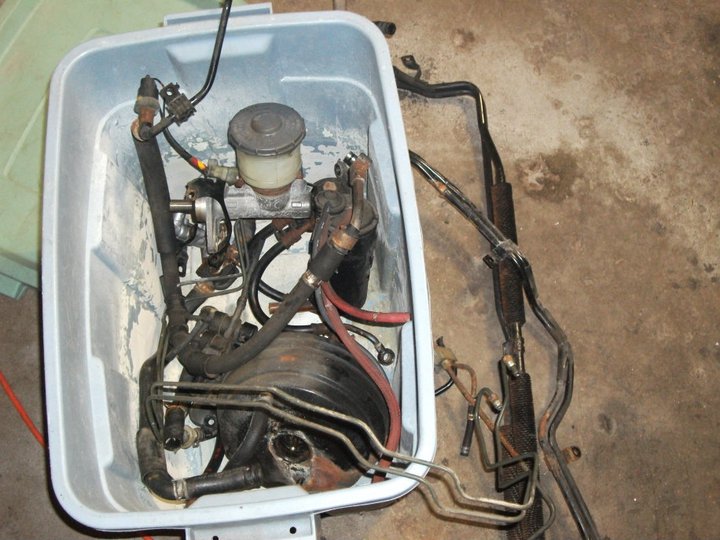
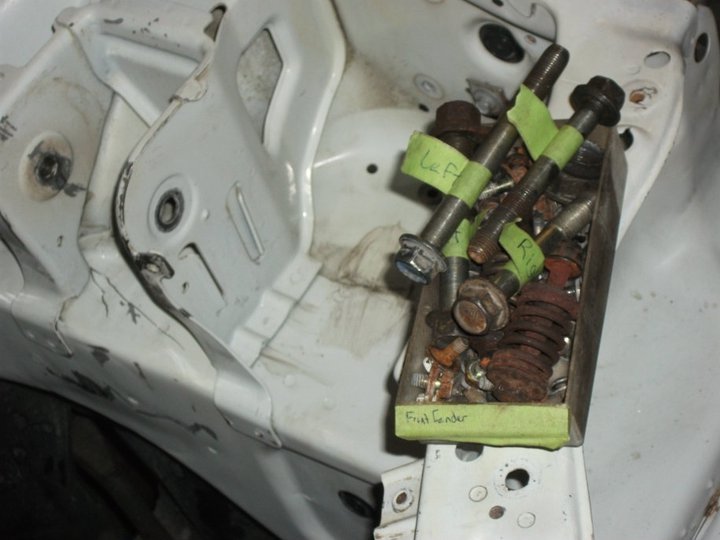
Im replacing most the hardware.
Sande, sandblaste cleaned and taped.
High build primer. Capable of filling 80grit.

What can i say. Oem Ppg Camillia Red Pearl.

Like a G6.
[IMG]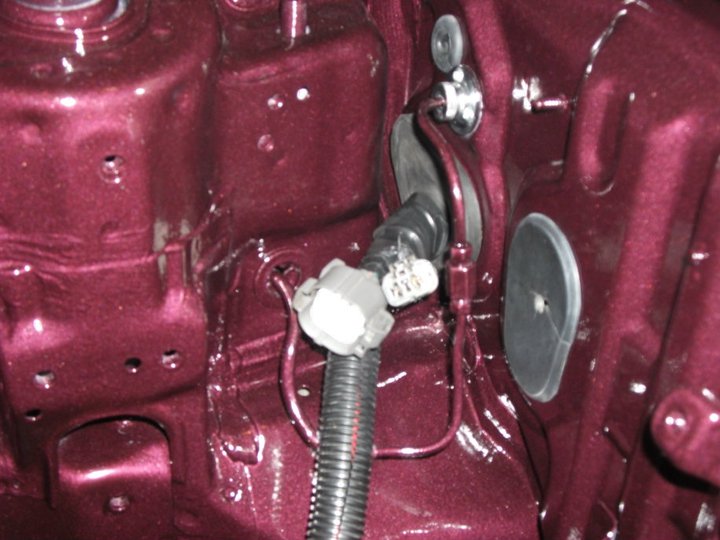 [/IMG]
Organized an ready to be cleand an painted
Im replacing most the hardware.
Sande, sandblaste cleaned and taped.
High build primer. Capable of filling 80grit.
What can i say. Oem Ppg Camillia Red Pearl.
Like a G6.
[IMG]
[/IMG]
Thread Starter
Junior Member
Joined: Feb 2012
Posts: 175
From: penetanguishene
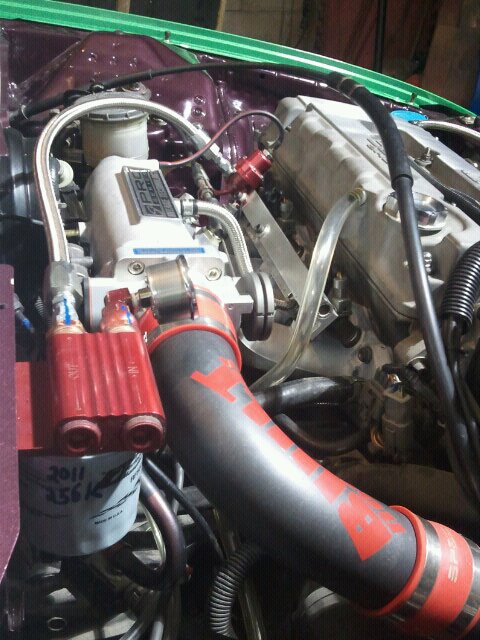
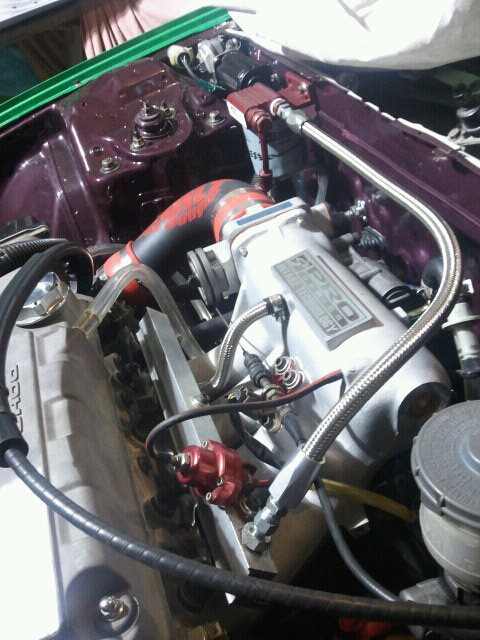
Fuel filter/water seperator.
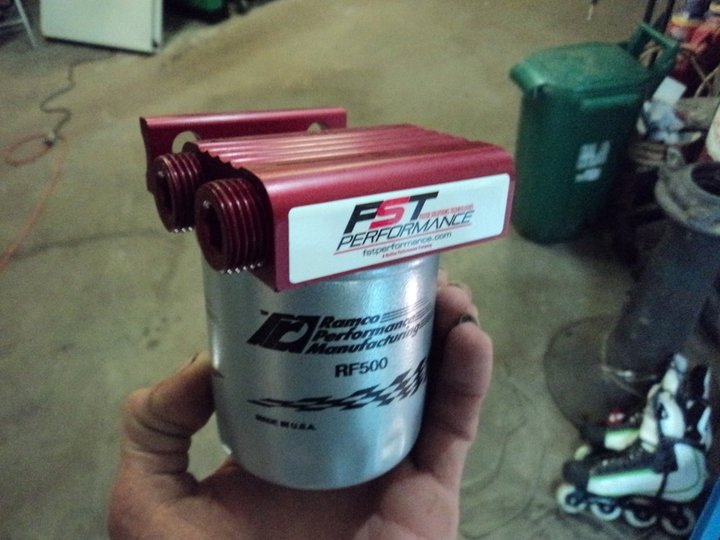
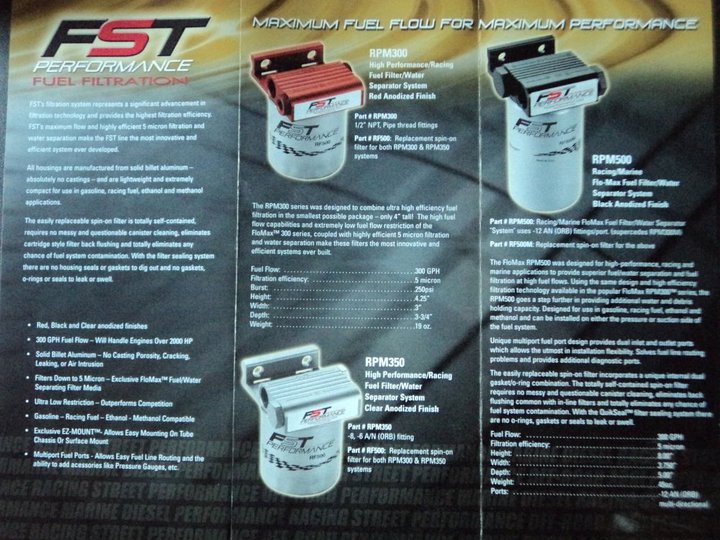
S2 nutswingn
Marshall fuel pressure guage.
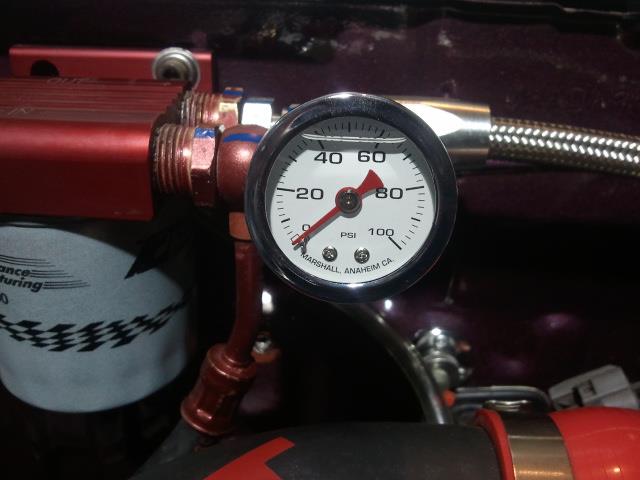
Ummm. 6' of Russel -6. and 6' of -8.
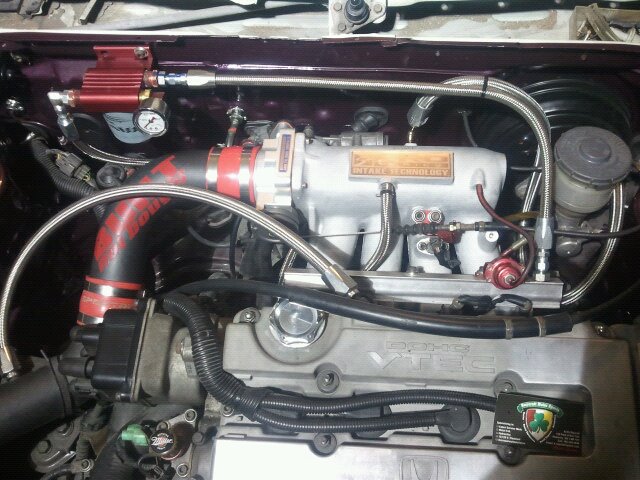
Nothing went back on without being cleaned or painted.
S2 nutswingn
Marshall fuel pressure guage.
Ummm. 6' of Russel -6. and 6' of -8.
Nothing went back on without being cleaned or painted.
Thread Starter
Junior Member
Joined: Feb 2012
Posts: 175
From: penetanguishene
Ummm. Dont try and copy any of this unless you have been turning wrenches your whole life. I have been welding since i was 10. My old man was a mechanic RIP. This build is entirely what you know and how you know it. Befor this i built a cleam 90 crx si and i have been swappn engines in things like trucks, boats, muscle cars and machinery. There realy are no write ups on this.
Thnx for checking it out.
Thnx for checking it out.
Thread Starter
Junior Member
Joined: Feb 2012
Posts: 175
From: penetanguishene

Thread Starter
Junior Member
Joined: Feb 2012
Posts: 175
From: penetanguishene
Thmx Paul. I still need to paint the doors, but other then that. Its almost finished. I hope to make it to a few meets this year. Honda-tech for sure...

n00b
Joined: Feb 2012
Posts: 2
From: California
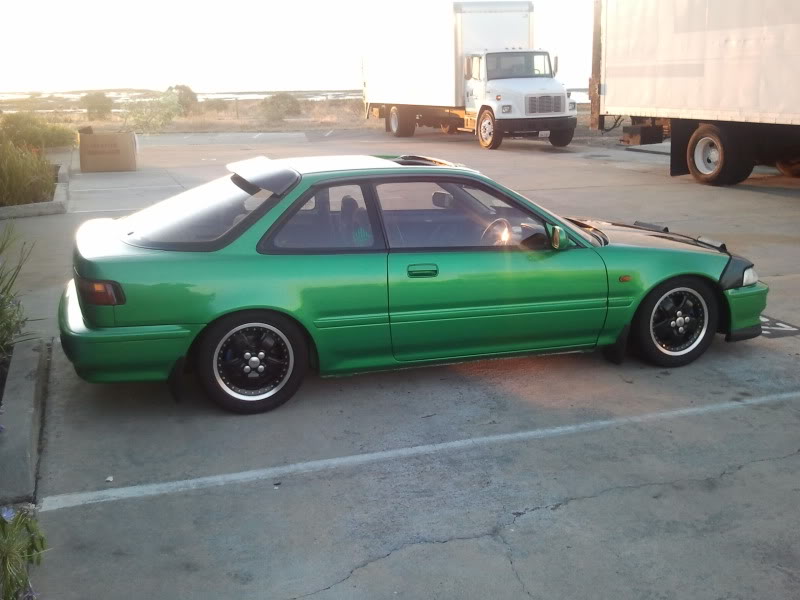
SAMBA GREEN? looks very similar to my buddies samba green RHD DA
RHD DA with a buttload of JDM goodies. he digged high and low to find all these rare parts!!! must of took him 5+ years to gather everything.
here is his build thread on g2ic.com
link:
http://forums.g2ic.com/showthread.ph...y-build-thread


RHD DA with a buttload of JDM goodies. he digged high and low to find all these rare parts!!! must of took him 5+ years to gather everything.
here is his build thread on g2ic.com
link:
http://forums.g2ic.com/showthread.ph...y-build-thread
n00b
Joined: Feb 2012
Posts: 2
From: California
when he bought the car, it was just a bare RHD shell w/ drum brakes in the rear, zero interior. he had to swap everything over from his parts car. everything on his ride was built from the ground up by him, other than the body and paint (he let the insurance handle that). he's actually in the process of painting his engine bay and dropping in a jdm B16.
the car is that clean because he is really meticulous and pays attention to every single detail when working on his car.
he's a JDM guru/fanatic. every single JDM part for that car was pieced together from everywhere and must have taken him 5+ years. he even has the JDM brown tinted rear window. he is constantly searching for those rare JDM parts.

