
DIY: 91 Integra Axles


Thread Starter
Time to become a Premier Member!
Joined: Mar 2007
Posts: 3,681
From: London, ON
Hey guys, this is my first DIY write up, so let me know what you think, and sorry about some of the blurry pictures, I was trying to get them quickly.Enjoy!
REMEMBER!
- Before removing the caliper, loosen the huge nut in the centre of the wheel and the two star tip screws holding the rotor. I made the mistake of not doing that and had to reattach the caliper quickly.
- Grab a small box or dish to keep all your bolts together!
- Keep a drain pan underneath the tranny for any fluid that will leak out when you pull out the axle.
----------------------------------------------------------------
First of all, remove all four lug nuts and remove the wheel.
Then WD40 or MOOVIT the bolts holding on the calipers, the fork, the one big nut in the centre of the rotor and the one bolt underneath the ball joint. And leave to sit for a couple minutes.
Tools to gather in the mean time:
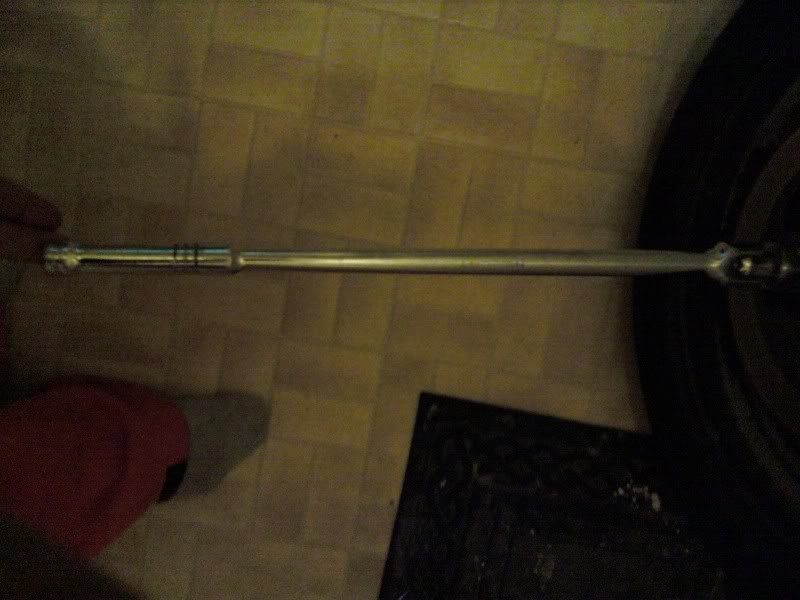
- 1/2" drive ratchet (better)
- 17mm, 18mm, 19mm, and 21mm sockets
- 17 mm wrench
- hammer
- dull center punch or dull chisel
- Propane torch
- WD40 or MOOVIT
- Anti-seize
- White Grease
- Crow bar
- Rubber mallet
- Breaker bar
Okay, now that the Lubricant has settled let us begin.
First of all use the breaker bar and the 21mm socket to break loose the nut in the centre holding the axle to the rotor / rotor hub.
Then use the punch / chisel to shock the two star tip screws loose. If that doesnt work at first then use the propane torch to heat it up and grab a larger bolt that is just slightly smaller than the head of the screw and tap it lightly with a hammer. The result of this is the heat softens the metal and when lightly tapping the screw with the bolt the locking head ------s up a bit to keep it from kissing up against the hole.
---------------------------------------------------
Once those are loose, remove caliper.
Top bolt removed

Bottom bolt of caliper

Once both bolts are removed, you should have this.

You may have to pry a bit to get the caliper off the rotor.
-------------------------------------------------------
Now remove the caliper, you may have to use the rubber mallet and hit it around the edges and not directly on the face of the rotor.
You end up with this

-------------------------------------------------------------
Then remove the bolt holding the fork to the lower control arm. You will need the 17mm socket and wrench. Use the wrench to grab the nut on the other end of the bolt and use the socket to grab the bolt and turn.
You might have this as a result

DO NOT USE AN EXTENSION! AS YOU WILL LOSE STRENGTH GOING STRAIGHT TO THE SOCKET!
After the bolt is removed you should have this out

And this left

---------------------------------------------------
Now, look underneath the ball joint and you should see a nut with square edges going up and down with a cotter pin in between.

Using a needle nose pliers, pull the cotter pin out without breaking it.
This should come out

Then just using an 18mm socket take off the nut.
-----------------------------------------------------------------
Now use the crow bar and hammer to seperate the ball joint.
Apply pressure on the lower control arm with the crow bar and be careful not too rip the ball joint boot so that its not much more effort needed to hit the control arm down. Do not hit the treaded piece coming down from the ball joint or else... trouble.

* the reason I didnt use the ball joint seperator is because I did not want to tear the ball joint boot.
----------------------------------------------------------
After taking it all apart, this is what you should have after pushing the seperating everything
 .
.
When pulling the axle out be very careful and pull it out straight so that you do not ruin the seal inside the tranny.
THATS ALL FOR NOW, BECAUSE STUPID PARTSOURCE GAVE ME THE WRONG AXLES... SO NOW I GOTTA GO EXHANGE THEM TOMORROW!
REMEMBER!
- Before removing the caliper, loosen the huge nut in the centre of the wheel and the two star tip screws holding the rotor.
I made the mistake of not doing that and had to reattach the caliper quickly.- Grab a small box or dish to keep all your bolts together!
- Keep a drain pan underneath the tranny for any fluid that will leak out when you pull out the axle.
----------------------------------------------------------------
First of all, remove all four lug nuts and remove the wheel.
Then WD40 or MOOVIT the bolts holding on the calipers, the fork, the one big nut in the centre of the rotor and the one bolt underneath the ball joint. And leave to sit for a couple minutes.
Tools to gather in the mean time:
- 1/2" drive ratchet (better)
- 17mm, 18mm, 19mm, and 21mm sockets
- 17 mm wrench
- hammer
- dull center punch or dull chisel
- Propane torch
- WD40 or MOOVIT
- Anti-seize
- White Grease
- Crow bar
- Rubber mallet
- Breaker bar
Okay, now that the Lubricant has settled let us begin.
First of all use the breaker bar and the 21mm socket to break loose the nut in the centre holding the axle to the rotor / rotor hub.
Then use the punch / chisel to shock the two star tip screws loose. If that doesnt work at first then use the propane torch to heat it up and grab a larger bolt that is just slightly smaller than the head of the screw and tap it lightly with a hammer. The result of this is the heat softens the metal and when lightly tapping the screw with the bolt the locking head ------s up a bit to keep it from kissing up against the hole.
---------------------------------------------------
Once those are loose, remove caliper.
Top bolt removed
Bottom bolt of caliper
Once both bolts are removed, you should have this.
You may have to pry a bit to get the caliper off the rotor.
-------------------------------------------------------
Now remove the caliper, you may have to use the rubber mallet and hit it around the edges and not directly on the face of the rotor.
You end up with this
-------------------------------------------------------------
Then remove the bolt holding the fork to the lower control arm. You will need the 17mm socket and wrench. Use the wrench to grab the nut on the other end of the bolt and use the socket to grab the bolt and turn.
You might have this as a result
DO NOT USE AN EXTENSION! AS YOU WILL LOSE STRENGTH GOING STRAIGHT TO THE SOCKET!
After the bolt is removed you should have this out
And this left
---------------------------------------------------
Now, look underneath the ball joint and you should see a nut with square edges going up and down with a cotter pin in between.
Using a needle nose pliers, pull the cotter pin out without breaking it.
This should come out
Then just using an 18mm socket take off the nut.
-----------------------------------------------------------------
Now use the crow bar and hammer to seperate the ball joint.
Apply pressure on the lower control arm with the crow bar and be careful not too rip the ball joint boot so that its not much more effort needed to hit the control arm down. Do not hit the treaded piece coming down from the ball joint or else... trouble.
* the reason I didnt use the ball joint seperator is because I did not want to tear the ball joint boot.
----------------------------------------------------------
After taking it all apart, this is what you should have after pushing the seperating everything
.When pulling the axle out be very careful and pull it out straight so that you do not ruin the seal inside the tranny.
THATS ALL FOR NOW, BECAUSE STUPID PARTSOURCE GAVE ME THE WRONG AXLES... SO NOW I GOTTA GO EXHANGE THEM TOMORROW!
There's plenty to do outside my room but I choose not to!
iTrader: (2)
Joined: Aug 2003
Posts: 8,164
From: The Hammer!
what you mean they gave you the wrong axle? did they give you one for ABS? if so, you can still use it.
you had to seperate the fork from the LCA? with stock DA forks the axle fits thru them.
you had to seperate the fork from the LCA? with stock DA forks the axle fits thru them.
Senior Member
Joined: Nov 2006
Posts: 1,481
From: sauga
fyi you do not pull out the axel of the tranny or you will ---- it up and have to take it apart and re attach the things inside(dont know what they are called) just use a big flat head and pry the axel out of the tranny.
Thread Starter
Time to become a Premier Member!
Joined: Mar 2007
Posts: 3,681
From: London, ON
Yea, I didnt get to the pulling out part on the DIY, sorta just left it there, until I have time to upload all the pics, but yea, use a big flat head and keep the axle straight up or else i think its the O-ring that gets messed up.

Time to become a Premier Member!
Joined: May 2003
Posts: 4,113
From: Closer than you think.
You don't have to pull the brakes off, including the caliper, they all swing out when you pop out the ball joint and remove the bolt from the bottom of the strut fork. Just to make things quicker 

Junior Member
Joined: Jun 2008
Posts: 450
From: Ontario
Also buy some short bungee cord or wire or something, because you should NEVER let your caliper hang by the brake line.


Post Whore
Joined: May 2005
Posts: 2,657
From: Hamilton
I'd like to see the size of your breaker bar because I know everytime I've tried to break that axle nut I break my own nuts.
also, what kind of extention did you break? The piece that broke off looks circular. shouldn't it be square?
btw, just spend a bit extra and use new cotter pins.
also, what kind of extention did you break? The piece that broke off looks circular. shouldn't it be square?
btw, just spend a bit extra and use new cotter pins.
Thread Starter
Time to become a Premier Member!
Joined: Mar 2007
Posts: 3,681
From: London, ON
I'd like to see the size of your breaker bar because I know everytime I've tried to break that axle nut I break my own nuts.
also, what kind of extention did you break? The piece that broke off looks circular. shouldn't it be square?
btw, just spend a bit extra and use new cotter pins.
also, what kind of extention did you break? The piece that broke off looks circular. shouldn't it be square?
btw, just spend a bit extra and use new cotter pins.


Junior Member
Joined: Jan 2008
Posts: 425
From: Brampton
Yea, no need to waste time removing the caliper or rotor; the entire hub swings out of the way once you crack the axle nut, and tap it out.
Other then that, it's the exact same procedure on a DC.
Other then that, it's the exact same procedure on a DC.
Last edited by BestodaBest; Dec 25, 2008 at 01:17 PM.
 ... had no idea, lol

Thread
Thread Starter
Forum
Replies
Last Post
B18C6ITR
Integra Parts Wanted
1
Mar 18, 2013 01:36 PM
DallasW
Integra Parts For Sale
2
Jul 28, 2008 02:14 PM
DallasW
Integra Parts For Sale
1
Jun 15, 2008 05:21 PM