
***How-To*** Polish A Header

Thread Starter
Time to become a Premier Member!
Joined: Aug 2003
Posts: 4,816
From: Whitby
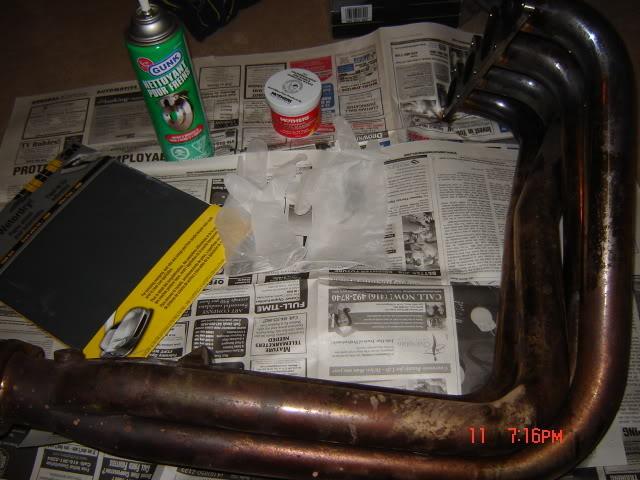
Tools Required:
- Mothers Aluminium Polish or another type of metal polish
- 800 grit & 1000grit sandpaper
- Soapy water
- 2 rags/cloths
- Old Newspaper
- Roll of paper towel
- Brake Cleaner
Optional:
- Latex gloves (to keep your hands clean)
- Tooth Brush
- Rust cleaner

Not pictured are the paper towel roll, tooth brush and bucket of soapy water.
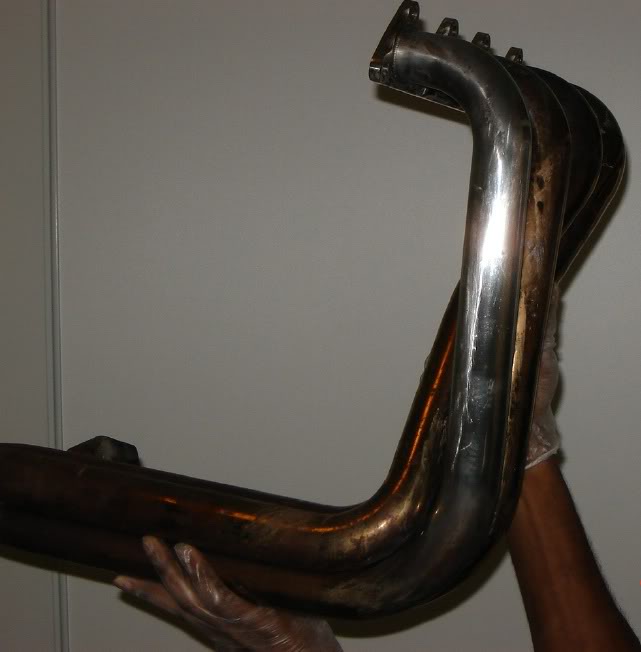
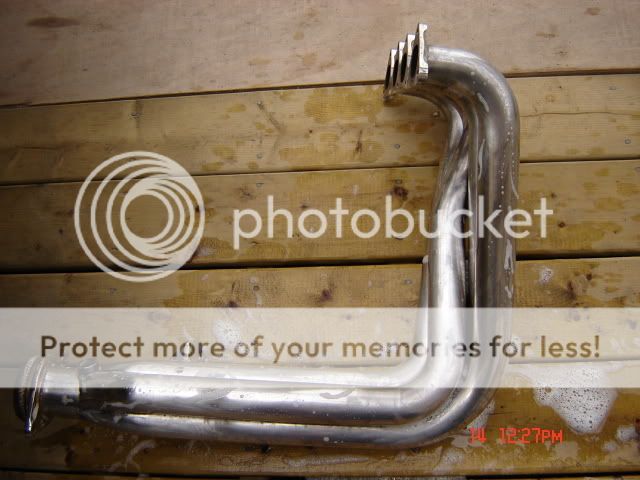
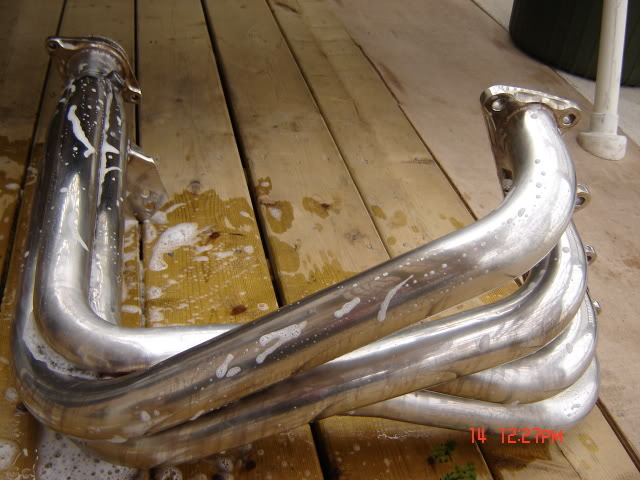
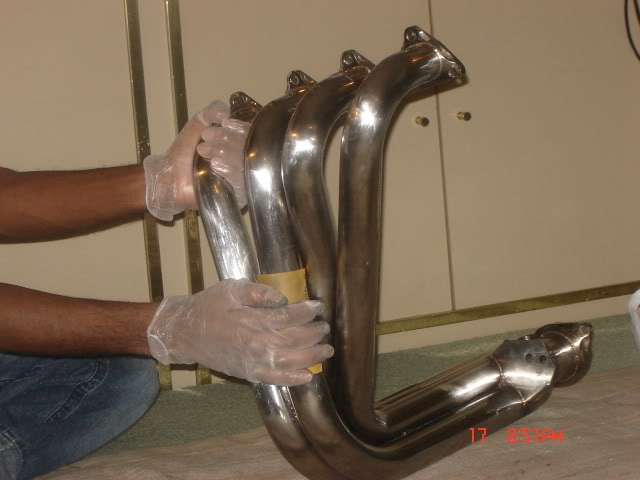
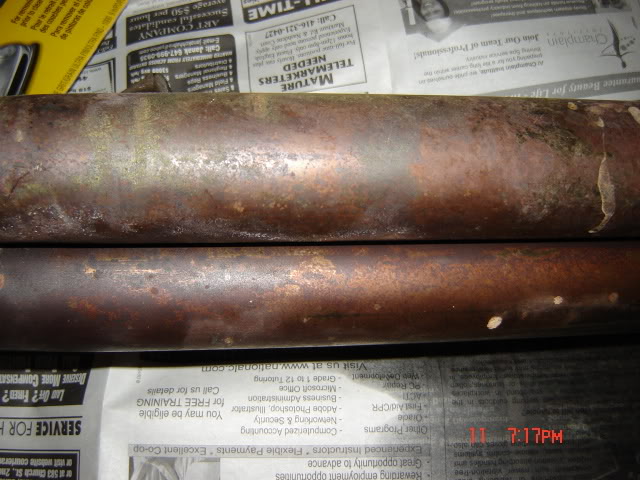
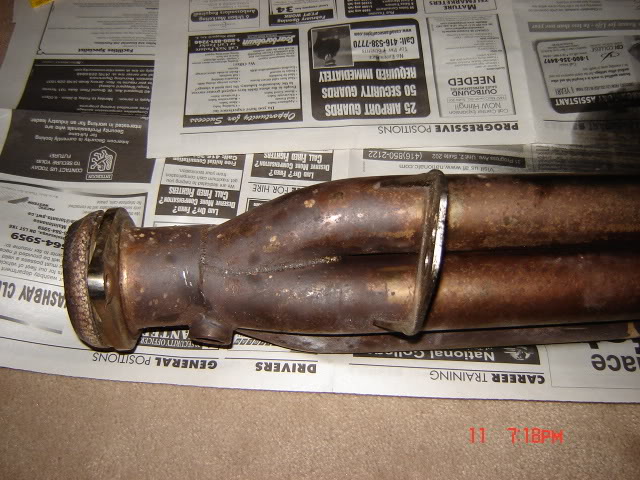
1) First you start off by cleaning up the header as best as you can. I did this by using the soapy water and a rag/cloth to wipe most of it clean. Then I dipped my tooth brush into the soapy water to get the hard to reach places like in-between the collectors.
2) After you�re done cleaning the header, rinse of the header with water and proceed to dry it with the paper towel. Since I wasn't looking to get the header perfect I moved on to the next step. If you want the nicest shine possible or your header is rusted to ----, this is where you grab the rust cleaner and repeat step one using the rust cleaner instead of the soapy water. Once finished with the rust cleaner repeat step one again with the soapy water solution.
3) No find a place where you�re going to start the labour intensive work or sanding down the header. Take your old newspaper and ------ it out over your work area.
4) Now after the finding your place to work put your gloves on. Then grab your brake cleaner and spray a clean rag/cloth or paper towels and wipe down the header. This should get all the parts you missed before with the soapy water solution clean.
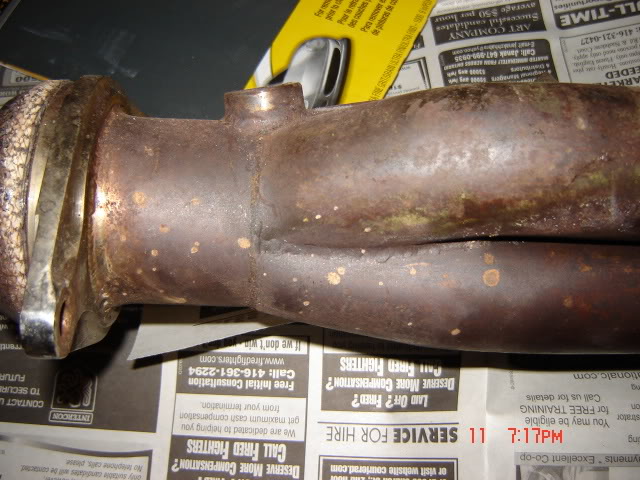
5) Now grab your 800 grit sandpaper and rip it into four equal pieces. This makes handling the sandpaper a lot easier. Begin to work away at the rusted header. Once you start to see the sandpaper get clogged up, give it a quick rinse to clean it out. Repeat this step for the whole header until most of the difficult rust is gone.
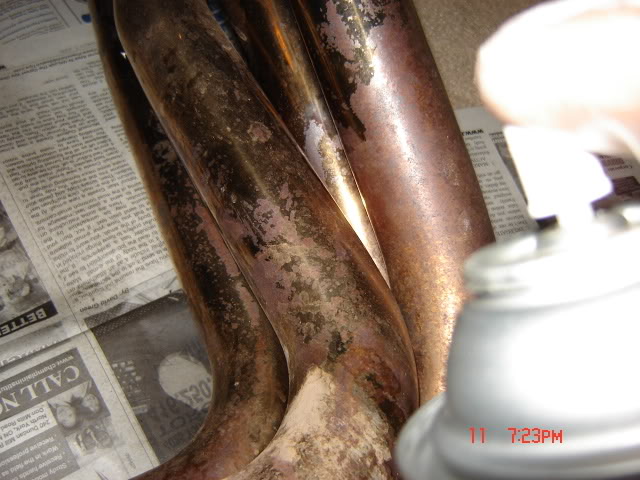
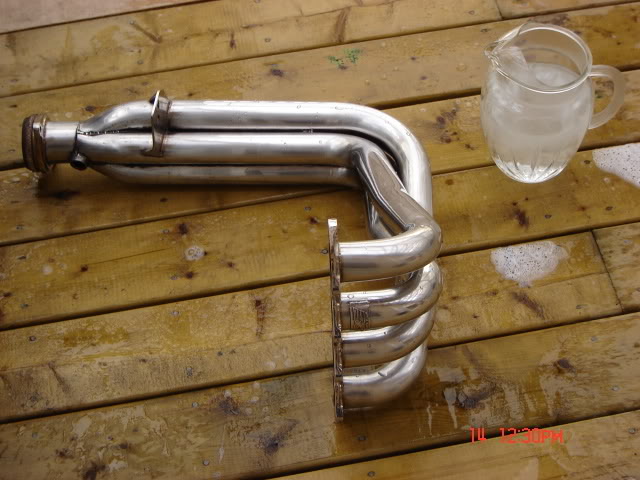
6) Now to make things go a little faster, a trick I picked up detailing. ------ the metal polish over the part of the header you'll be working on like so. Make sure not to over apply the metal polish. In the picture below I used that amount for the front of that collector I was working on.
- Mothers Aluminium Polish or another type of metal polish
- 800 grit & 1000grit sandpaper
- Soapy water
- 2 rags/cloths
- Old Newspaper
- Roll of paper towel
- Brake Cleaner
Optional:
- Latex gloves (to keep your hands clean)
- Tooth Brush
- Rust cleaner
Not pictured are the paper towel roll, tooth brush and bucket of soapy water.
1) First you start off by cleaning up the header as best as you can. I did this by using the soapy water and a rag/cloth to wipe most of it clean. Then I dipped my tooth brush into the soapy water to get the hard to reach places like in-between the collectors.
2) After you�re done cleaning the header, rinse of the header with water and proceed to dry it with the paper towel. Since I wasn't looking to get the header perfect I moved on to the next step. If you want the nicest shine possible or your header is rusted to ----, this is where you grab the rust cleaner and repeat step one using the rust cleaner instead of the soapy water. Once finished with the rust cleaner repeat step one again with the soapy water solution.
3) No find a place where you�re going to start the labour intensive work or sanding down the header. Take your old newspaper and ------ it out over your work area.
4) Now after the finding your place to work put your gloves on. Then grab your brake cleaner and spray a clean rag/cloth or paper towels and wipe down the header. This should get all the parts you missed before with the soapy water solution clean.
5) Now grab your 800 grit sandpaper and rip it into four equal pieces. This makes handling the sandpaper a lot easier. Begin to work away at the rusted header. Once you start to see the sandpaper get clogged up, give it a quick rinse to clean it out. Repeat this step for the whole header until most of the difficult rust is gone.
6) Now to make things go a little faster, a trick I picked up detailing. ------ the metal polish over the part of the header you'll be working on like so. Make sure not to over apply the metal polish. In the picture below I used that amount for the front of that collector I was working on.
Last edited by WildoutWhiteGSR; Mar 16, 2006 at 11:34 AM.
Thread Starter
Time to become a Premier Member!
Joined: Aug 2003
Posts: 4,816
From: Whitby
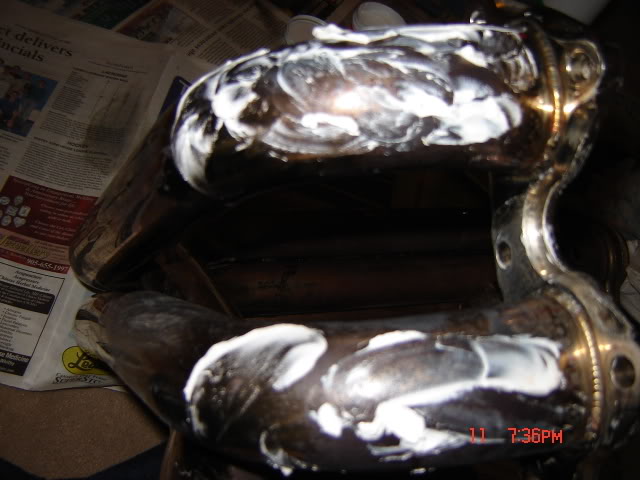
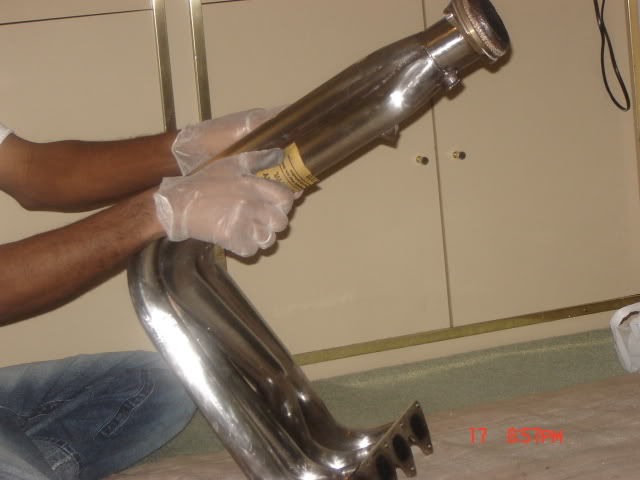
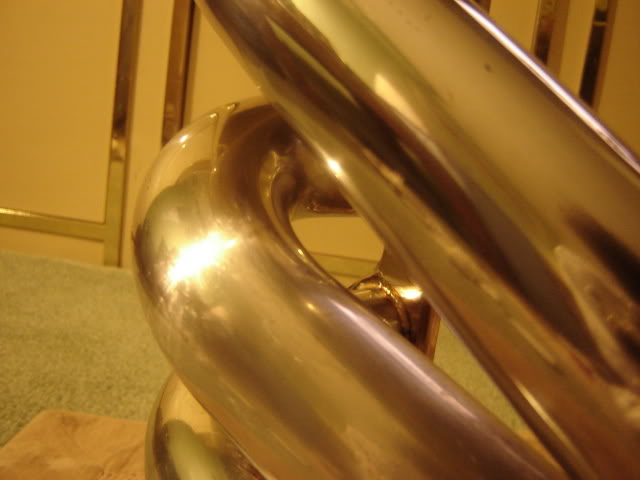
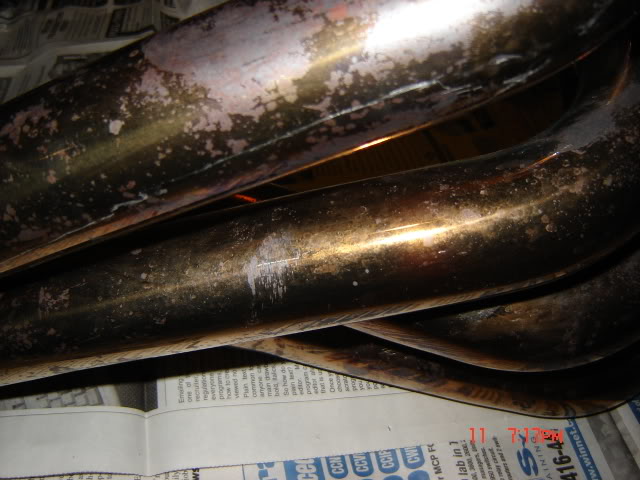
Then grab your 1000 grit sandpaper and again rip the sandpaper into four equal pieces. Then use the sandpaper together with the metal polish to get your desired results quicker. This way is faster than just using sandpaper alone; like so.
Your sandpaper will get clogged up and the metal polish will turn a rusty brown colour. Don't worry just rinse out your sandpaper or grab a new piece. Then wipe off the old metal polish with your paper towel and add some more metal polish to the header. Remember not to over apply the polish.
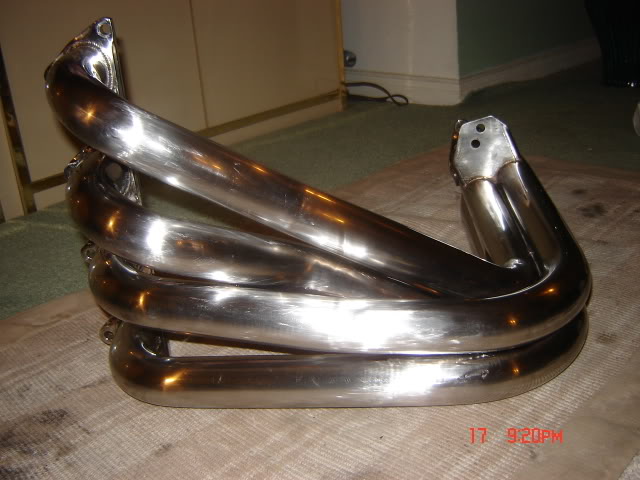
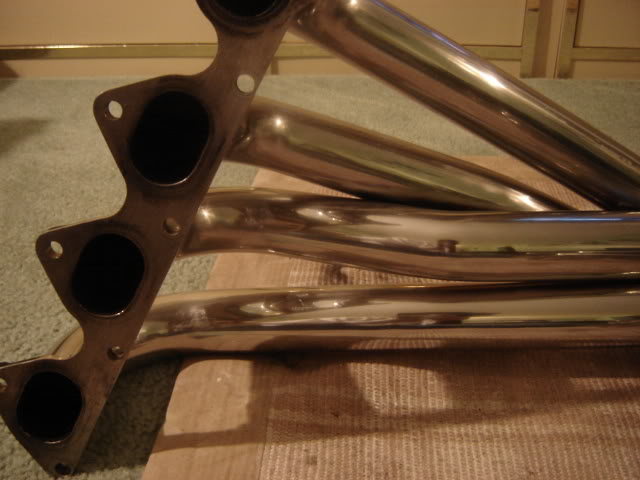
This is what collector # 4 looks like after this process. It took me about 30 - 45mins. Just make sure to take your time.
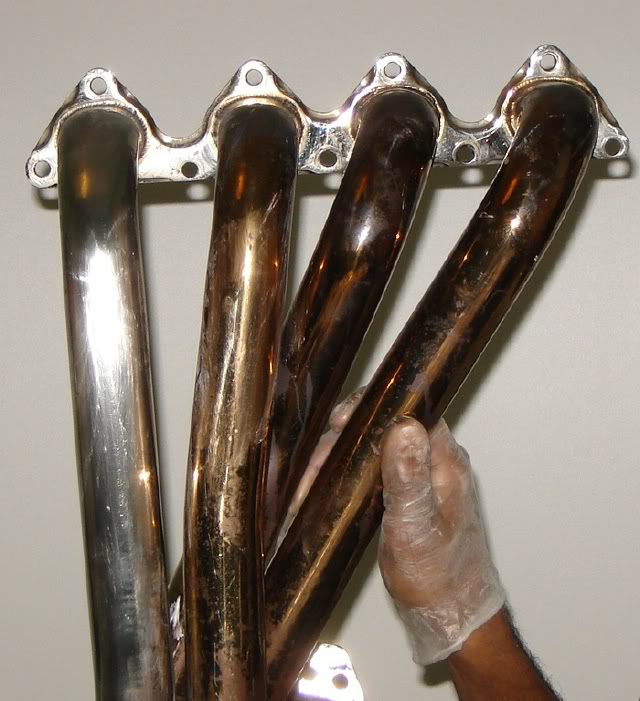
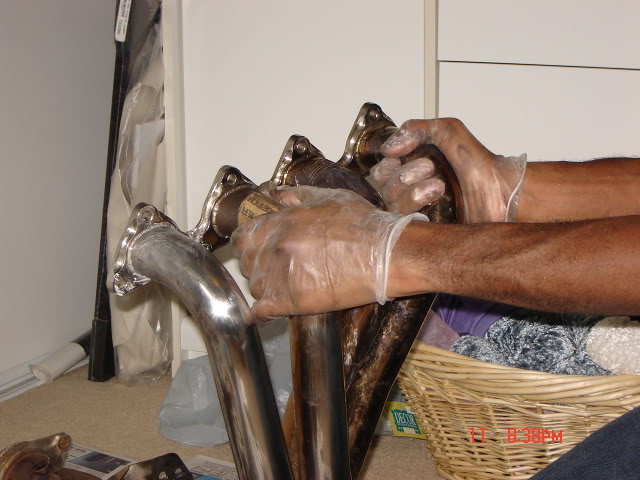
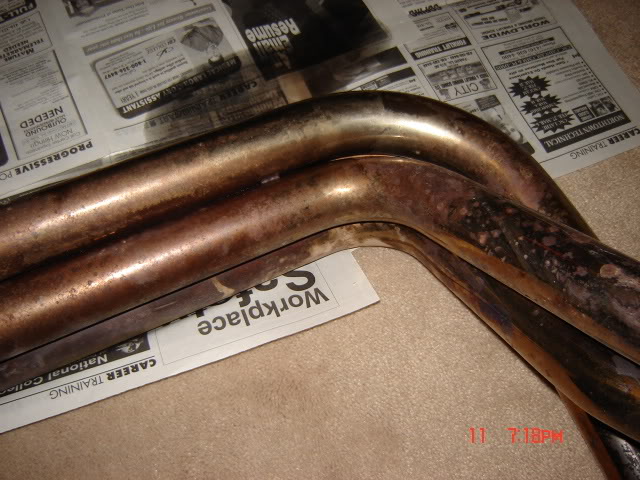
7) Now repeat step 6 again for the rest of the header. This is me moving on to collector # 3.
Your sandpaper will get clogged up and the metal polish will turn a rusty brown colour. Don't worry just rinse out your sandpaper or grab a new piece. Then wipe off the old metal polish with your paper towel and add some more metal polish to the header. Remember not to over apply the polish.
This is what collector # 4 looks like after this process. It took me about 30 - 45mins. Just make sure to take your time.
7) Now repeat step 6 again for the rest of the header. This is me moving on to collector # 3.
Last edited by WildoutWhiteGSR; Mar 16, 2006 at 11:35 AM.
Thread Starter
Time to become a Premier Member!
Joined: Aug 2003
Posts: 4,816
From: Whitby
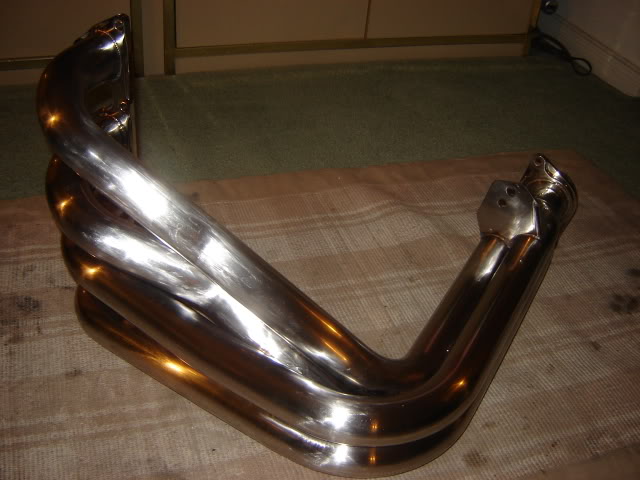
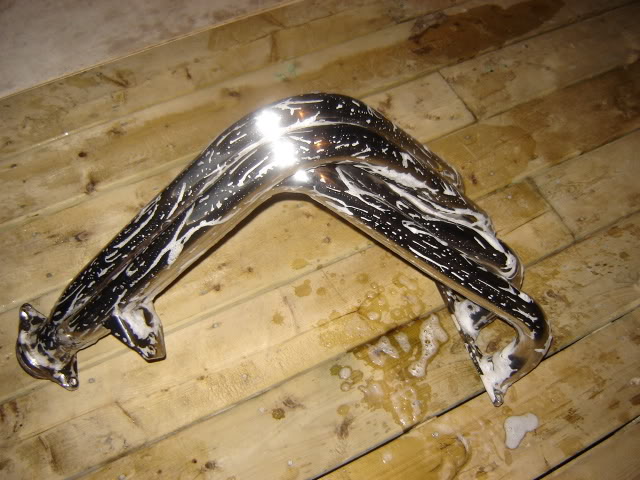
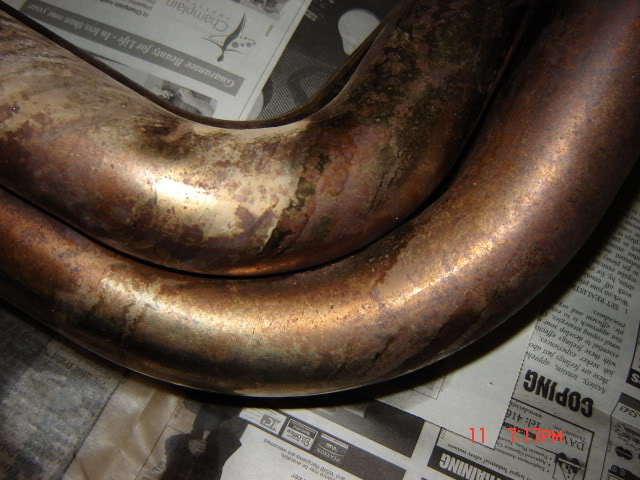
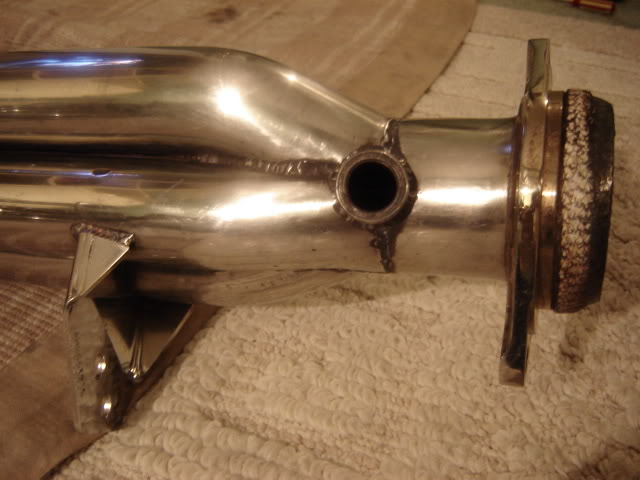
This is how my header looked after about 3 hours of work. Yes I skipped collector # 2 just because it was the hardest one, so I did that last.
8) Once you�re done with the sanding/polishing of the header, clean it again with your soapy water and give it a good wipe down with your rag/cloth or paper towels.
9) Then give it a good rinse with some water
8) Once you�re done with the sanding/polishing of the header, clean it again with your soapy water and give it a good wipe down with your rag/cloth or paper towels.
9) Then give it a good rinse with some water
Last edited by WildoutWhiteGSR; Mar 16, 2006 at 11:36 AM.
Thread Starter
Time to become a Premier Member!
Joined: Aug 2003
Posts: 4,816
From: Whitby
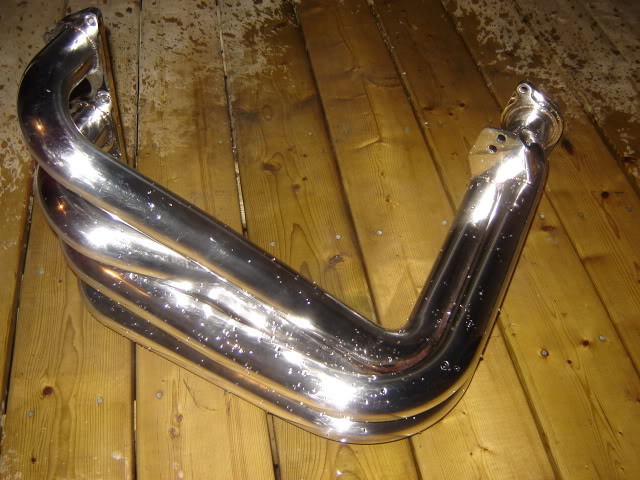
10) Now if the header is looking good to your satisfaction, re-install it on your car and skip to step # 16.
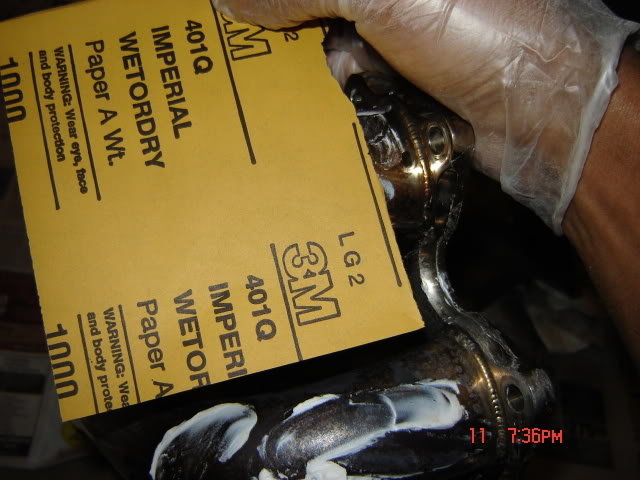
11) If not grab your sandpaper and give the header another light scuffing. Like so:
How the header looked after the light scuffing
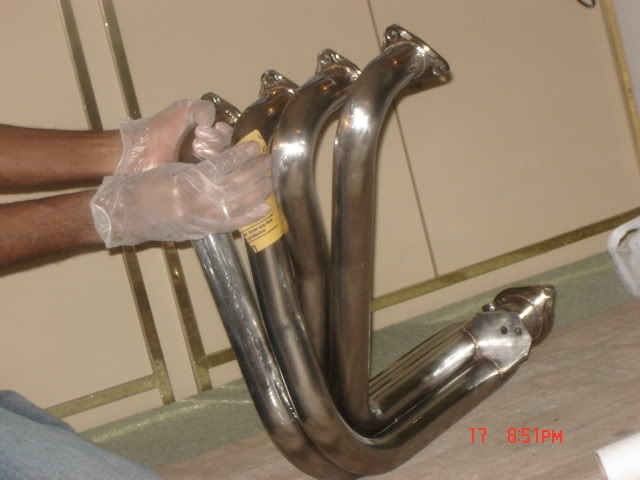
12) Grab another rag/cloth and get to work with the metal polish working it into the header until you get the shine you want. It will not shine like chrome so; do not get your hopes too high. Remove any excess polish with paper towel.
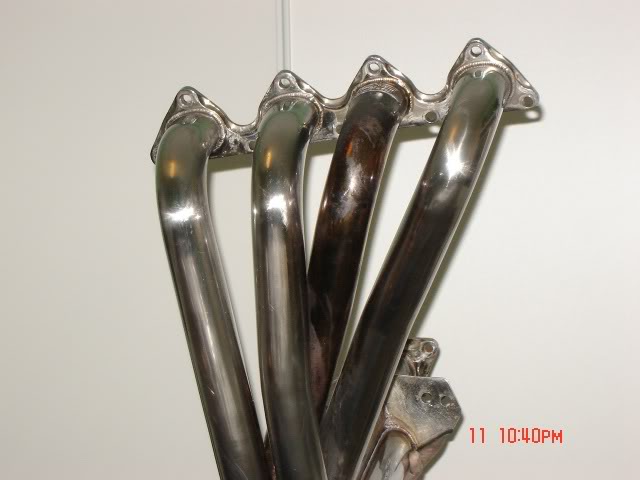
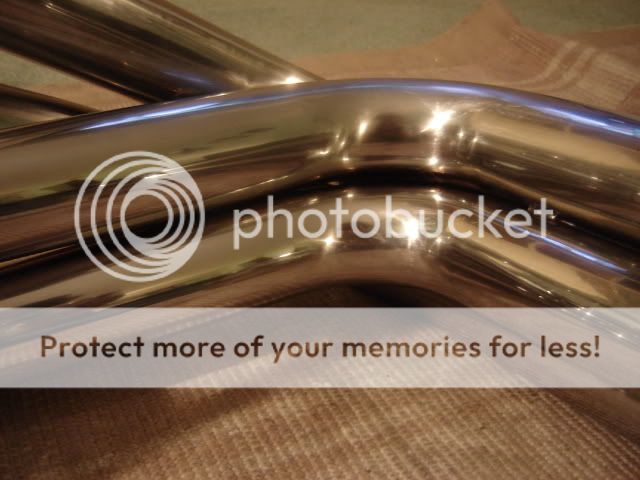
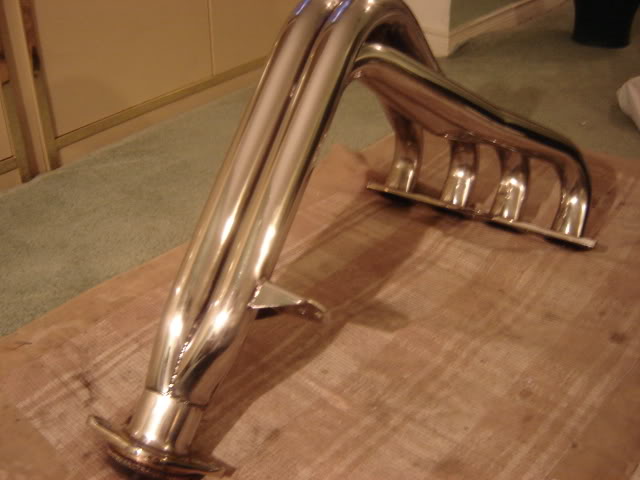
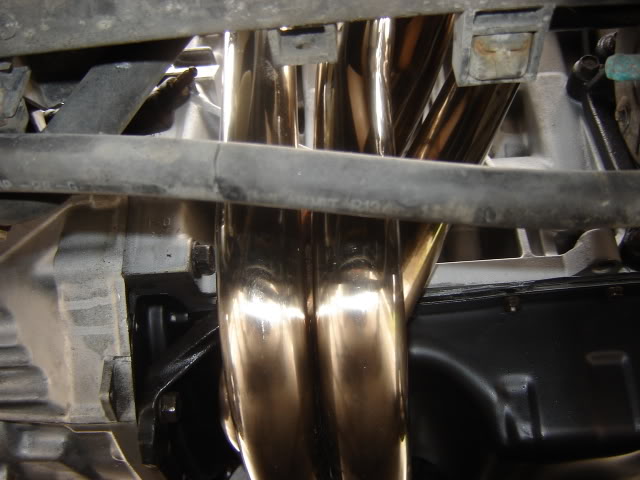
How the header looked after polishing collector # 1. (Closest to the top of the picture) The other three collectors untouched by the polish.
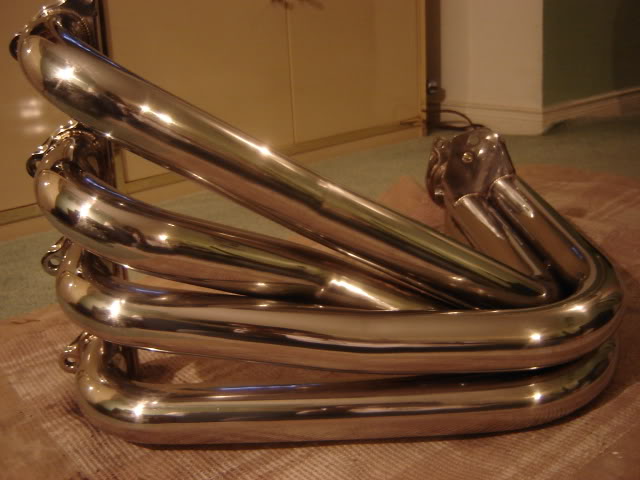
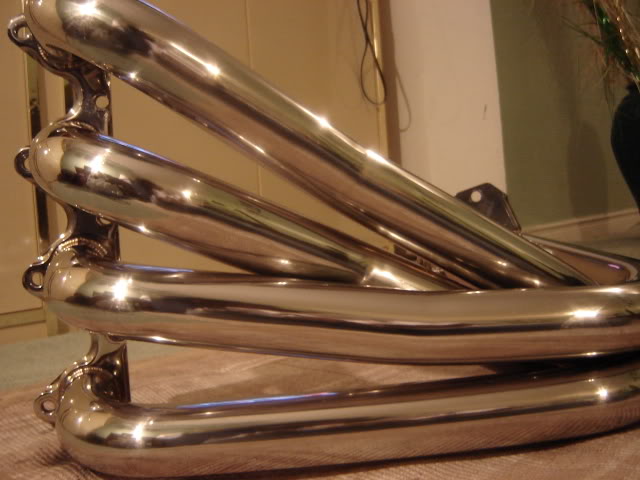
How it looked after all the header was polished

13) Give it a good wipe down with soapy water once again
14) Rinse it off for the last time before installing it on your car
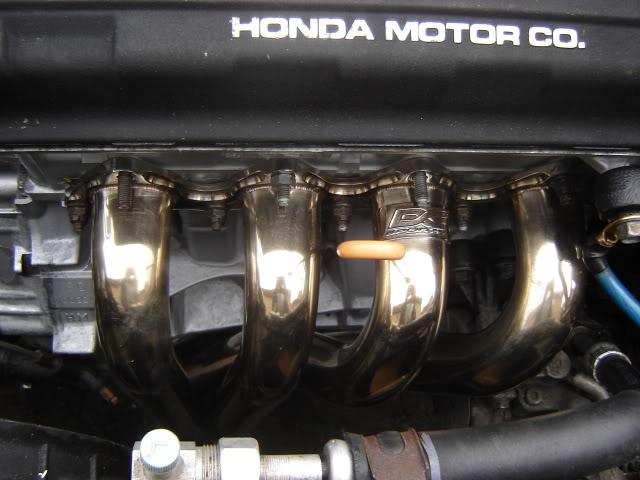
15) Dry off the remainding water on the header. This will be your finished product.
16) Once re-installed on the car BEFORE starting the engine, grab your brake cleaner and spray the entire header down with it. Then spray some brake cleaner onto some paper towels and give the header a final wipe down, making sure to wipe everything. You do this because the oils from your hands will cause the header to discolour unevenly, once the engine is started. You do not want this. You want it to turn a nice even bronze after a couple kilometres of use.
11) If not grab your sandpaper and give the header another light scuffing. Like so:
How the header looked after the light scuffing
12) Grab another rag/cloth and get to work with the metal polish working it into the header until you get the shine you want. It will not shine like chrome so; do not get your hopes too high. Remove any excess polish with paper towel.
How the header looked after polishing collector # 1. (Closest to the top of the picture) The other three collectors untouched by the polish.
How it looked after all the header was polished
13) Give it a good wipe down with soapy water once again
14) Rinse it off for the last time before installing it on your car
15) Dry off the remainding water on the header. This will be your finished product.
16) Once re-installed on the car BEFORE starting the engine, grab your brake cleaner and spray the entire header down with it. Then spray some brake cleaner onto some paper towels and give the header a final wipe down, making sure to wipe everything. You do this because the oils from your hands will cause the header to discolour unevenly, once the engine is started. You do not want this. You want it to turn a nice even bronze after a couple kilometres of use.
Last edited by WildoutWhiteGSR; Mar 18, 2006 at 02:20 AM.


Special Edumacated
Joined: Aug 2004
Posts: 442
From: St.Catharines
ey man mine is a bronze tintish header but im gonna try this in spring when my car in the shopp./ i post pics as well i got a greddy header well c how it shines nice job thanks alot for this informational writeup.


Ah okay. I would imagine you could polish anything that's a smooth metal surface, even not smooth surfaces - just takes some doing and effort. Not sure how much you could tackle rust though, if there's any.


Thread
Thread Starter
Forum
Replies
Last Post
FuzzyLS BRO
Pictures and Videos
42
Jan 26, 2006 07:49 PM

