HOW-TO: Mirror Removal & Paint + Wiper Arms
 04-12-2009, 02:48 PM
#1

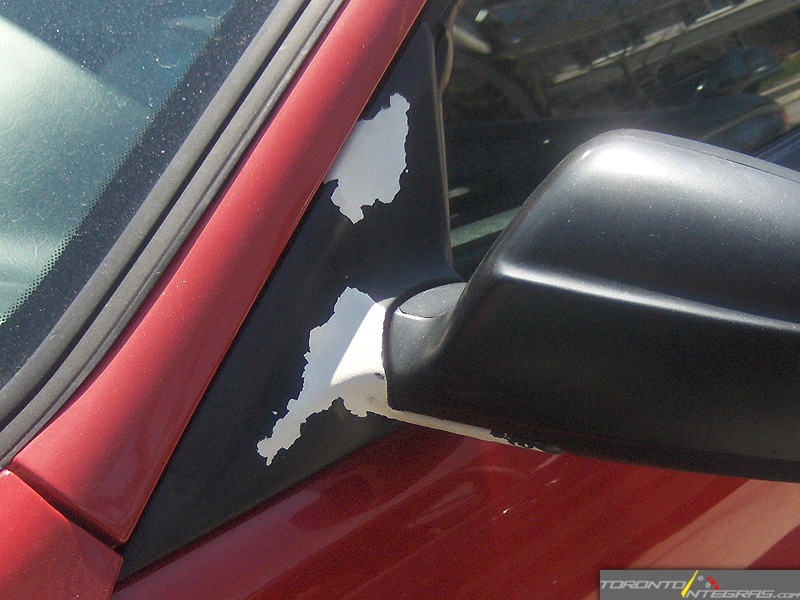
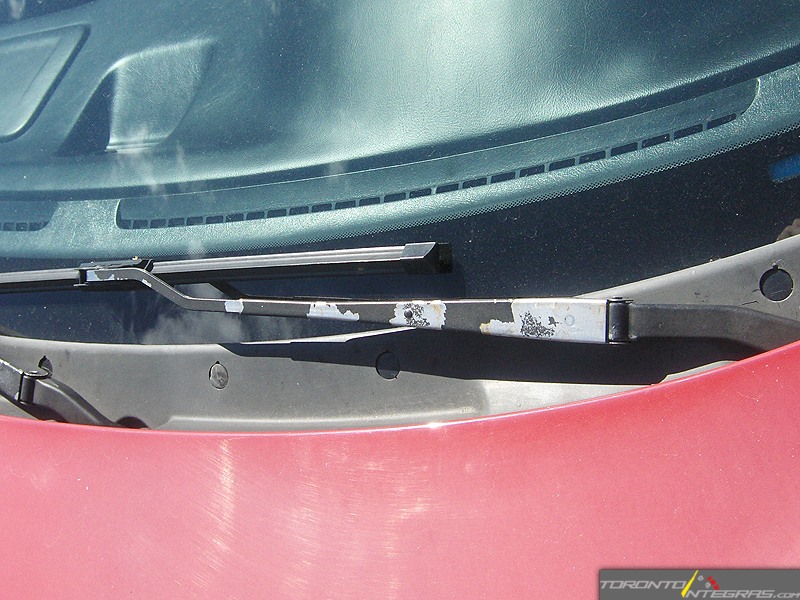
Purpose: My mirrors were badly flaking and the base was showing through. My wipers were also peeling showing the metal underneath. Wanted to remove any rust and repaint so it looked better.
The wiper arms came after the fact as I had some extra paint and sand paper.
This will also answer this question here.
Total Cost:
Sand Paper 220 grit - $0.99 each
Sand Paper 400 grit - $0.99 each
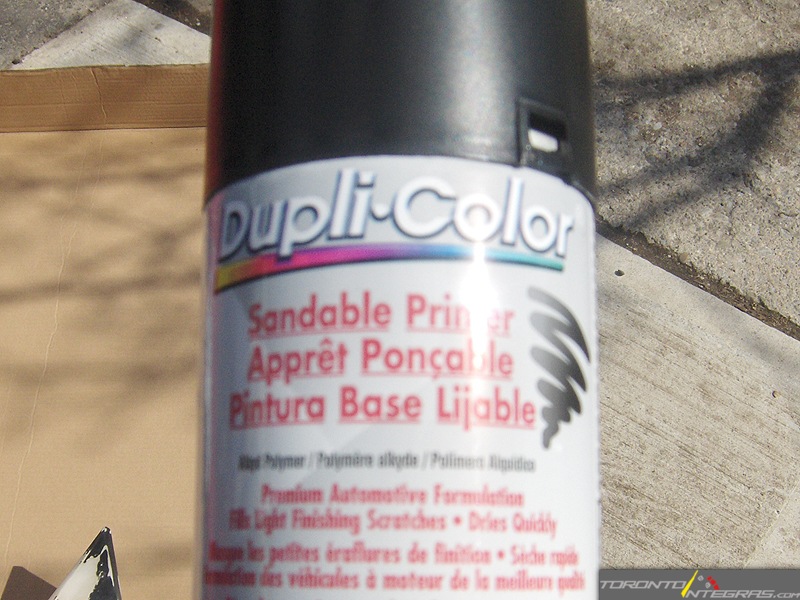
Dupli-Color Sandable Primer - $8.99
Dupli-Color Acrylic Enamel - $8.99
Mastercraft sand paper - $6.99
Cost: $27 in items.
Time: With the help of one friend sanding, dry time etc 5 hours.
Difficulty: 2/5
Play by play
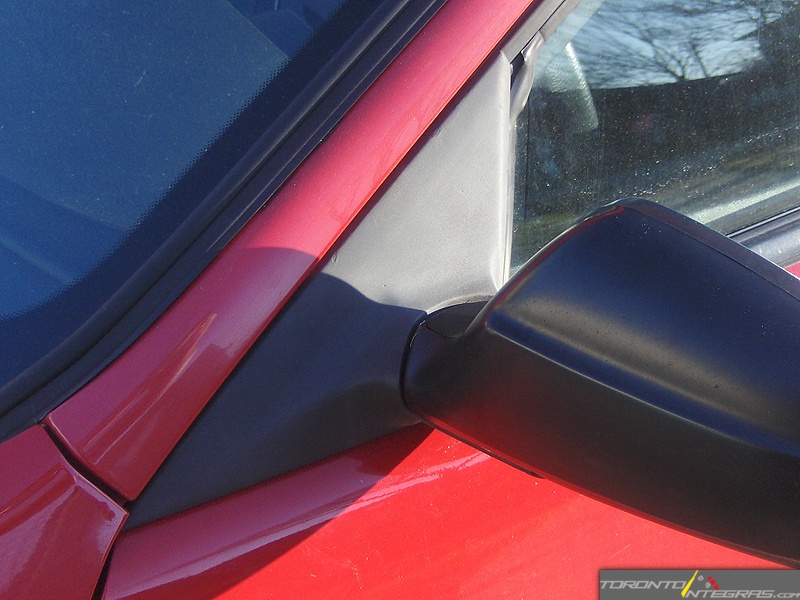
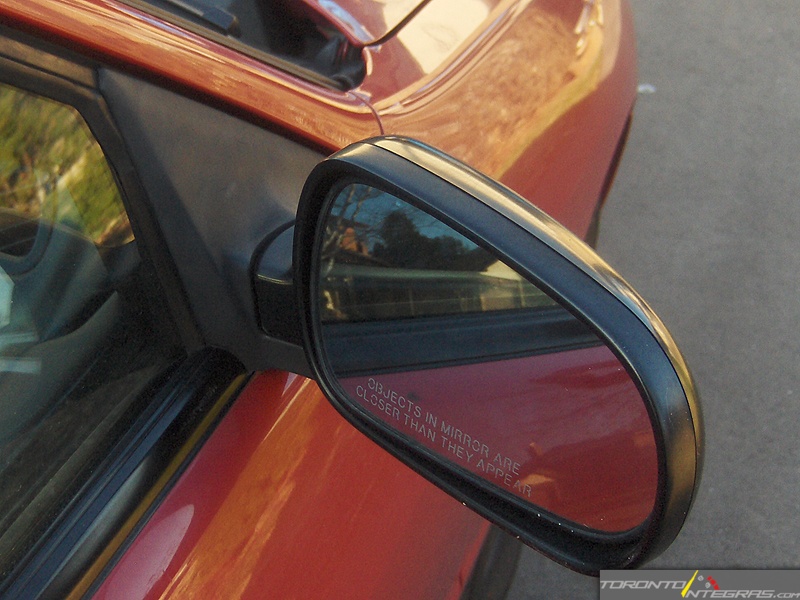
The first 3 shots are from before I got started. This clearly shows how bad the mirrors were when I bought my Integra. Compare these shots to the final ones in the end.

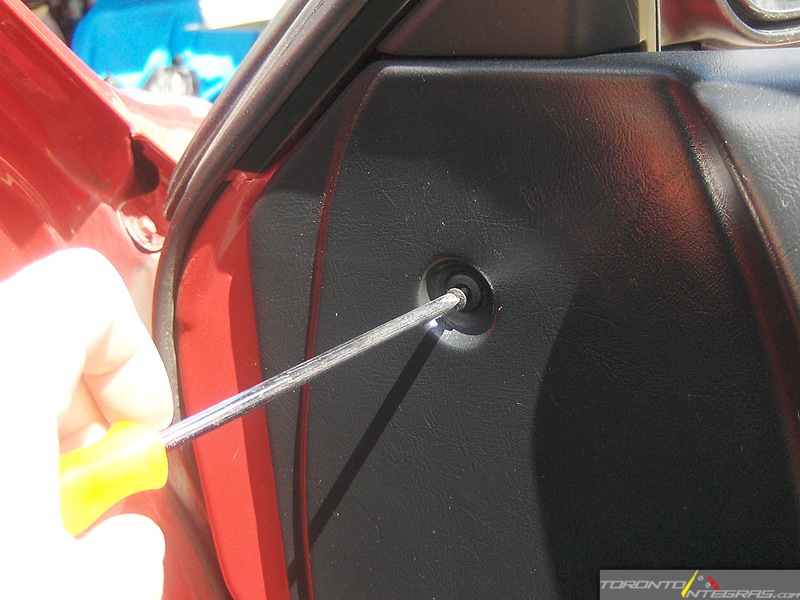
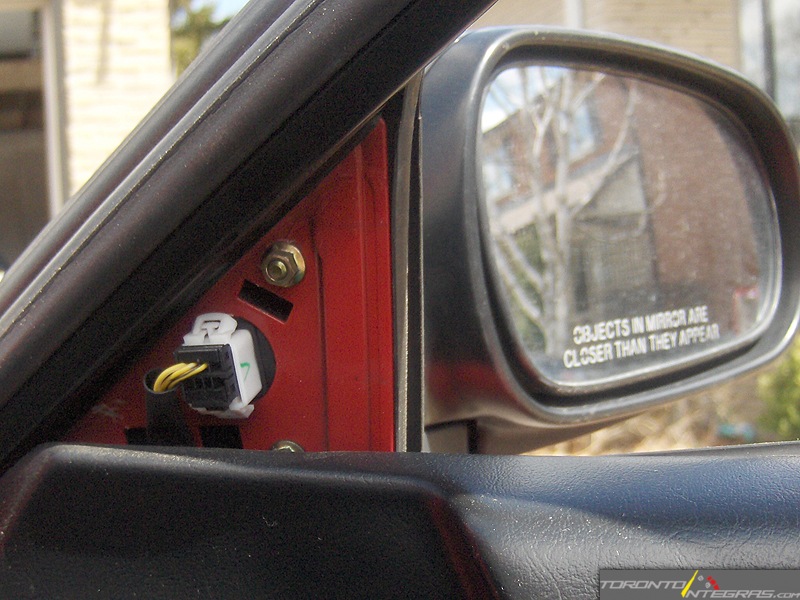
Now to remove the mirror u first unscrew this plastic screw (philips/star screwdriver). You could remove the whole door skin and this would go a lot smoother, however it will then take you longer.
Then this plastic cover just pulls back and lifts up for removal.
For the driver side, the procedure is the same.
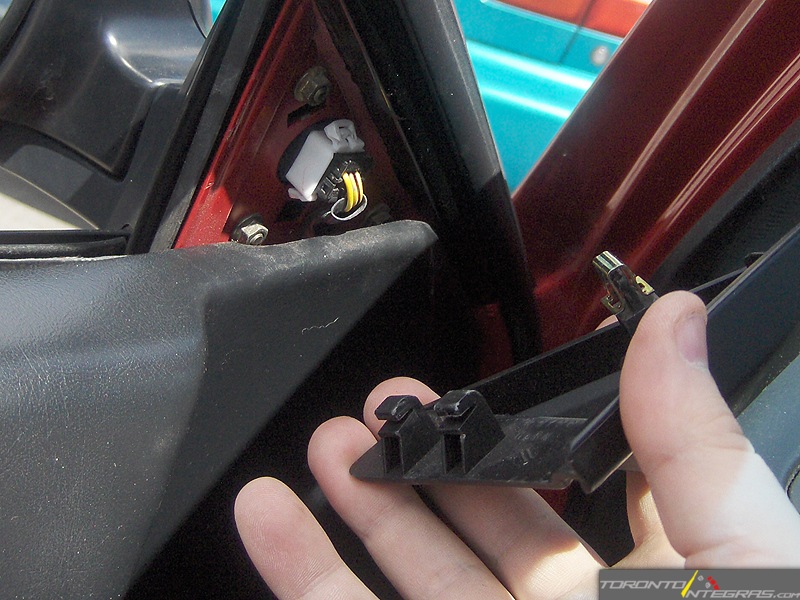
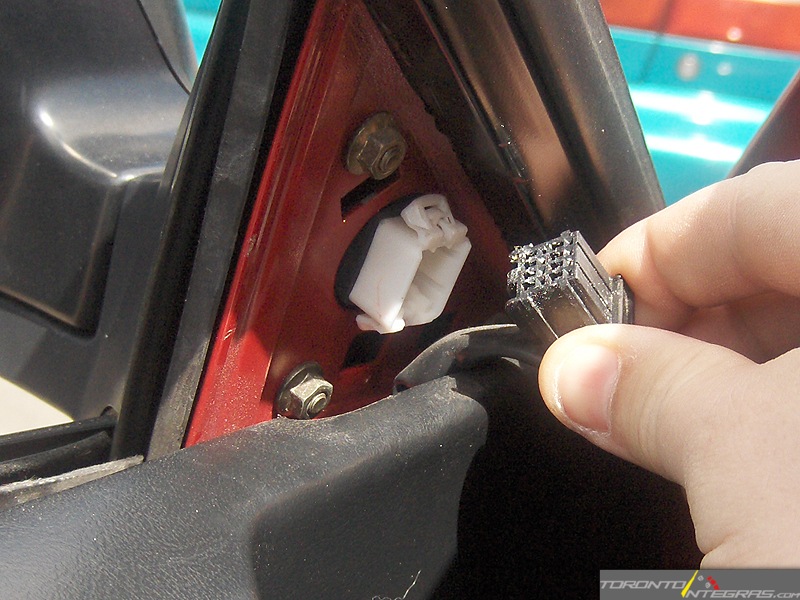
Then just pull out the wire harness, there's a small clip on the bottom.
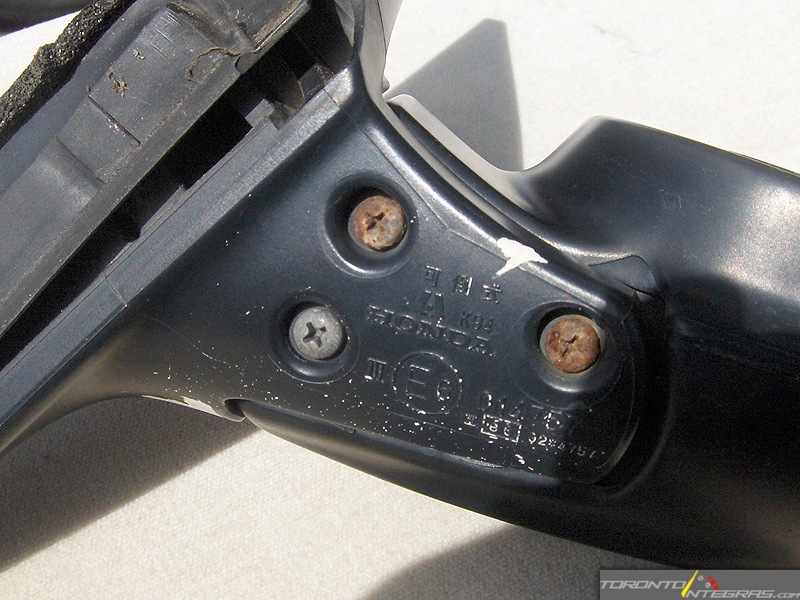
Then remove the 3 nuts holding the mirror on. This again would be easier with the door skin removed, but with patience can still be done.
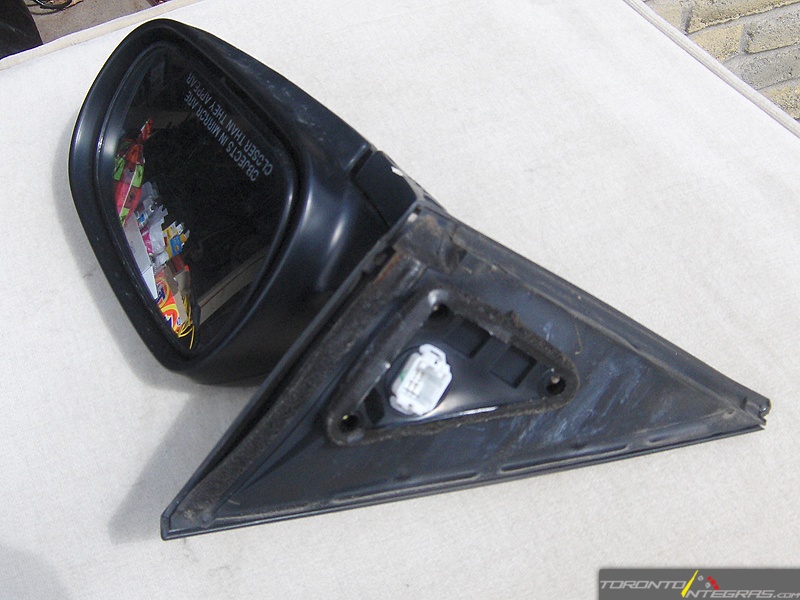
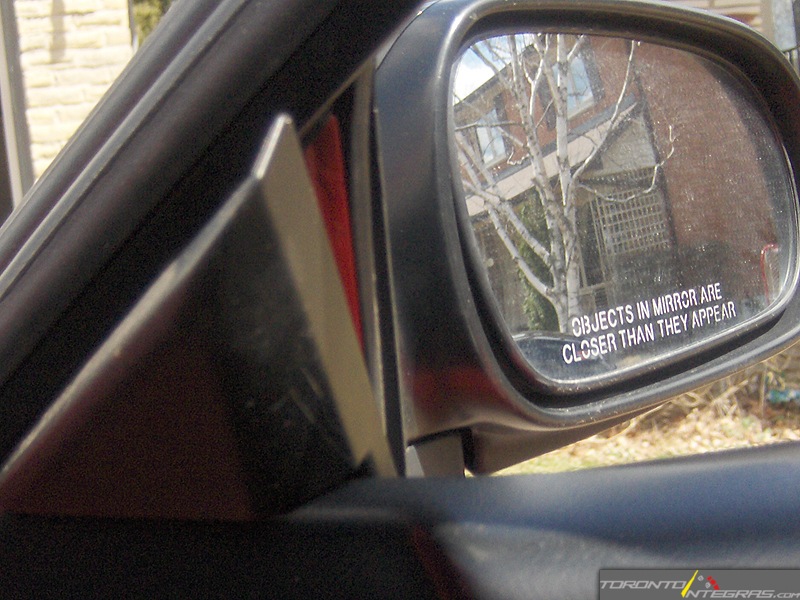
Next here are the 3 screws you need to remove unless u want take a little more time to mask the mirror. There is a chance the screw may strip if you aren't careful. I opted to mask one side vs removing the screws from the other side.
The gasket just pulls off pretty easy. Take note to the 4 little nubs and the 3 tabs that hold it in. Don't just tear it off, notice how it sat on there. This would be a good time to swap out for a new gasket. Take your time when removing it if you want to use it again.

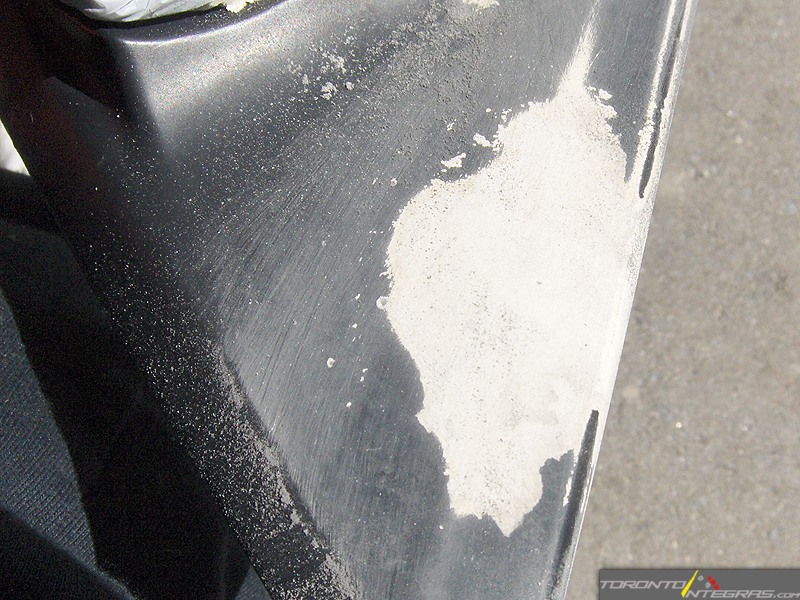
Here is how it looked after just a little sanding. The paint was coming off pretty easy. The plastic was pitted so it took some elbow grease and sanding with the the 100 grit paper first, followed by the 150, then 220 and 400.
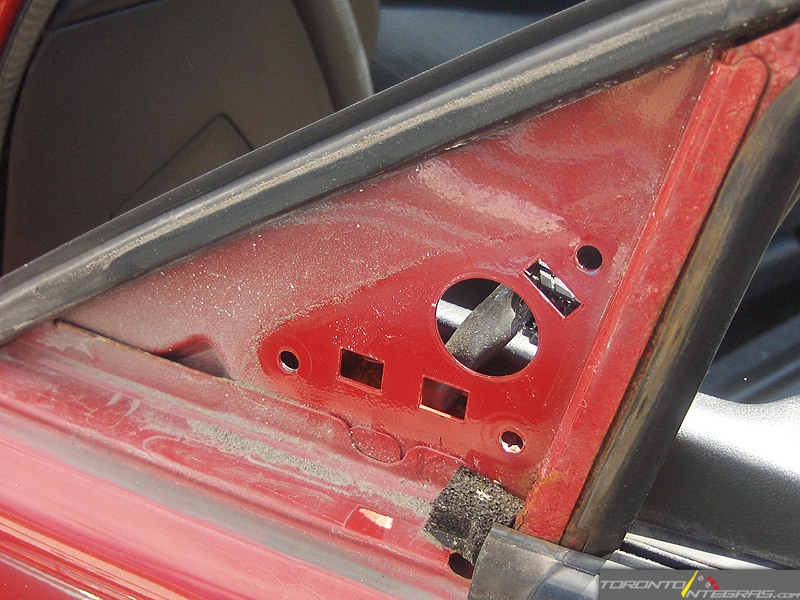
This area behind the mirror was fairly dirty. I took a moment to just clean it up a bit (regretted not getting new gaskets, easy addon later.)
This is how they looked after i was finished sanding and ready for paint.

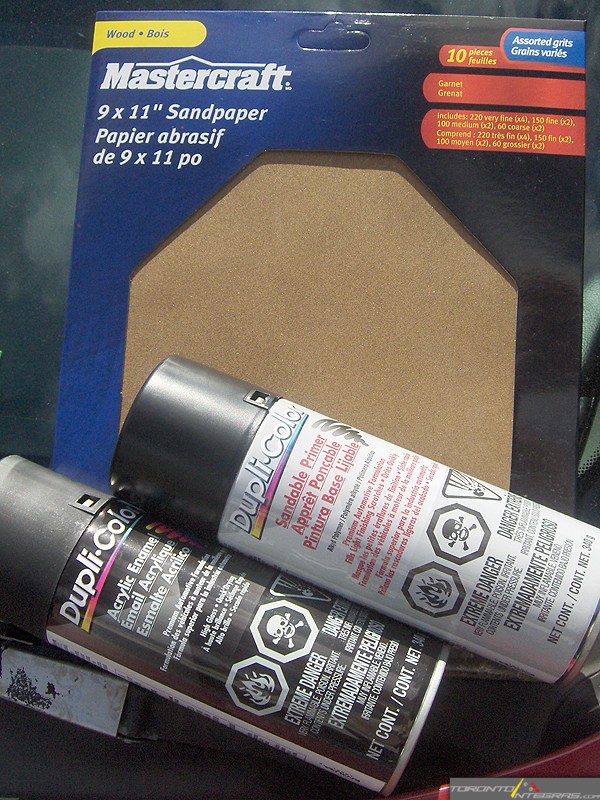
These are the products I used for paint and sanding. Purchased from CTC.
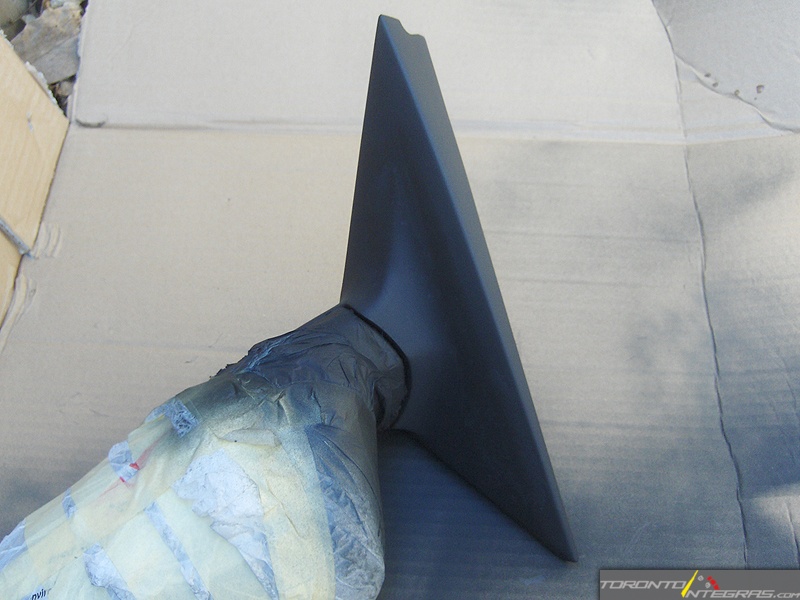
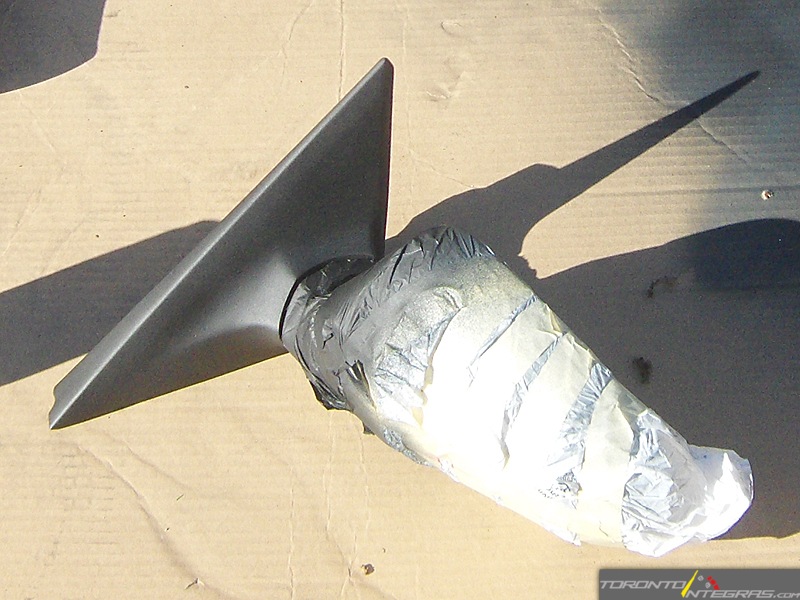
And this is the first coat of sandable primer.
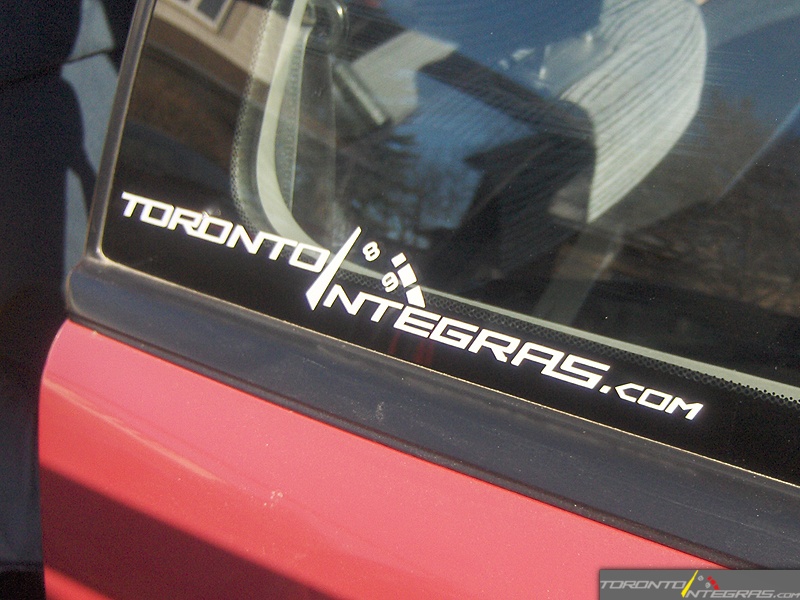
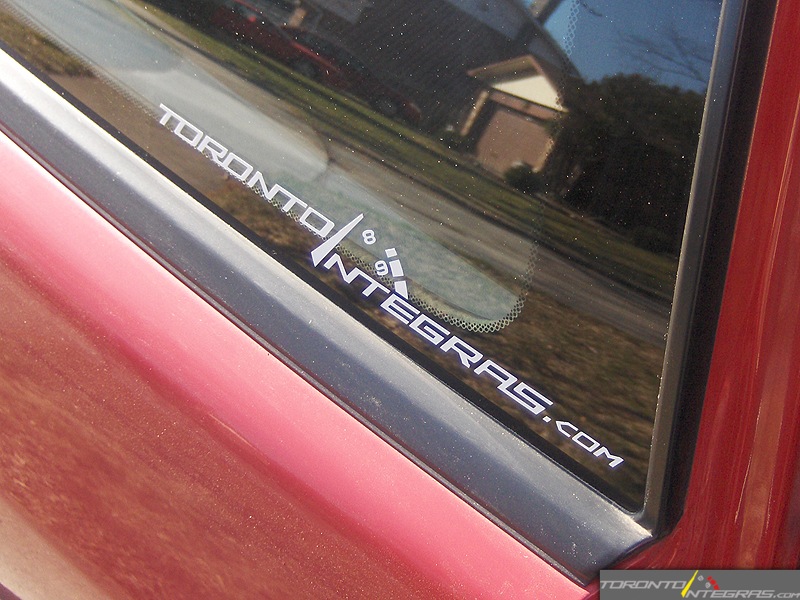
While the first coat was drying i decided to add some Toronto Integras stickers. I think they look pretty damn sweet. I will dyno the car soon and see if they added any HP.
One of the mirrors primed and looking far better than what it did.
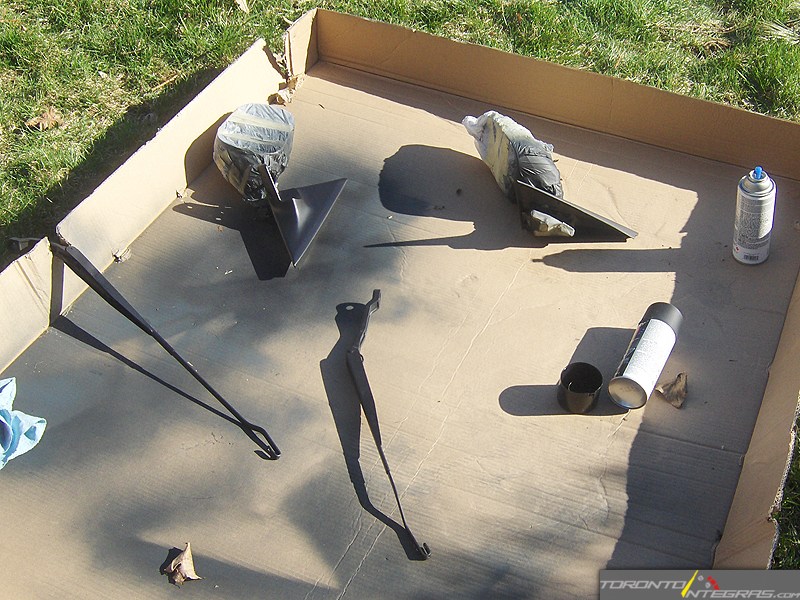
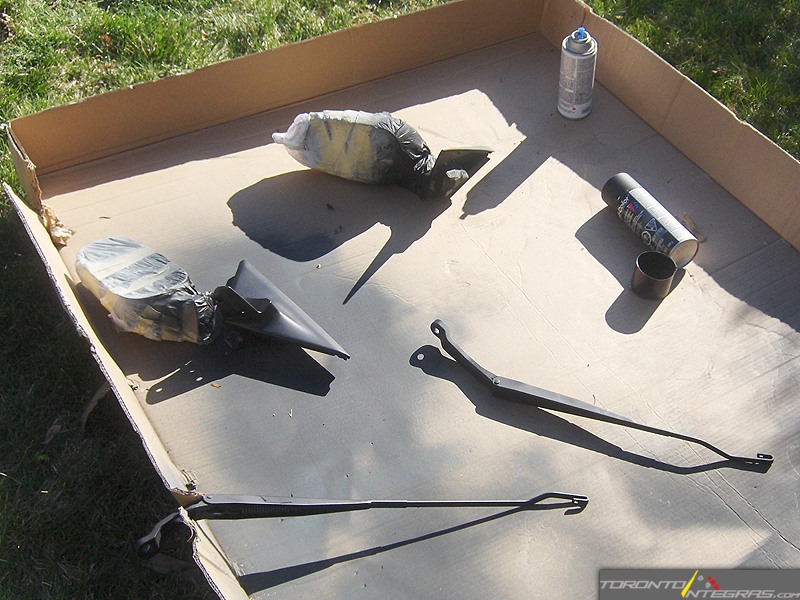
Here are all the parts after there second coat of primer. I could now see more imperfections and went back and sanded again.
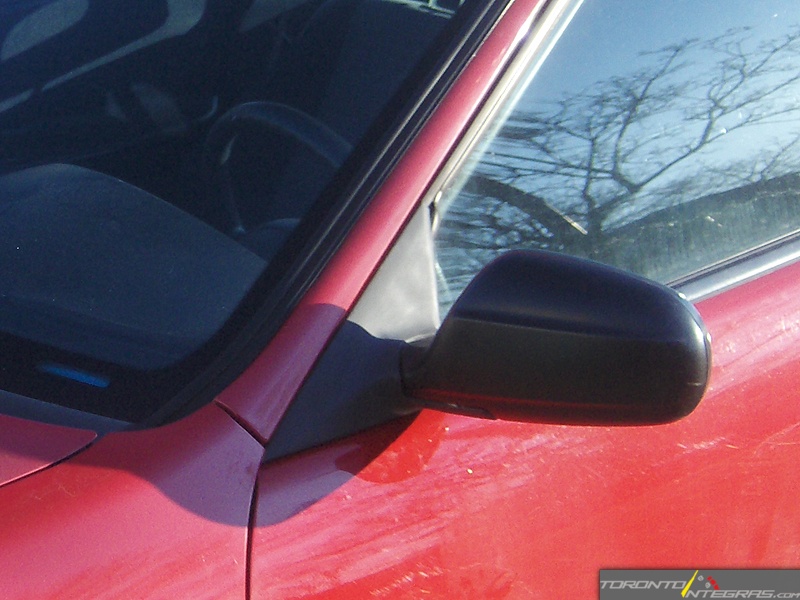
And now back on the car. The flat black paint is hard to differentiate from the primer. I could have gone gloss and depending on future mods / fixes I may still pull them off, add a new gasket and finish in gloss.
The driver side mirror was the worst. I am pretty happy with the way it turned out considering how bad it was.
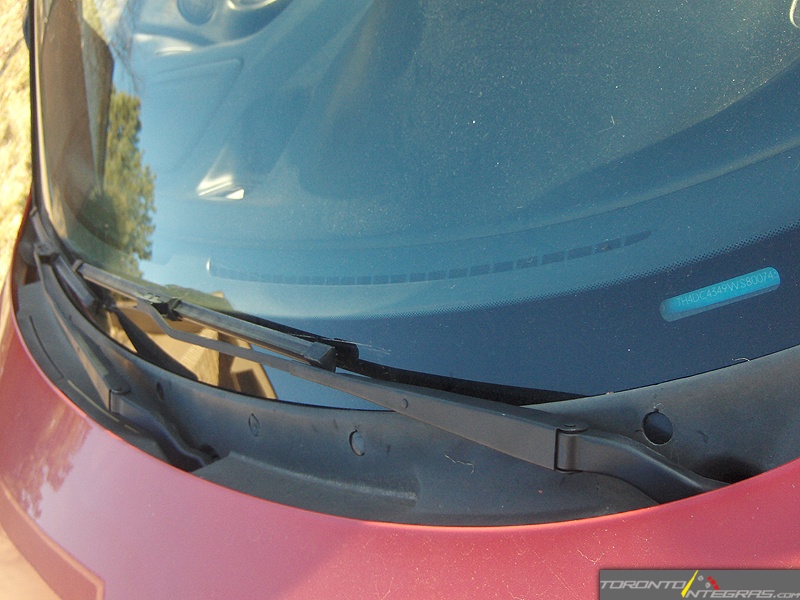
Doing the wipers was the same procedure with regards to prepping. Sanding and making it the best I could before paint ensured I wouldn't have to do it again.
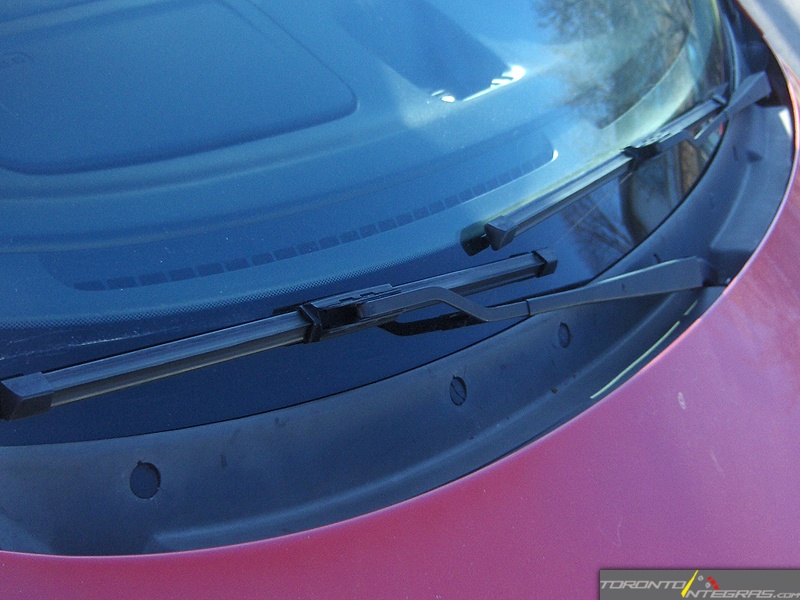
Again, compared to the original this looks far better.
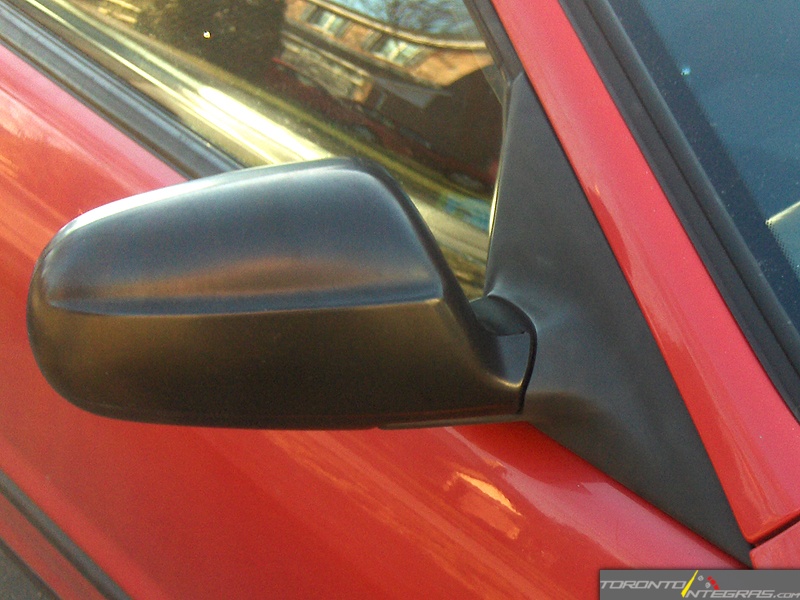
The passenger mirror, while not as pitted as the driver side turned out great as well.
Well, there you go. A quick how to on how to remove the mirrors, prep them for some paint and so on.
May not be perfect or good enough for Sema, but it sure makes my Integra look a bit better.
The wiper arms came after the fact as I had some extra paint and sand paper.
This will also answer this question here.
Total Cost:
Sand Paper 220 grit - $0.99 each
Sand Paper 400 grit - $0.99 each
Dupli-Color Sandable Primer - $8.99
Dupli-Color Acrylic Enamel - $8.99
Mastercraft sand paper - $6.99
Cost: $27 in items.
Time: With the help of one friend sanding, dry time etc 5 hours.
Difficulty: 2/5
Play by play
The first 3 shots are from before I got started. This clearly shows how bad the mirrors were when I bought my Integra. Compare these shots to the final ones in the end.
Now to remove the mirror u first unscrew this plastic screw (philips/star screwdriver). You could remove the whole door skin and this would go a lot smoother, however it will then take you longer.
Then this plastic cover just pulls back and lifts up for removal.
For the driver side, the procedure is the same.
Then just pull out the wire harness, there's a small clip on the bottom.
Then remove the 3 nuts holding the mirror on. This again would be easier with the door skin removed, but with patience can still be done.
Next here are the 3 screws you need to remove unless u want take a little more time to mask the mirror. There is a chance the screw may strip if you aren't careful. I opted to mask one side vs removing the screws from the other side.
The gasket just pulls off pretty easy. Take note to the 4 little nubs and the 3 tabs that hold it in. Don't just tear it off, notice how it sat on there. This would be a good time to swap out for a new gasket. Take your time when removing it if you want to use it again.
Here is how it looked after just a little sanding. The paint was coming off pretty easy. The plastic was pitted so it took some elbow grease and sanding with the the 100 grit paper first, followed by the 150, then 220 and 400.
This area behind the mirror was fairly dirty. I took a moment to just clean it up a bit (regretted not getting new gaskets, easy addon later.)
This is how they looked after i was finished sanding and ready for paint.
These are the products I used for paint and sanding. Purchased from CTC.
And this is the first coat of sandable primer.
While the first coat was drying i decided to add some Toronto Integras stickers. I think they look pretty damn sweet. I will dyno the car soon and see if they added any HP.
One of the mirrors primed and looking far better than what it did.
Here are all the parts after there second coat of primer. I could now see more imperfections and went back and sanded again.
And now back on the car. The flat black paint is hard to differentiate from the primer. I could have gone gloss and depending on future mods / fixes I may still pull them off, add a new gasket and finish in gloss.
The driver side mirror was the worst. I am pretty happy with the way it turned out considering how bad it was.
Doing the wipers was the same procedure with regards to prepping. Sanding and making it the best I could before paint ensured I wouldn't have to do it again.
Again, compared to the original this looks far better.
The passenger mirror, while not as pitted as the driver side turned out great as well.
Well, there you go. A quick how to on how to remove the mirrors, prep them for some paint and so on.
May not be perfect or good enough for Sema, but it sure makes my Integra look a bit better.

 04-12-2009, 03:13 PM
#3
There's plenty to do outside my room but I choose not to!
iTrader: (5)

Join Date: Apr 2009
Location: Burlington
Posts: 5,142
he is posting on how he did it, not every one know how to do body work or paint repair. People learn from seeing stuff done in the DIY section. How about you leave and not come back here, because you seem to be like the rest of the **** on JDRM, asways trying to start drama.
P.S. nice wright up Kevin
P.S. nice wright up Kevin


 06-27-2009, 02:12 PM
#17
There's plenty to do outside my room but I choose not to!
iTrader: (5)
Join Date: Apr 2009
Location: Burlington
Posts: 5,142
If you put the wiper arm up, you should be able to wiggle it free, if not, you can buy a tool that clamps under the wiper arm where it bolts to, and then you turn a screw down on where the nut would go, and it pulls the arm up.
06-27-2009, 02:15 PM
#18
n00b

Join Date: Jun 2009
Location: Otown
Posts: 29
09-13-2009, 09:33 PM
#21
^ That's actually something I'd like to find out as well myself.
My front wiper arms I repainted not long ago. I found that the easiest way to remove them was to fold them up and then (after the nut is removed) turn at its pivot point to the fully out (on the windshield) position and wiggle it up. I couldn't just wiggle them off straight for some reason.
My front wiper arms I repainted not long ago. I found that the easiest way to remove them was to fold them up and then (after the nut is removed) turn at its pivot point to the fully out (on the windshield) position and wiggle it up. I couldn't just wiggle them off straight for some reason.
10-19-2009, 11:10 PM
#23
I just did my rear one a little while ago. There's a plastic cover on the whole assembly, which you just have to remove (by pushing it up and away from the wiper assembly). Underneath you'll find a similar setup to the fronts, a bolt holding the wiper arm to a shaft attached to the mechanics underneath. Remove the bolt, wiggle the wiper free, and paint away!


Thread
Thread Starter
Forum
Replies
Last Post

