
DIY: Swaybar Endlinks Installation


Thread Starter
Junior Member
Joined: Jul 2009
Posts: 356
From: Scarborough
*** Copy of my writeup that I posted on Team-Integra. Hopefully it can help someone else out on this site.***
I finally got around to doing my front sway bar end links, and decided to put together a writeup for it, as it is one of the few things I couldn't find a writeup for on Team-Integra. Installation is pretty much the same for both sides. Feel free to add this to the articles mods! If anyone has the required torque specs on the endlinks, PM me and I'll add it in.
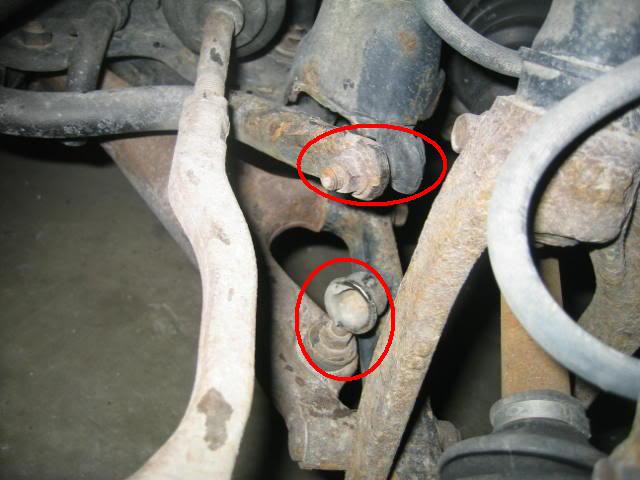
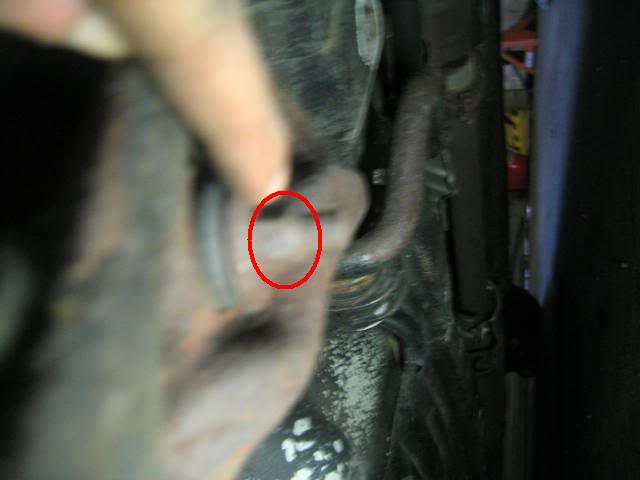
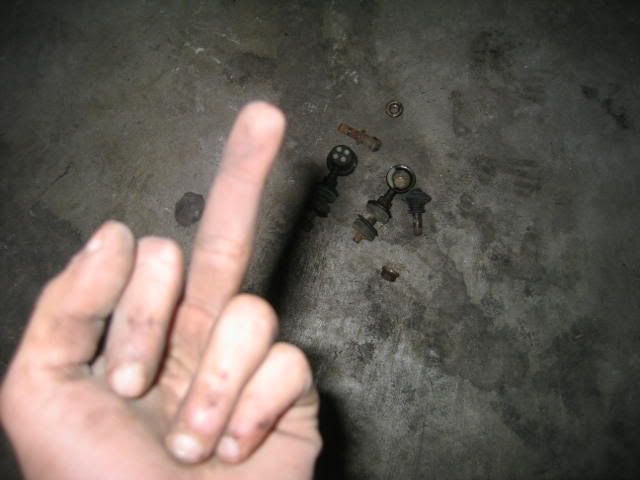
Here we have a broken sway bar end link. Mine has snapped cleanly in two, and these two pieces must be removed.
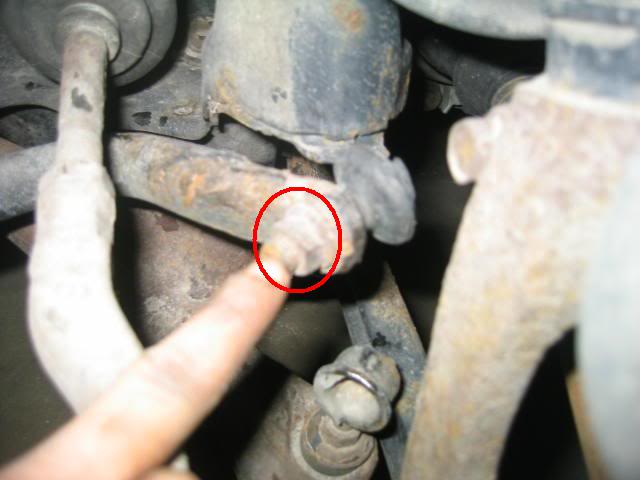
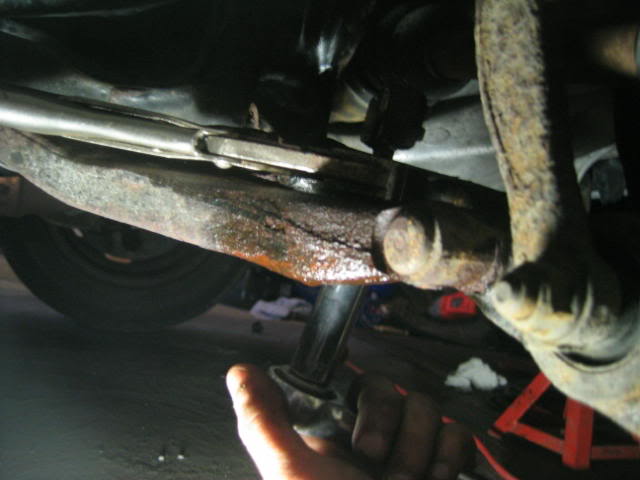
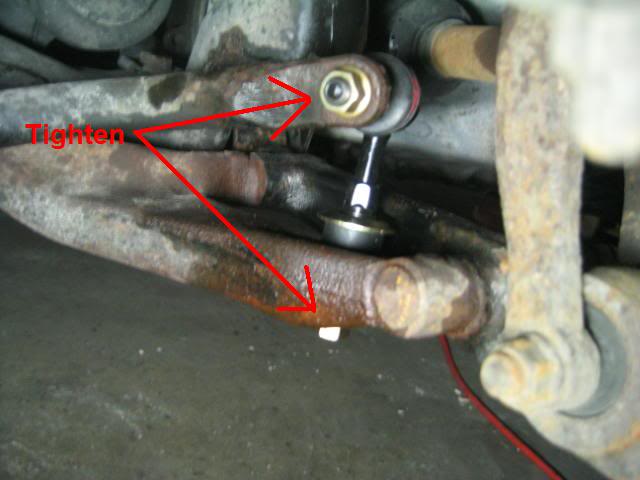
Remove this 14 mm Nut
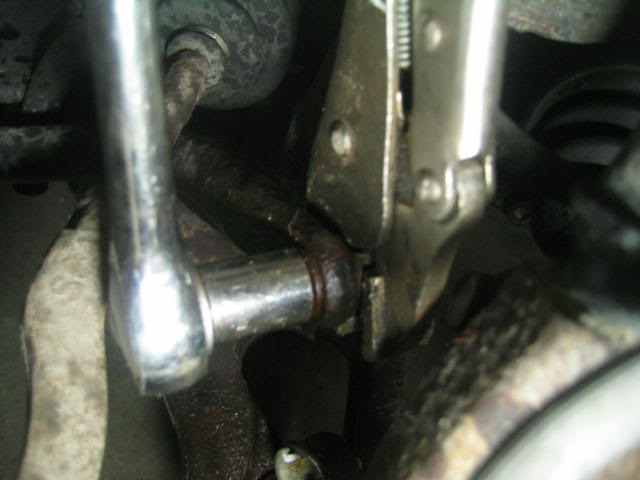
Hold the other end with a pair of vice grips so it doesn�t spin, and loosen the nut.
Hold this piece with a wrench, or vice grips. I chose vicegrips, but either does the trick
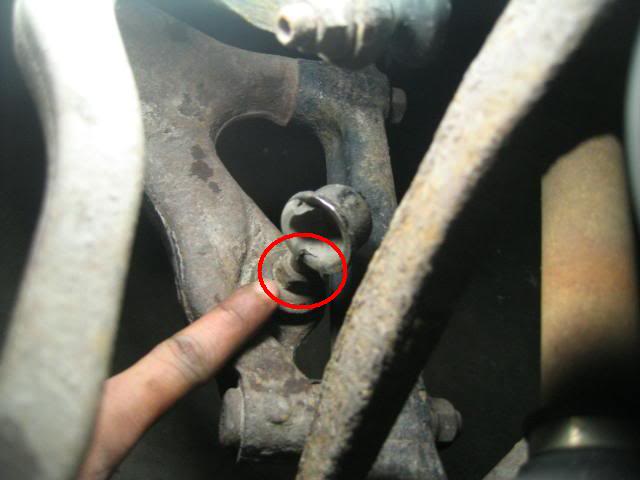
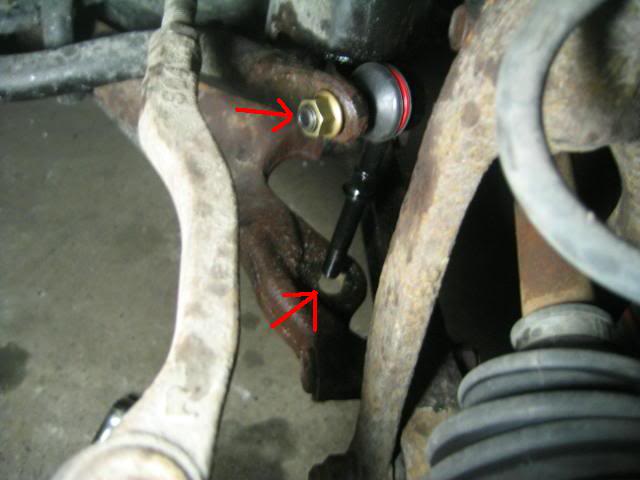
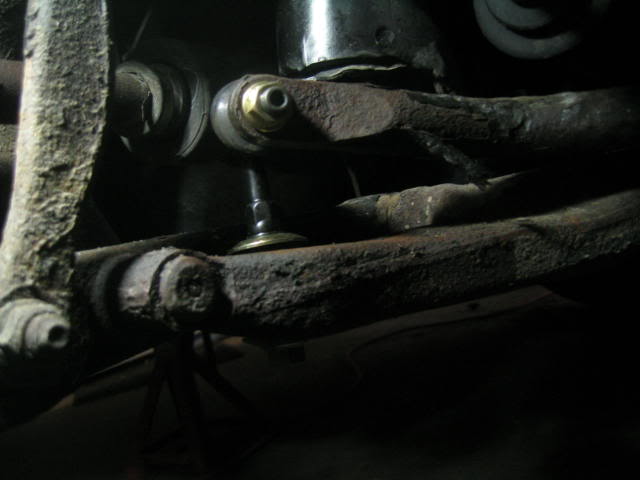
This is the nut on the bottom which must be removed. On the original end link, it was 12MM, but the new one I put on came with a 14mm.
Removing the end link.
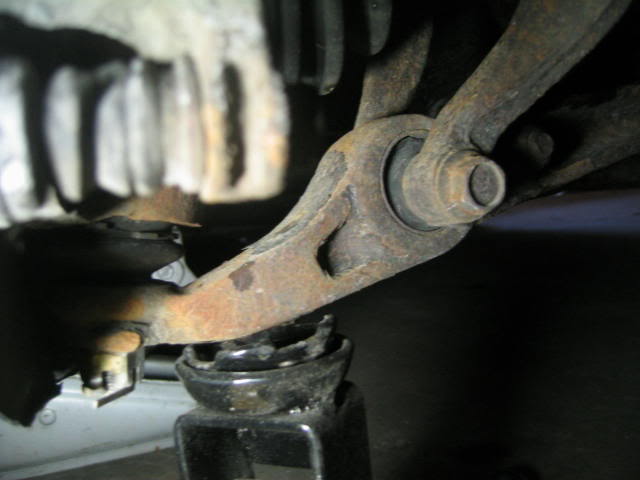
Attach the end link onto the sway bar, and line it up to the hole on the arm
The sway bar wont want to move down enough for you to push it through the LCA, so the best way to do it I found, was to jack up the LCA. Jack the lower control arm up slowly, and make sure the end link goes into the hole. Make sure the new bushings + washers are on properly. It should be Washer-bushing-control arm-bushing-washer-nut.
Once the end link is pushed through the hole, put on the second bushing, washer, and 14mm nut and tighten it down. Tighten the nut on the sway bar as well.
All done, double check that everything is tight.

Put the wheel back on. (Forgive me for the ugly winter rims lol [ ] )
] )
All done! Process is the same for both sides.
I finally got around to doing my front sway bar end links, and decided to put together a writeup for it, as it is one of the few things I couldn't find a writeup for on Team-Integra. Installation is pretty much the same for both sides. Feel free to add this to the articles mods! If anyone has the required torque specs on the endlinks, PM me and I'll add it in.
Here we have a broken sway bar end link. Mine has snapped cleanly in two, and these two pieces must be removed.
Remove this 14 mm Nut
Hold the other end with a pair of vice grips so it doesn�t spin, and loosen the nut.
Hold this piece with a wrench, or vice grips. I chose vicegrips, but either does the trick
This is the nut on the bottom which must be removed. On the original end link, it was 12MM, but the new one I put on came with a 14mm.
Removing the end link.
Attach the end link onto the sway bar, and line it up to the hole on the arm
The sway bar wont want to move down enough for you to push it through the LCA, so the best way to do it I found, was to jack up the LCA. Jack the lower control arm up slowly, and make sure the end link goes into the hole. Make sure the new bushings + washers are on properly. It should be Washer-bushing-control arm-bushing-washer-nut.
Once the end link is pushed through the hole, put on the second bushing, washer, and 14mm nut and tighten it down. Tighten the nut on the sway bar as well.
All done, double check that everything is tight.
Put the wheel back on. (Forgive me for the ugly winter rims lol [
] ) All done! Process is the same for both sides.


Thread
Thread Starter
Forum
Replies
Last Post