DIY: Fixing Curb Rash
 02-01-2007, 04:42 PM
#1
Junior Member
Thread Starter
Join Date: Jul 2005
Location: Oshawa
Posts: 369
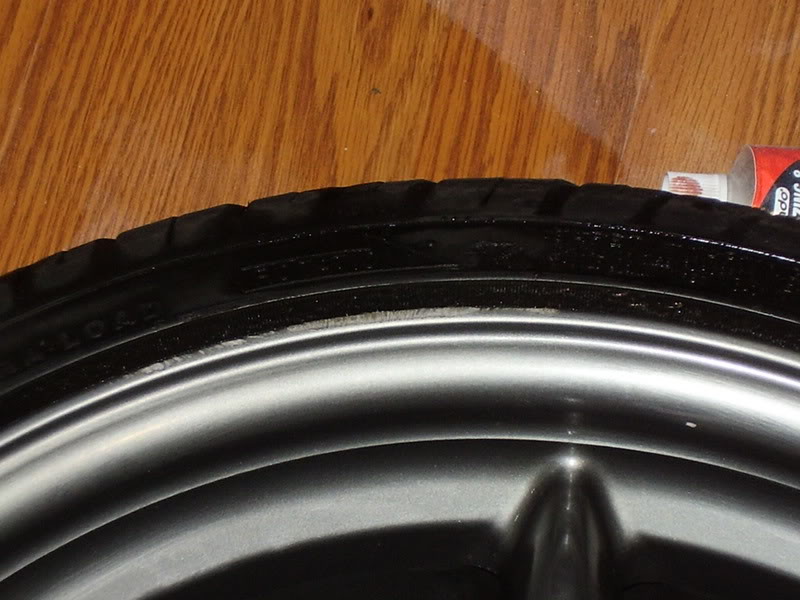
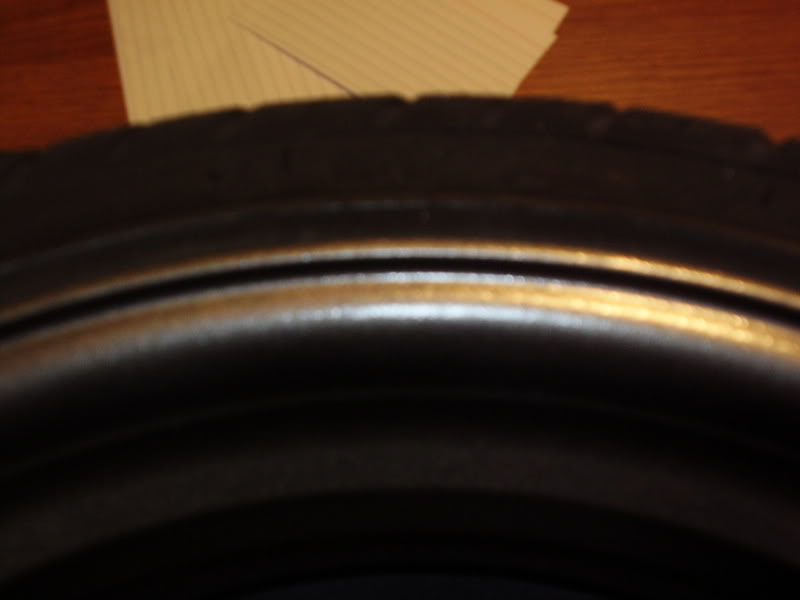
Well I have had some curb rash on my wheels for some time now, and figured it was time to get it all fixed up. I read a bunch of atricles on the net that explained how to do it, so I figured I'd give it a go. Here's what needed fixing.

I had put it off long enough, so I went to walmart and picked up some stuff.
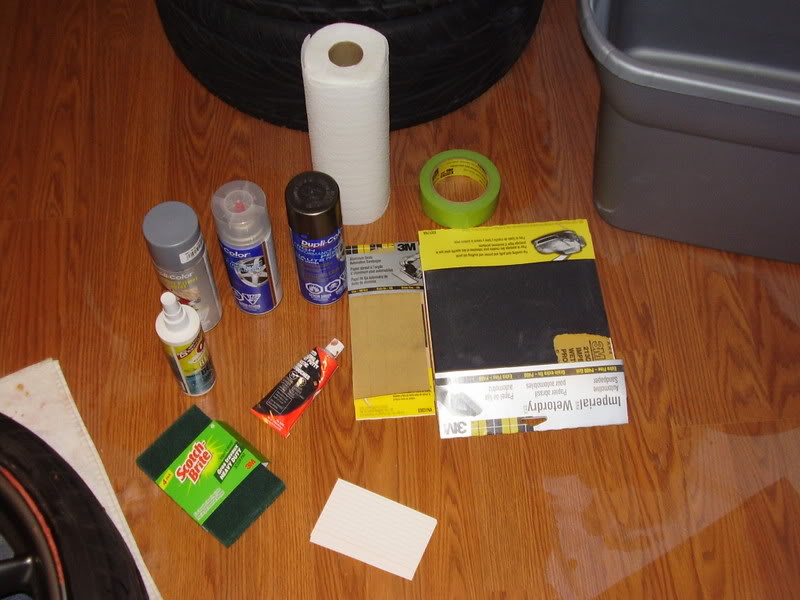
I got some 240 Grit sandpaper, some 400 grit sandpaper, scratching filling primer, duplicolor graphite paint, and duplicolor clearcoat, a small tube of bondo spot filler, some wax and grease remover, some cue cards, scotchbrite and masking tape. It was all about $50 or so. I had priced getting the wheels done by a refinishing place and they wanted $170 per wheel. Screw that.
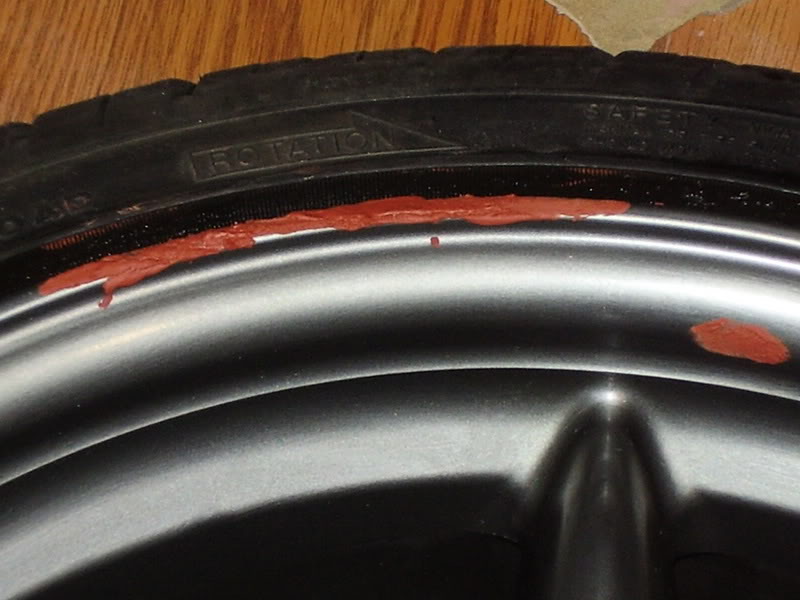
My first step was to clean the wheel with the wax and grease remover. Wash the wheel, and then rub the scotchbrite all over the wheel to rough up the surface. Wash the wheel again. Let it dry, very important. Next was to add some of the bondo spot filler to the spot I wanted to fix. Its not super important to be neat, because you will be sanding it down afterwards.
Let it dry for a good hour at least. Once its dry, bust out the 240 grit sand paper and smooth it out.
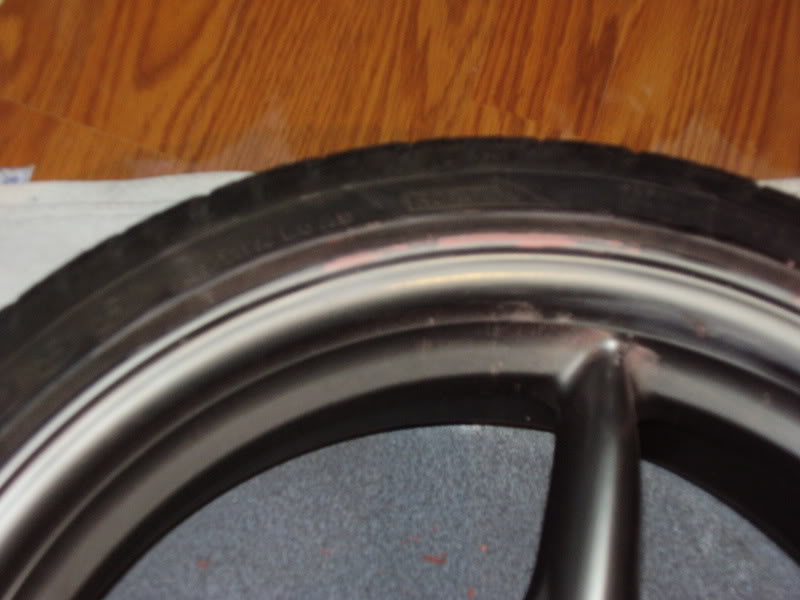
once your done with the 240, use the 400 to remove as much of the groves as possible.
Again wash the wheel, make sure its very clean. Dry it and your ready for some primer. Before you spray, you can lay down some cue cards under the lip of the wheel to catch overspray and keep it off the tires.
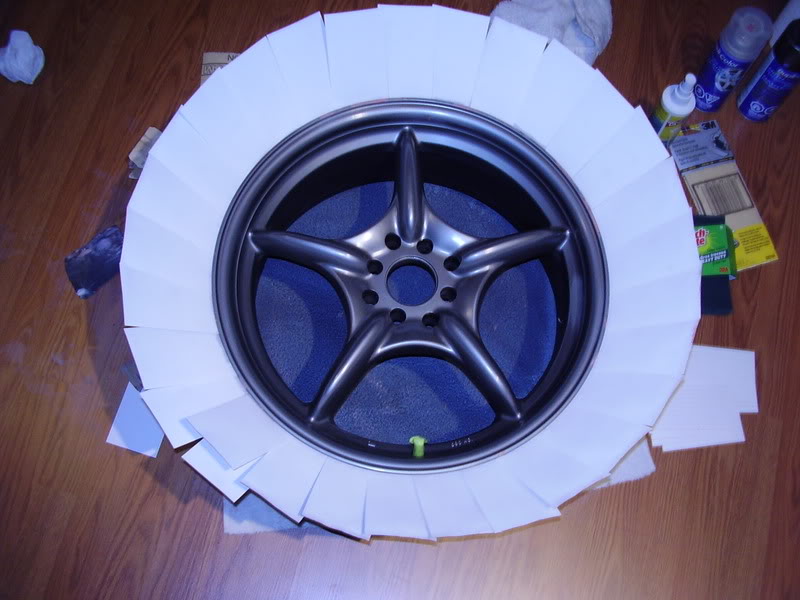
When you have done spraying the primer, should look like this.
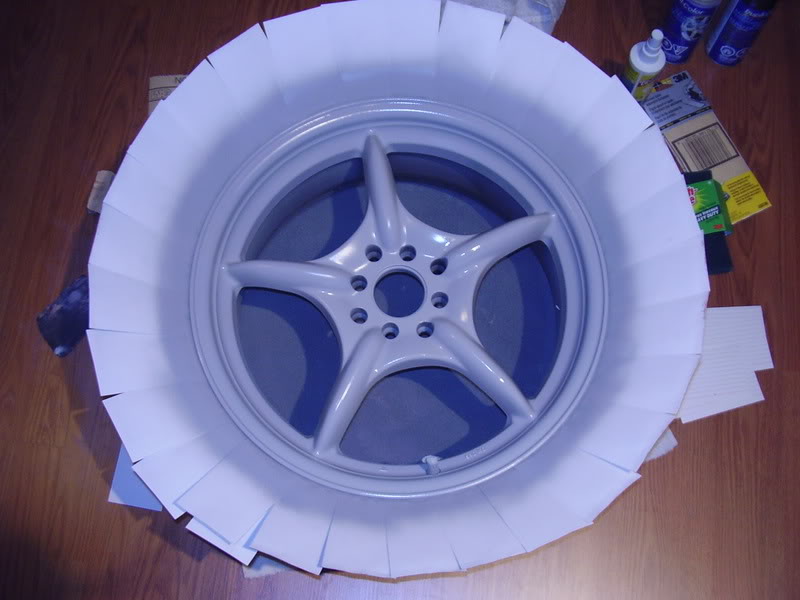
When the primer is dry, make sure no dust or anything has gotten on the wheel, and you are ready for the duplicolor paint. Because it was so damn cold out, I ended up painting the wheels in the basement which I would advise against. The house got a little stinky.
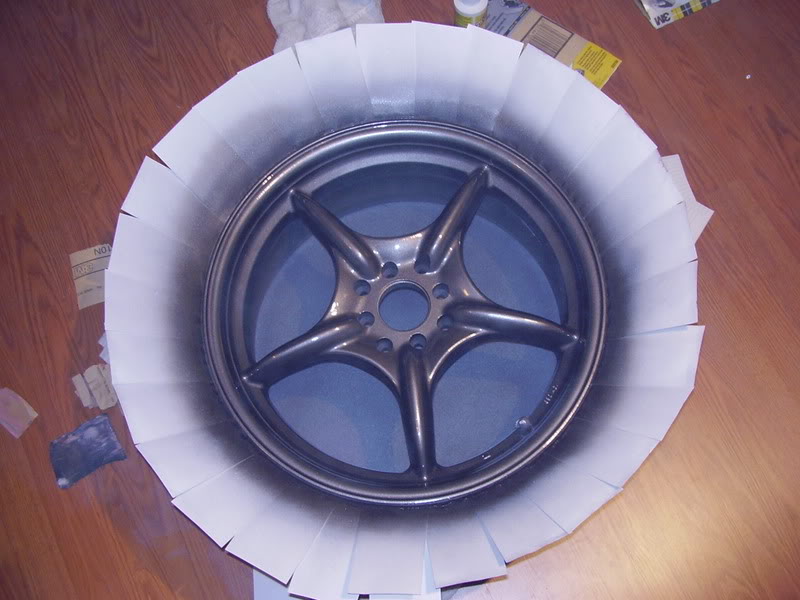
This is after first color coat, be sure to follow directions on the can and use small coats instead of one big one. I used 4 small coats
Also be sure to follow the directions on the clear coat. I used 2 coats of clear

Once the clear is dry, you can remove the cue cards and sit back and enjoy your work. The key to the painting process is keeping everything clean, and dry before paint. They should come out looking great.
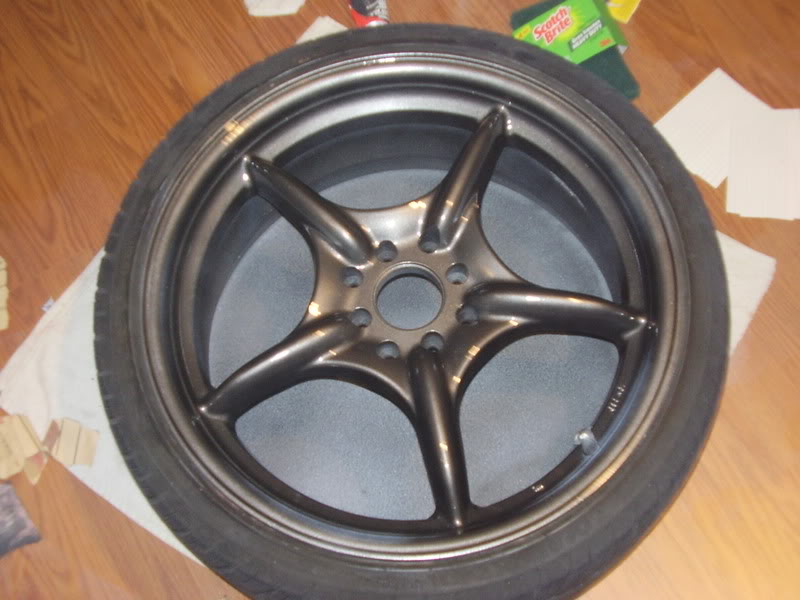
The picture doesn't do the wheel justice.
And the spot I needed to fix
If you have any questions, please let me know.
I had put it off long enough, so I went to walmart and picked up some stuff.
I got some 240 Grit sandpaper, some 400 grit sandpaper, scratching filling primer, duplicolor graphite paint, and duplicolor clearcoat, a small tube of bondo spot filler, some wax and grease remover, some cue cards, scotchbrite and masking tape. It was all about $50 or so. I had priced getting the wheels done by a refinishing place and they wanted $170 per wheel. Screw that.
My first step was to clean the wheel with the wax and grease remover. Wash the wheel, and then rub the scotchbrite all over the wheel to rough up the surface. Wash the wheel again. Let it dry, very important. Next was to add some of the bondo spot filler to the spot I wanted to fix. Its not super important to be neat, because you will be sanding it down afterwards.
Let it dry for a good hour at least. Once its dry, bust out the 240 grit sand paper and smooth it out.
once your done with the 240, use the 400 to remove as much of the groves as possible.
Again wash the wheel, make sure its very clean. Dry it and your ready for some primer. Before you spray, you can lay down some cue cards under the lip of the wheel to catch overspray and keep it off the tires.
When you have done spraying the primer, should look like this.
When the primer is dry, make sure no dust or anything has gotten on the wheel, and you are ready for the duplicolor paint. Because it was so damn cold out, I ended up painting the wheels in the basement which I would advise against. The house got a little stinky.
This is after first color coat, be sure to follow directions on the can and use small coats instead of one big one. I used 4 small coats
Also be sure to follow the directions on the clear coat. I used 2 coats of clear
Once the clear is dry, you can remove the cue cards and sit back and enjoy your work. The key to the painting process is keeping everything clean, and dry before paint. They should come out looking great.
The picture doesn't do the wheel justice.
And the spot I needed to fix
If you have any questions, please let me know.

 02-05-2007, 11:03 AM
#8
Junior Member
Thread Starter
Join Date: Jul 2005
Location: Oshawa
Posts: 369
yea for sure, if you are able to find a paint that would match the wheel, you could only paint a small section. For me, I painted all 4 of my wheels so they would all be the same color. I used the dublicolor, so now I know if I need to touch anything up, I have a perfect match.
03-28-2007, 11:24 PM
#16
Junior Member

Join Date: Jun 2005
Posts: 171
hey could you post a pic of that degreaser? i was at walmart today and couldnt find it.... also which primer / paint / clear did you use?
there were so many... i was confused lol.... the primer was it the sealer or the "sandable" one? and as for the wheel paint?? the only bottle there with a wheel on it like urs in the picture was a "performance coating" and it said only for aluminum or steel rims?
anyways could you by any chance show pics of or give detailed info on the label? THANKS!
04-04-2007, 01:30 PM
#17
Junior Member
Join Date: Apr 2006
Location: Toronto/Barrie
Posts: 182
Those products are at canadian tire and I believe that they are dupli color products. I have a question though... If you don't want ot redo the whole wheel and u have a polished lip how would you go upon bondo ing the lip?!
04-04-2007, 06:40 PM
#18
Junior Member
Thread Starter
Join Date: Jul 2005
Location: Oshawa
Posts: 369
Hey, sorry it took so long to get back to you. I've since got rid of most of the stuff I used for the wheels, but I did pick everything up at canadian tire. Also, as far as pollished lips, you woudln't be able to use the bondo on them. The bondo only works on areas that are painted.


Thread
Thread Starter
Forum
Replies
Last Post