
*** How-To*** Clean Your FITV aka Fast Idle Thermo Valve

Thread Starter
Time to become a Premier Member!
Joined: Aug 2003
Posts: 4,816
From: Whitby
First things first, you have to determine if your FITV needs cleaning. Now if you�ve never done it before it probably does unless you bought a complete new one.
Reasons why you should take it apart and clean it:
-High idle before your car warms up
-Lumpy idle
-Roaming idle
-Hunting idle
-Fluctuating idle
Tools Needed:
Ratchet
8mm Socket
10mm Socket
Pliers
Flathead Screwdriver
Throttle Body Cleaner or Brake Cleaner
Paper Towels
A cooled down engine for at least 2 hours
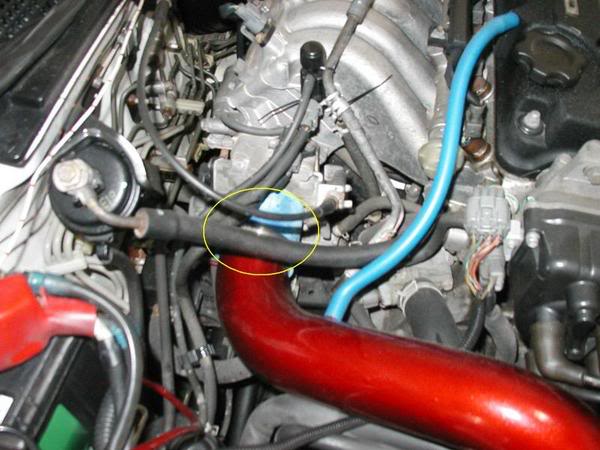
1) Now you got to locate where the FITV is. If your car is 1996 and newer you don�t have one. But for the older Gen 3 models like me, we do. Pop your hood and it�s located directly beneath the throttle body. It�s actually connected to it.
Attached to the FITV is one coolant line. This is how it looks with the intake on
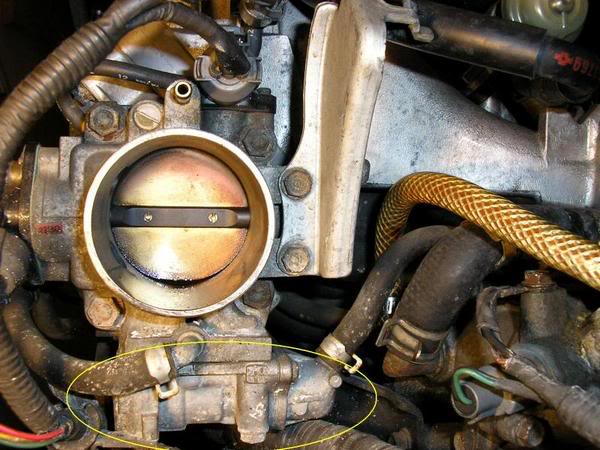
This is how it looks with the intake removed
2) Now that we�ve located it, Remove your intake and strut tower bar (if applicable). Next remove the one coolant hose that is attached to it, using the pliers to loosen the clip. Have lots paper towels underneath to catch the coolant when it leaks out.
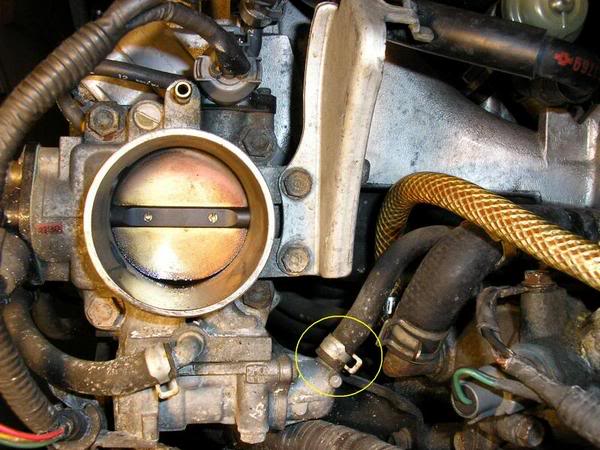
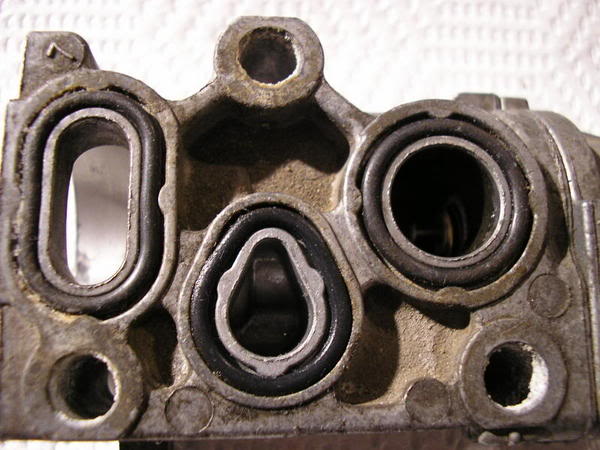
3) Next is to remove the three 10mm bolts located at the bottom of the FITV. **Note the intake manifold here is upside down to make it easier for you to see**
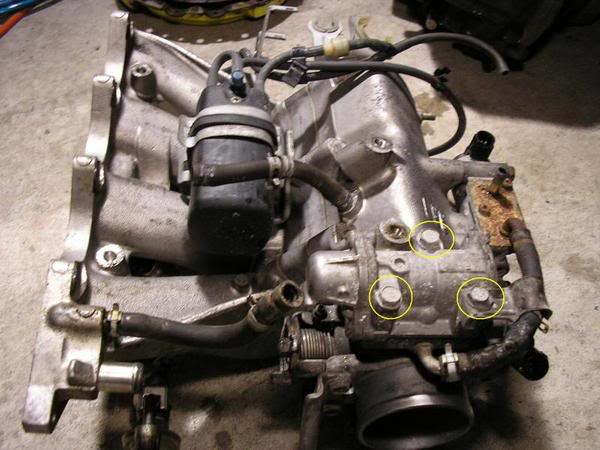
After it is removed from the engine it should look like this
Now spin it around to located the two 8mm bolts
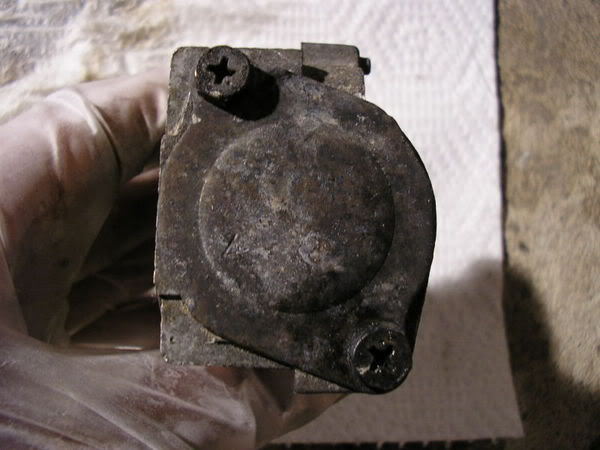
4) After you located those two bolts remove them carefully and you should be left with this. Sorry for the blurry picture, I was cold and shivering.
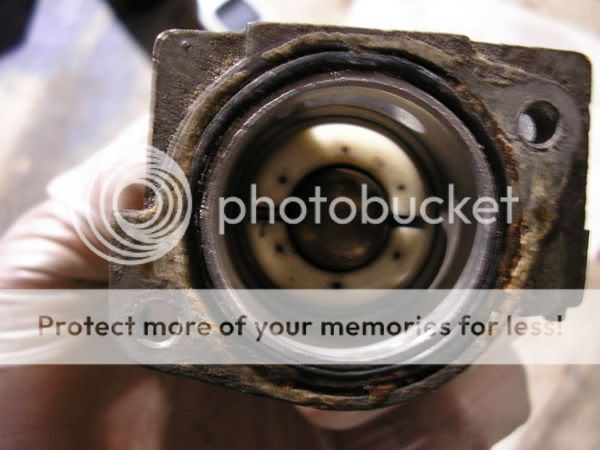
5) Now unscrew it with a screwdriver
You should be left with this
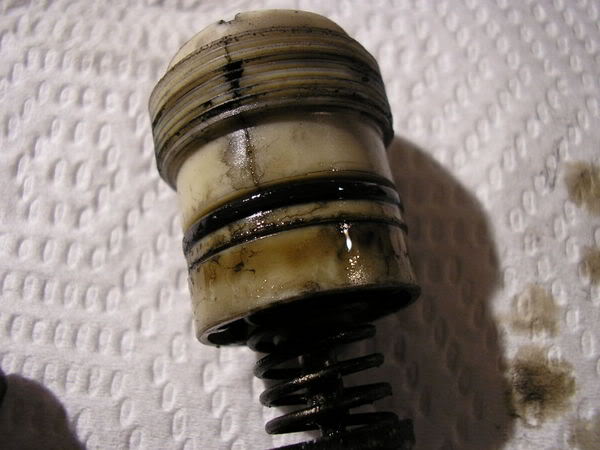
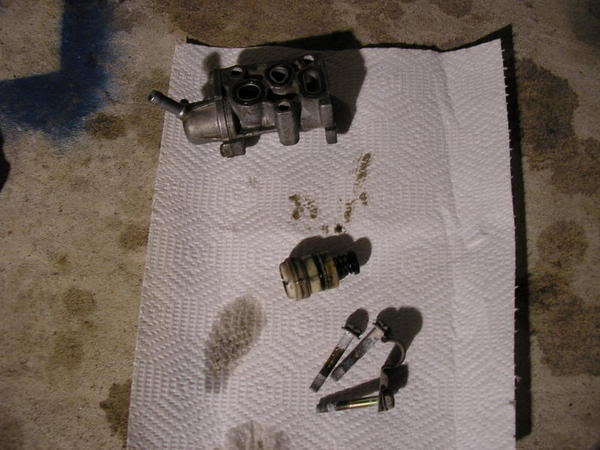
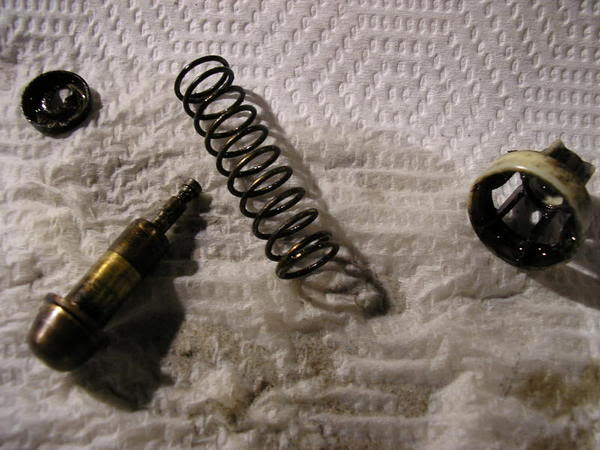
6) Now take it apart and give it a good cleaning with the throttle body or brake cleaner. This is what we should have taken apart so far minus the cap and two 8mm bolts
Before
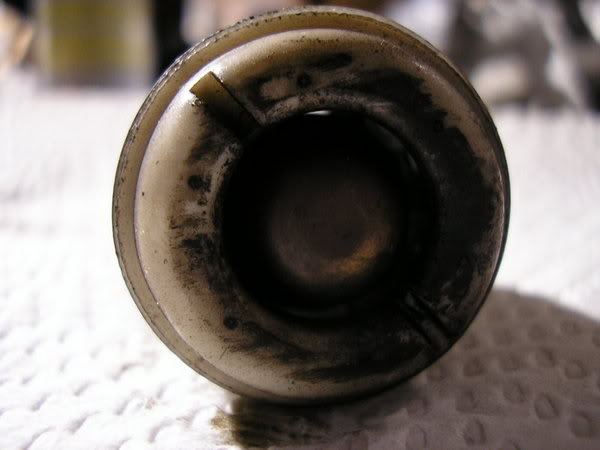
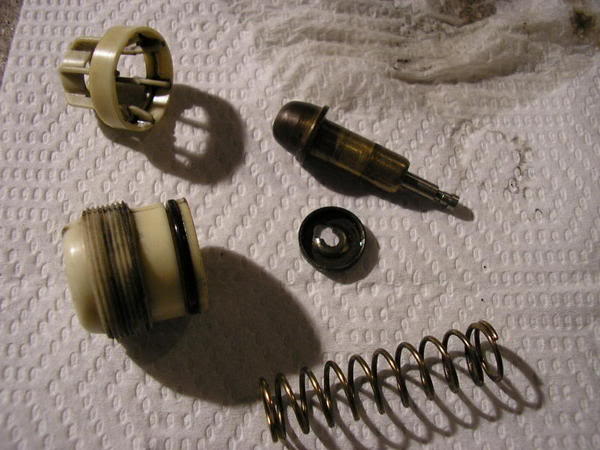
After
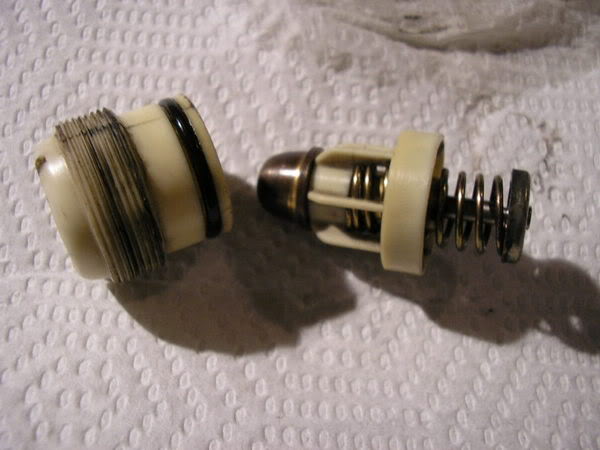
Semi put back together and cleaned
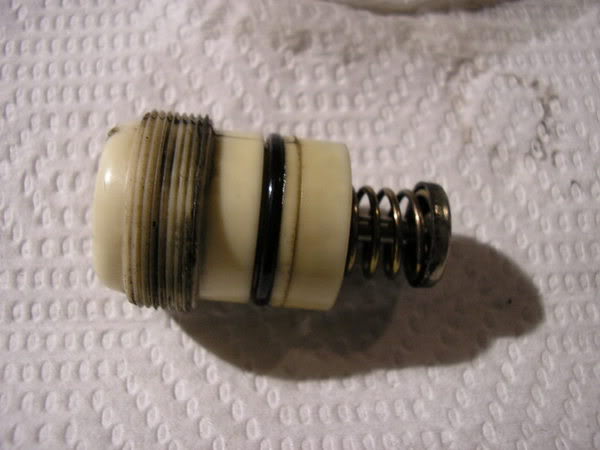
All cleaned up and back together
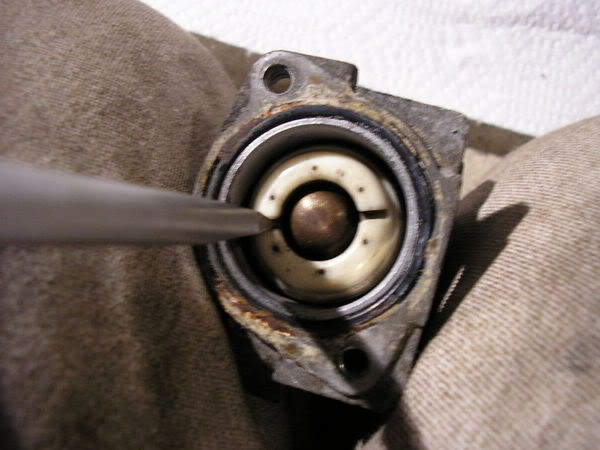
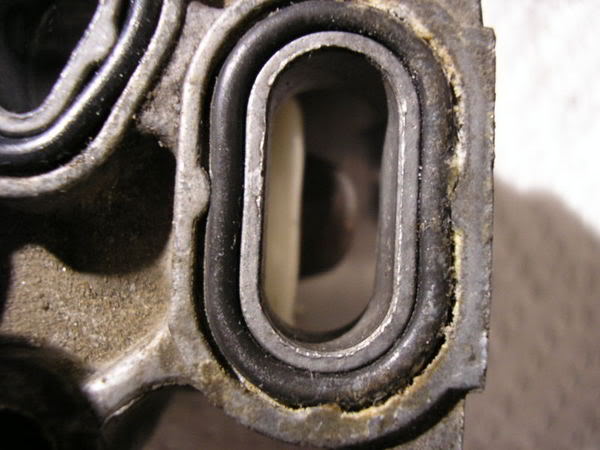
7) Clean up the inside of the FITV body like so
8) Now screw it all the way back in or back to where it was before if your car idles fine.
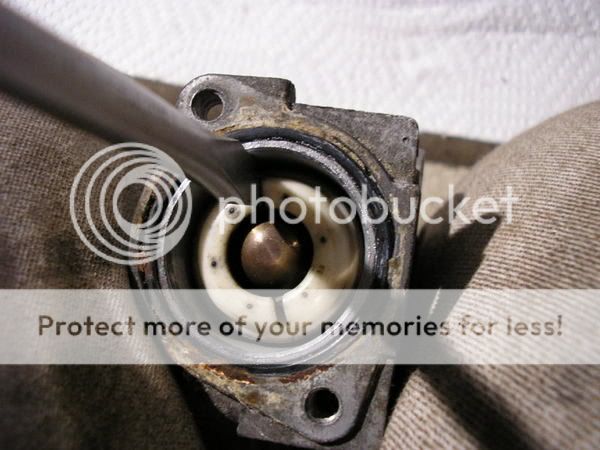
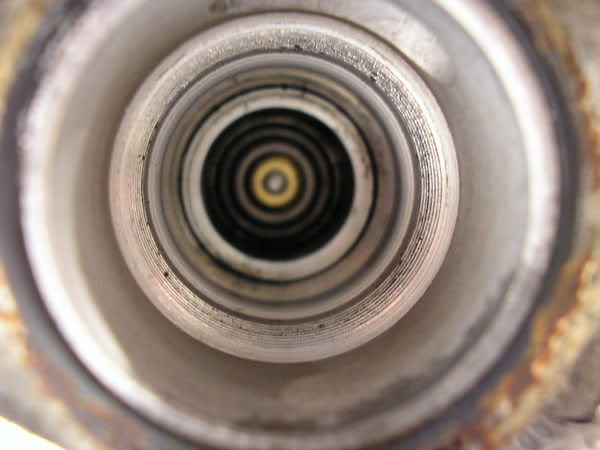
Side view shot through the hole. It isn�t screwed in all the way since my car idles fine at that position. Screw it in more if your car idles to high. The opposite if it idles to low.
9) Now put the cap back on and tighten the two 8mm bolts back down.
10) Reinstall the FITV back on your car following steps backwards from step 3 to step 1
Good Luck
Reasons why you should take it apart and clean it:
-High idle before your car warms up
-Lumpy idle
-Roaming idle
-Hunting idle
-Fluctuating idle
Tools Needed:
Ratchet
8mm Socket
10mm Socket
Pliers
Flathead Screwdriver
Throttle Body Cleaner or Brake Cleaner
Paper Towels
A cooled down engine for at least 2 hours
1) Now you got to locate where the FITV is. If your car is 1996 and newer you don�t have one. But for the older Gen 3 models like me, we do. Pop your hood and it�s located directly beneath the throttle body. It�s actually connected to it.
Attached to the FITV is one coolant line. This is how it looks with the intake on
This is how it looks with the intake removed
2) Now that we�ve located it, Remove your intake and strut tower bar (if applicable). Next remove the one coolant hose that is attached to it, using the pliers to loosen the clip. Have lots paper towels underneath to catch the coolant when it leaks out.
3) Next is to remove the three 10mm bolts located at the bottom of the FITV. **Note the intake manifold here is upside down to make it easier for you to see**
After it is removed from the engine it should look like this
Now spin it around to located the two 8mm bolts
4) After you located those two bolts remove them carefully and you should be left with this. Sorry for the blurry picture, I was cold and shivering.
5) Now unscrew it with a screwdriver
You should be left with this
6) Now take it apart and give it a good cleaning with the throttle body or brake cleaner. This is what we should have taken apart so far minus the cap and two 8mm bolts
Before
After
Semi put back together and cleaned
All cleaned up and back together
7) Clean up the inside of the FITV body like so
8) Now screw it all the way back in or back to where it was before if your car idles fine.
Side view shot through the hole. It isn�t screwed in all the way since my car idles fine at that position. Screw it in more if your car idles to high. The opposite if it idles to low.
9) Now put the cap back on and tighten the two 8mm bolts back down.
10) Reinstall the FITV back on your car following steps backwards from step 3 to step 1
Good Luck
Last edited by WildoutWhiteGSR; Mar 29, 2006 at 10:25 AM.
Thread Starter
Time to become a Premier Member!
Joined: Aug 2003
Posts: 4,816
From: Whitby
Originally Posted by HKJ
so when adjusting the idle (step 8) how would you know if it's adjusted properly?
would you have to adjust it, install and test to see if it idles properly, and adjust more if needed?
would you have to adjust it, install and test to see if it idles properly, and adjust more if needed?


ya ive always been meanin to do that but never had the courage i guess....
how much coolant really leaks out?
how long does it take from start to finish?
do u really need to remove the intake and tower bar or is that optional to make it easier?
another great write up T
how much coolant really leaks out?
how long does it take from start to finish?
do u really need to remove the intake and tower bar or is that optional to make it easier?
another great write up T
Thread Starter
Time to become a Premier Member!
Joined: Aug 2003
Posts: 4,816
From: Whitby
Originally Posted by HyBrId
ya ive always been meanin to do that but never had the courage i guess....
how much coolant really leaks out?
how long does it take from start to finish?
do u really need to remove the intake and tower bar or is that optional to make it easier?
another great write up T
how much coolant really leaks out?
how long does it take from start to finish?
do u really need to remove the intake and tower bar or is that optional to make it easier?
another great write up T
-should take the average person 45mins from start to finish, with cleaning up
-no you don't need to remove the intake or the strut tower bar, in fact you don't even have to take the hose off, so no coolant will leak out, but be prepared for a lot of swearing, cursing and a sore lower back once your done.
I'm a lazy person so if there's things on the car that I have to remove to make the job go faster at the cost of having to put them back on later, I'll do it.
There's plenty to do outside my room but I choose not to!
iTrader: (2)
Joined: Aug 2003
Posts: 8,164
From: The Hammer!
nice write up T....i think Vinnie Mack is cursing at you cuz you didn't do it sooner... would've helped him alot and probably solved his bouncing idle problem

Junior Member
Joined: Oct 2006
Posts: 260
From: Calgary AB
lol doing this right now as we speak and a little bit more than a handful of coolant comes out that line.
My car has been sitting overnight so its pretty cooled down.
I already cleaned my IAC and it hasn't fixed my surging idle, so hopefully cleaning the FITV does it.
Thanks for the writeup!
My car has been sitting overnight so its pretty cooled down.
I already cleaned my IAC and it hasn't fixed my surging idle, so hopefully cleaning the FITV does it.
Thanks for the writeup!

Thread
Thread Starter
Forum
Replies
Last Post
WildoutWhiteGSR
Integra DIY Articles
15
Apr 16, 2008 07:34 AM