
***How-To*** Leakdown Test

Thread Starter
Time to become a Premier Member!
Joined: Aug 2003
Posts: 4,816
From: Whitby
What is a leakdown test? Well a leak down test determines exactly how much compression your losing and from which cylinder, as well as the cause of it. More on that later. This test along with a compression test will determine the health of your motor.
Tools Needed:
Compressor
5/8� Spark Plug Socket
10mm
19mm
Rachet
6� Extension
Leakdown Tester
1) First things first, find a place to work on your car.
2) Proceed to plug in your compressor and set it up with the hose attached and pressure regulated between 60psi and 100psi. I choose 100psi.
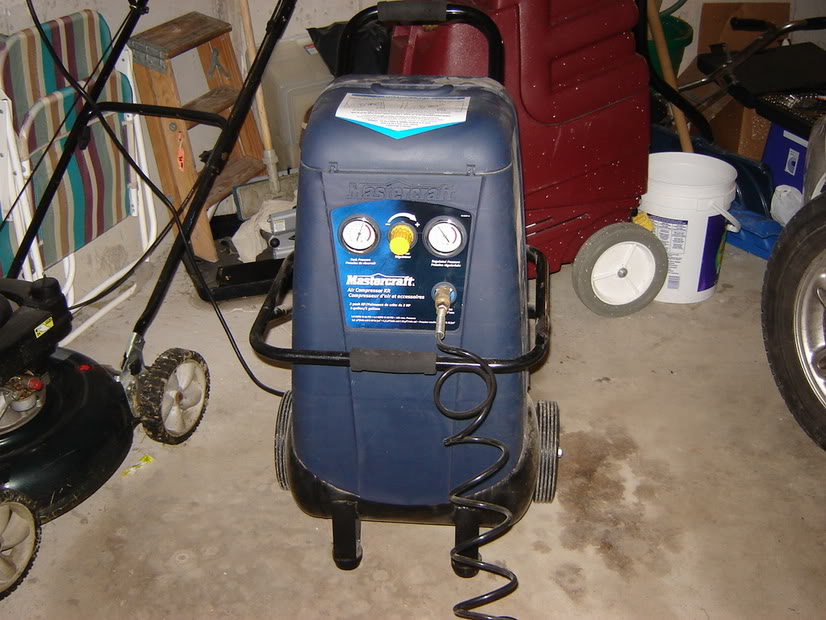
3) Plug the gauge half of the leakdown tester into the compressor and then turn the adjustment **** so that it reads 0Psi.
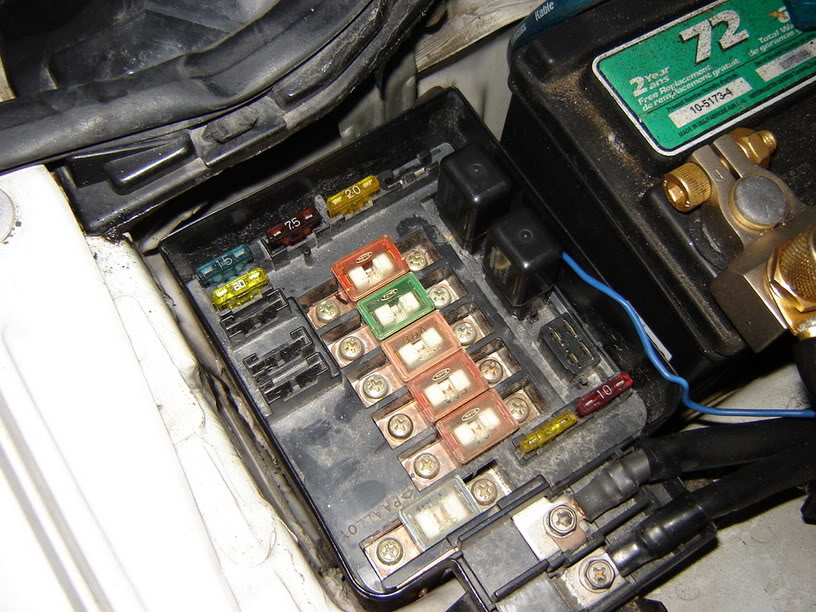
4) Remove the cover on the underhood fusebox. Should look like this.
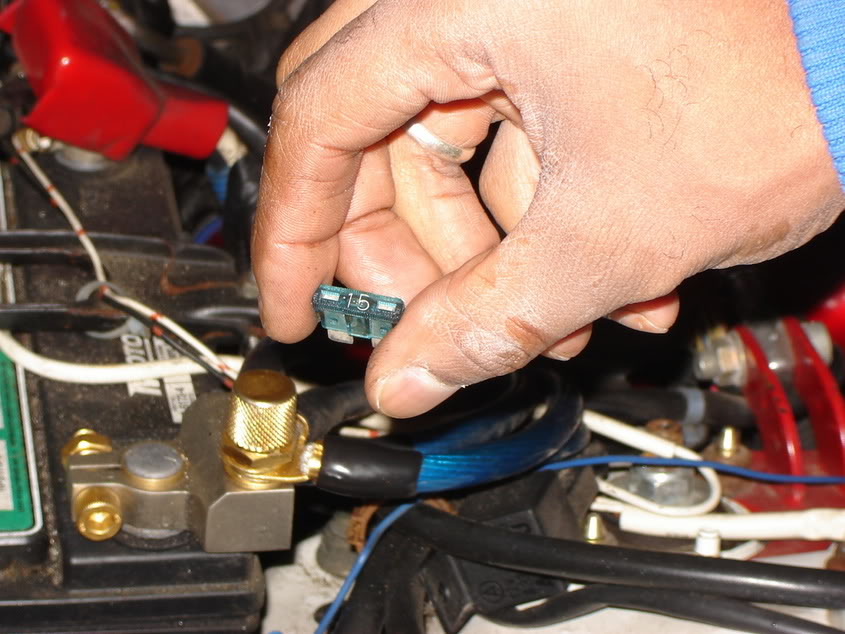
5) Locate the 15A fuse in the upper lefthand corner and remove it. This prevents fuel from being squirted into the engine when manually cranking it over to TDC for each cylinder.
Tools Needed:
Compressor
5/8� Spark Plug Socket
10mm
19mm
Rachet
6� Extension
Leakdown Tester
1) First things first, find a place to work on your car.
2) Proceed to plug in your compressor and set it up with the hose attached and pressure regulated between 60psi and 100psi. I choose 100psi.
3) Plug the gauge half of the leakdown tester into the compressor and then turn the adjustment **** so that it reads 0Psi.
4) Remove the cover on the underhood fusebox. Should look like this.
5) Locate the 15A fuse in the upper lefthand corner and remove it. This prevents fuel from being squirted into the engine when manually cranking it over to TDC for each cylinder.
Last edited by WildoutWhiteGSR; Jan 12, 2006 at 11:09 PM.
Thread Starter
Time to become a Premier Member!
Joined: Aug 2003
Posts: 4,816
From: Whitby
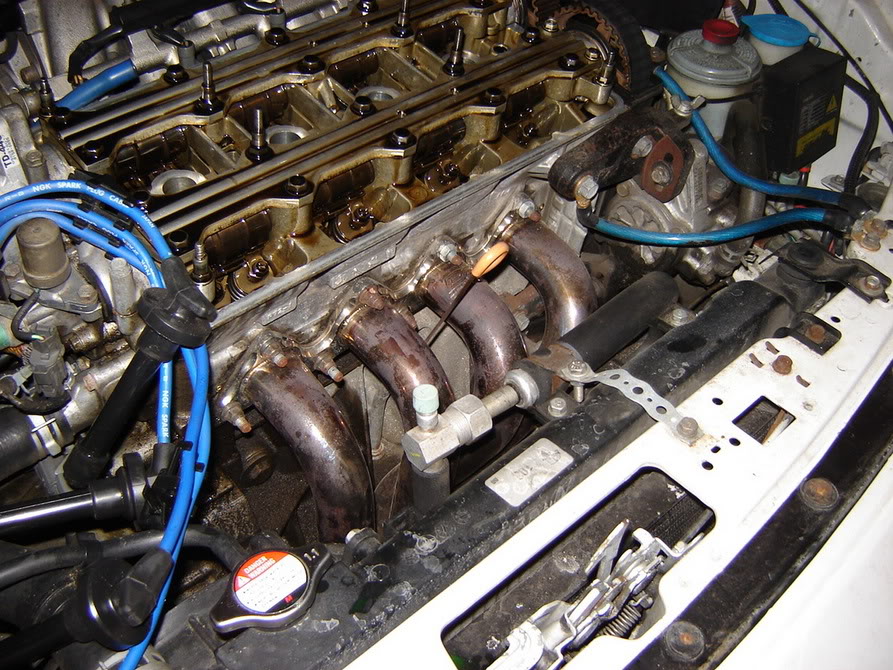
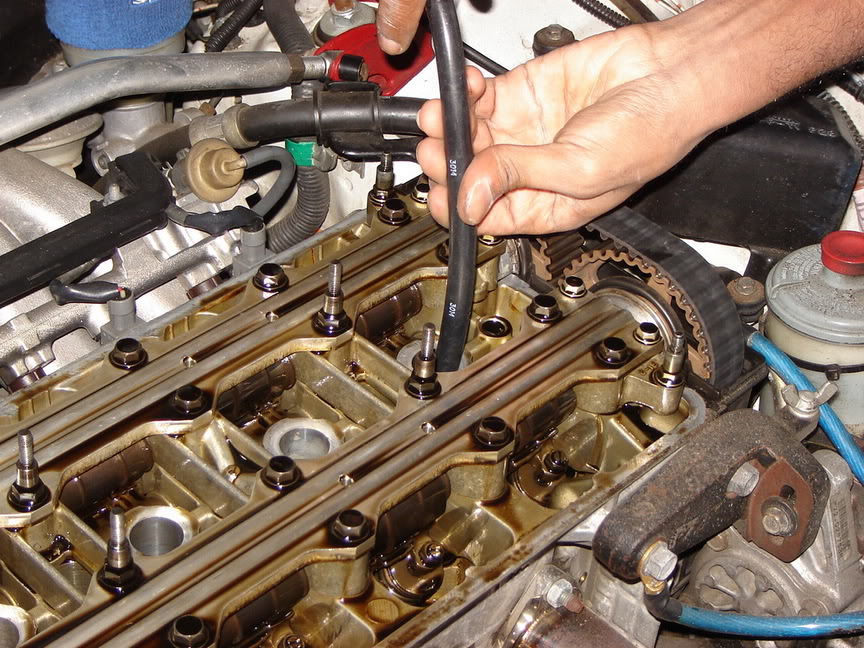
6) Proceed to the car and remove your spark plug cover, spark plug wires and valve cover.
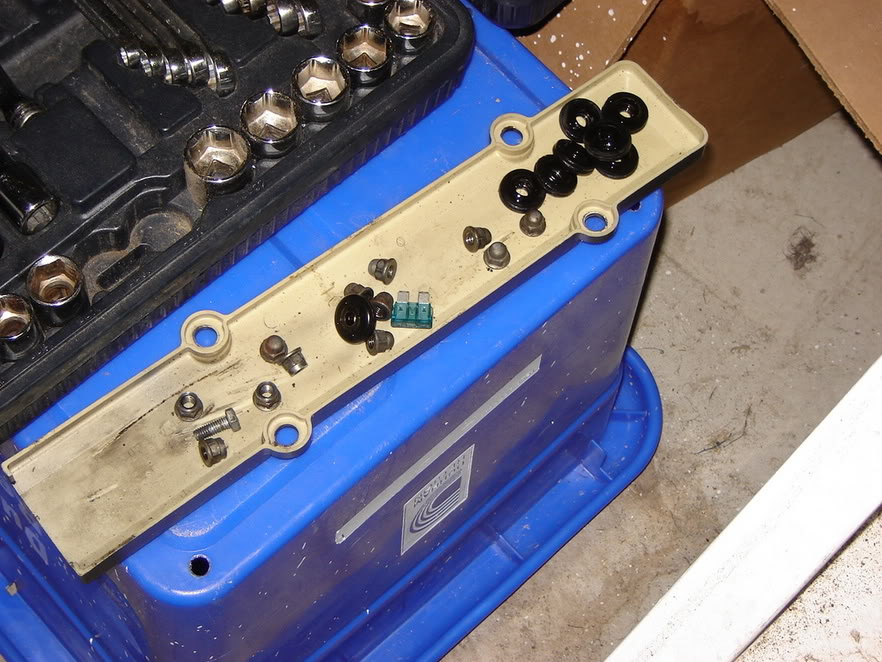
Place all the bolts and valve cover grommets in a safe place. For me it's in the spark plug cover.
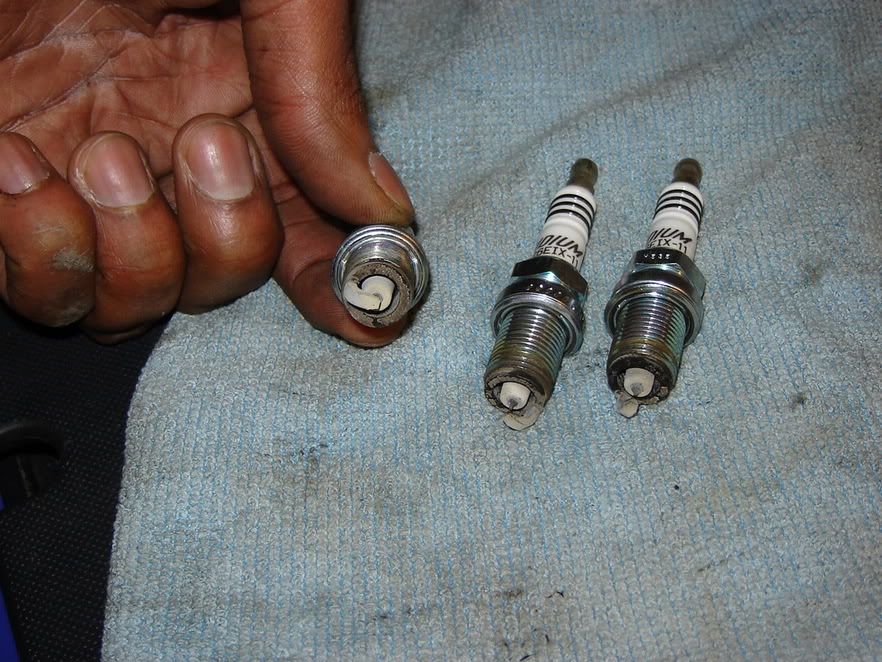
7) Then remove each spark plug like so.
Place all the bolts and valve cover grommets in a safe place. For me it's in the spark plug cover.
7) Then remove each spark plug like so.
Last edited by WildoutWhiteGSR; Apr 23, 2006 at 10:37 PM.
Thread Starter
Time to become a Premier Member!
Joined: Aug 2003
Posts: 4,816
From: Whitby
Once all the spark plugs are removed, place them in a safe place.
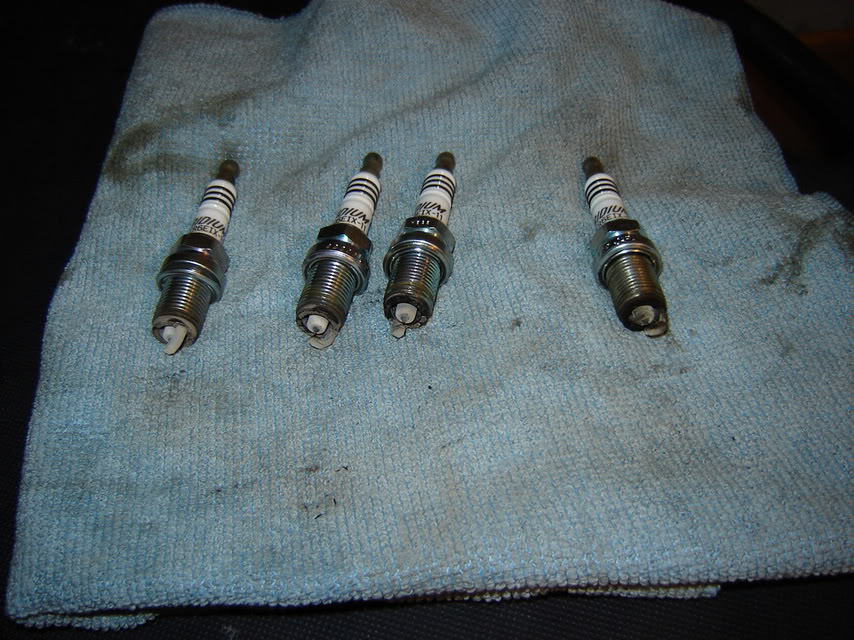
This is also a good time to check them to see what condition there in.
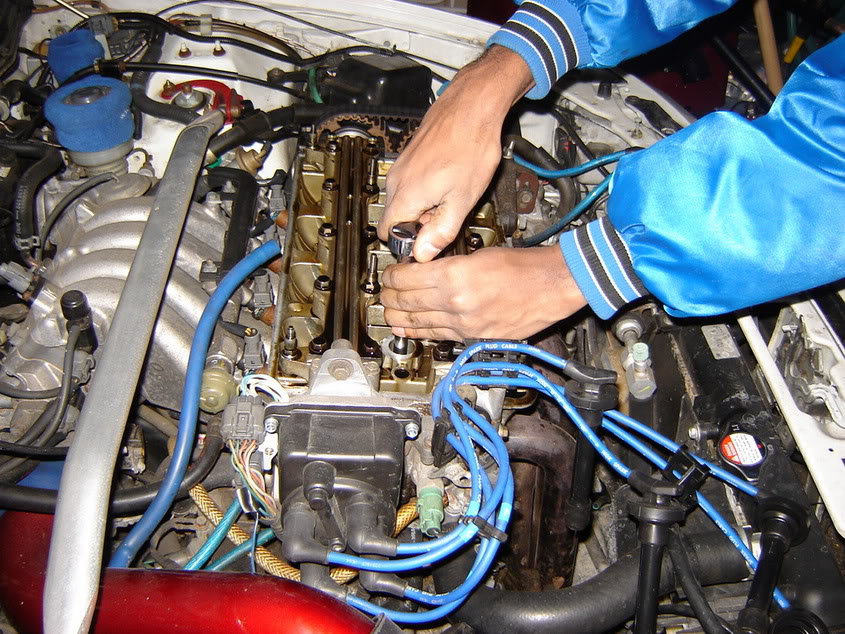
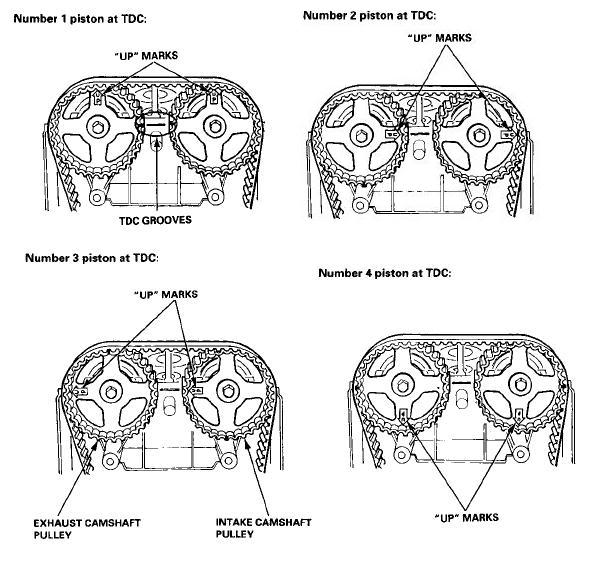
8) Once each spark plug is removed, you then set cylinder 1 to TDC (Top Dead Center). You accomplish this by manually turning over the engine with the 19mm socket and extention on the rachet. Proceed to turn the engine counter-clockwise until your cam gears reach TDC for cylinder one.
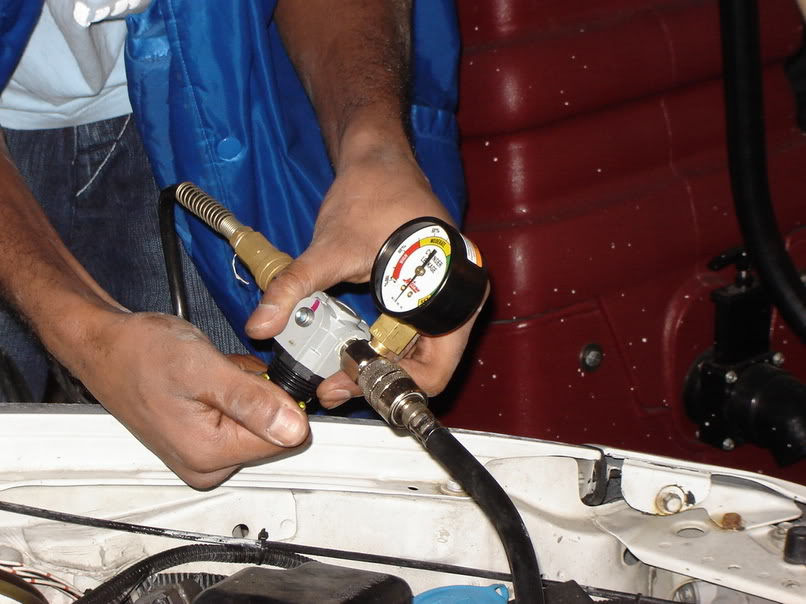
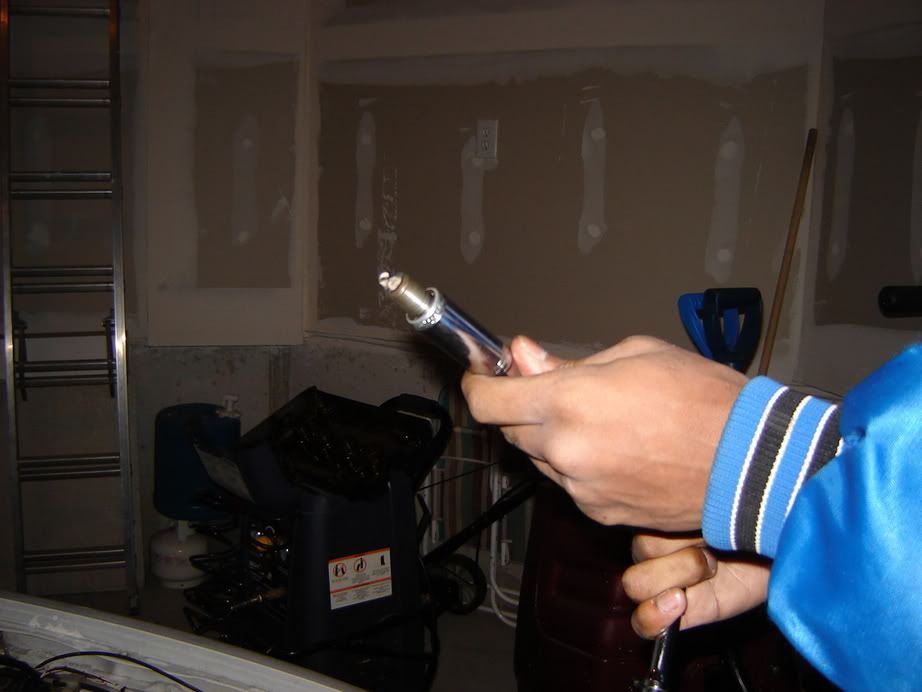
9) Proceed to screw in the hose of the leakdown tester into cylinder 1
This is also a good time to check them to see what condition there in.
8) Once each spark plug is removed, you then set cylinder 1 to TDC (Top Dead Center). You accomplish this by manually turning over the engine with the 19mm socket and extention on the rachet. Proceed to turn the engine counter-clockwise until your cam gears reach TDC for cylinder one.
9) Proceed to screw in the hose of the leakdown tester into cylinder 1
Last edited by WildoutWhiteGSR; Jan 12, 2006 at 11:11 PM.
Thread Starter
Time to become a Premier Member!
Joined: Aug 2003
Posts: 4,816
From: Whitby
10) Attach the other half of the leakdown tester (gauge) to the hose in the spark plug hole, cylinder 1 and read the percentage of air that is leaking out of the cylinder.
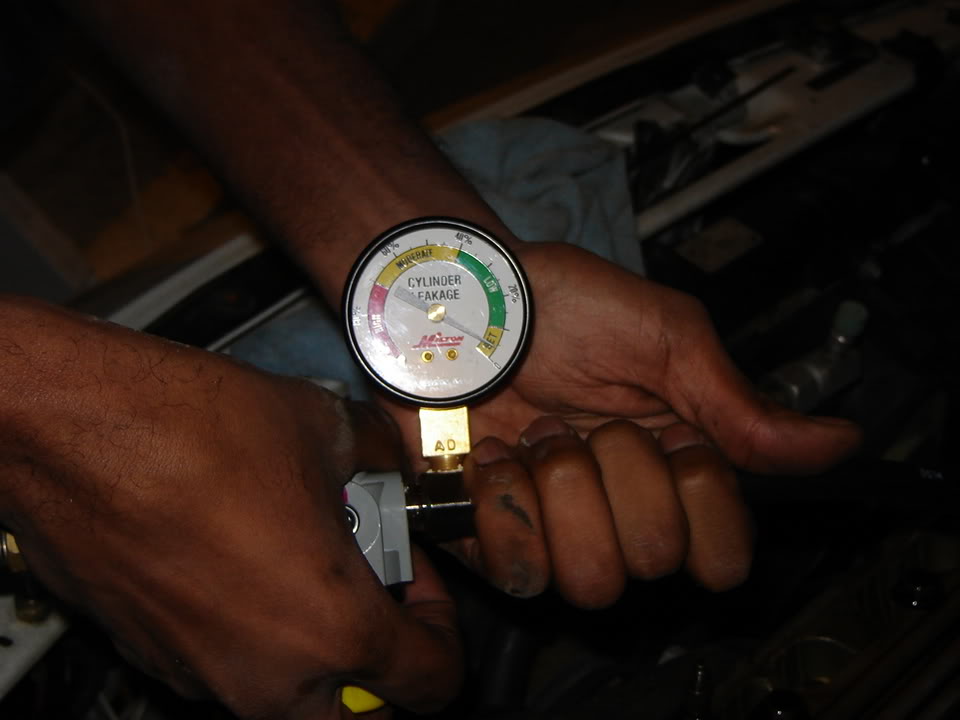
1-10% leakage is normal. OEM Honda Specs. No engine is 100% leak free even when brand new. If the gauge reads above 10%. Listen to where the air is escaping from. The bigger the amount of leakage the harder it is to hear. Think of blowing thru a huge pipe with you mouth compared to a straw.
Air leakage Table:
Leaking out the exhaust = Exhaust Valve
Leaking into the intake/throttle plate = Intake Valve
Air bubbles in the top of the radiator(take off the rad cap) or into the adjacent cylinder = headgasket
Oil cap, Dipstick, Bottem end = Piston Rings
Remember that 1-10% is normal so you will still hear some air leaking out in general. Just more than 10% isn't normal or within Honda specs.
11) Repeat steps 8-10 for the remaining 3 cylinders and record them on a piece of paper.
12) Put everything back together. Install is the same as removal. Just follow the steps in reverse.
Good luck


Thread
Thread Starter
Forum
Replies
Last Post
aznegg
Integra Technical Questions and Tips
1
Mar 27, 2007 03:50 PM